These Greek Yogurt English Muffins are soft, fluffy, and so much easier to make than traditional ones! Made with just self-raising flour and Greek yogurt – no yeast, no kneading, and no proofing required. They’re higher in protein, come together quickly, and taste absolutely delicious. Perfect for breakfast, brunch, or meal prep!
There is a certain comfort in knowing you can make something from scratch with just a couple of ingredients you already have on hand. These Greek Yogurt English Muffins are exactly that kind of recipe – simple, reliable, and surprisingly good.
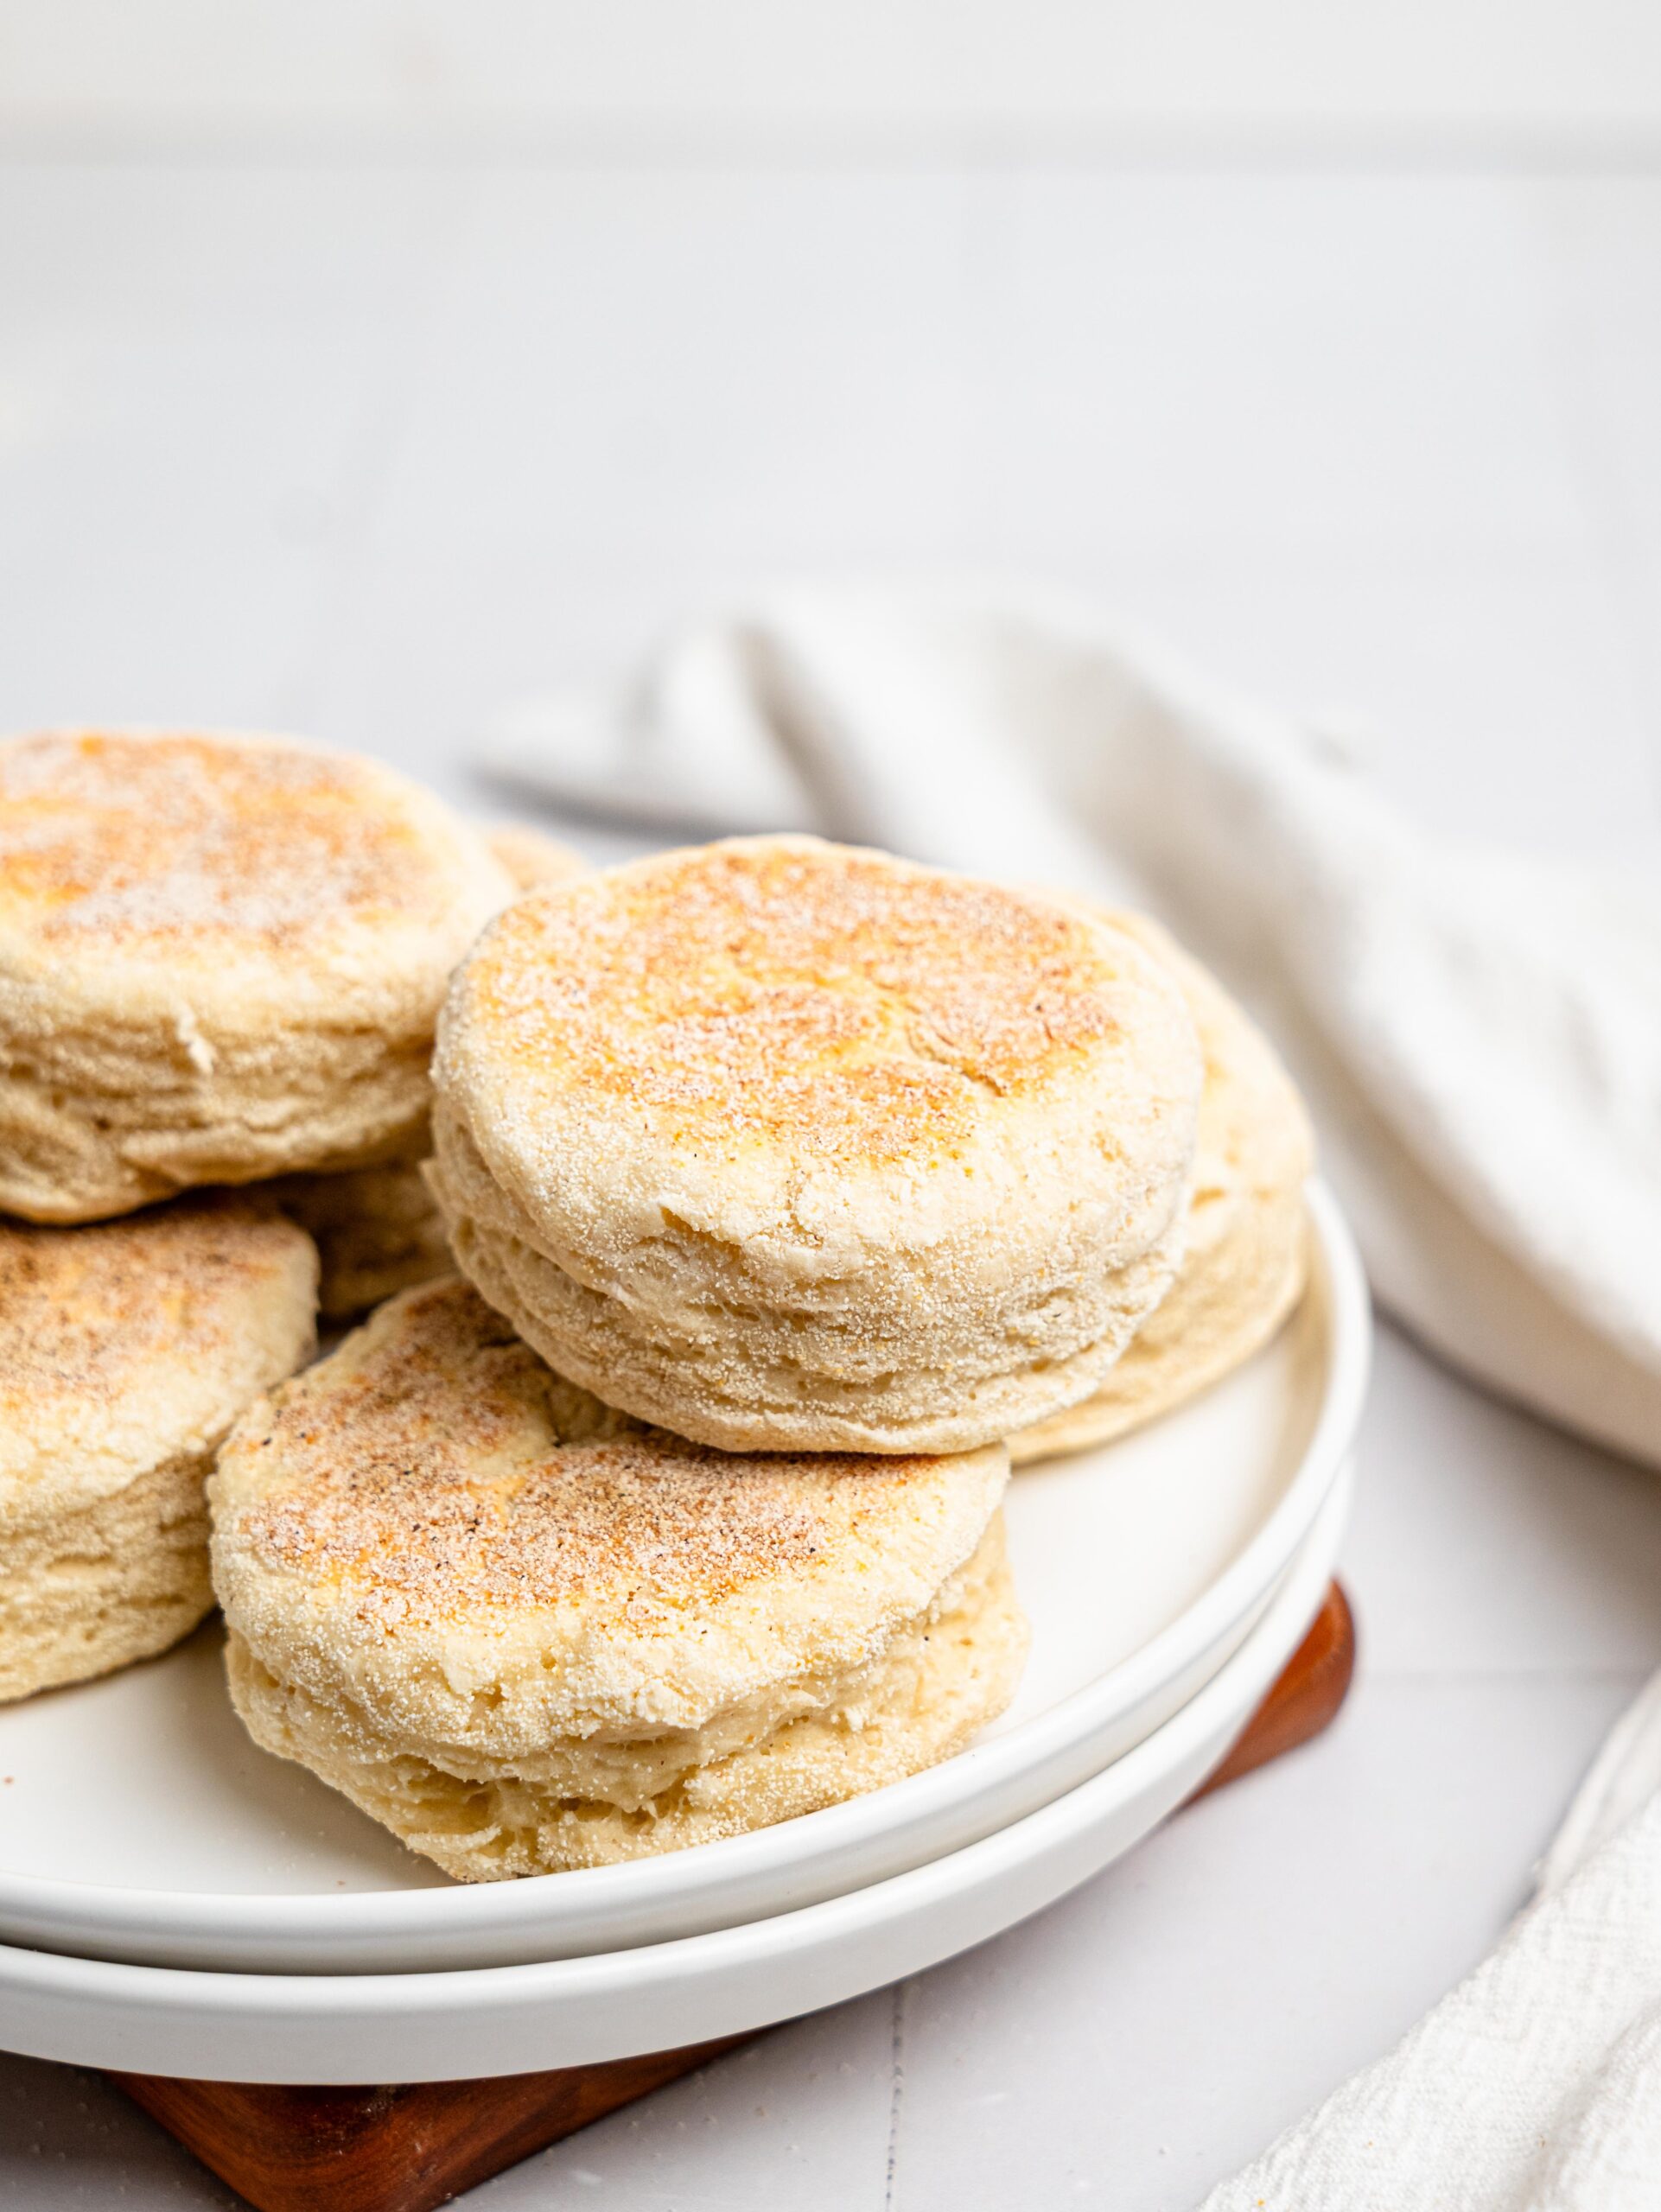
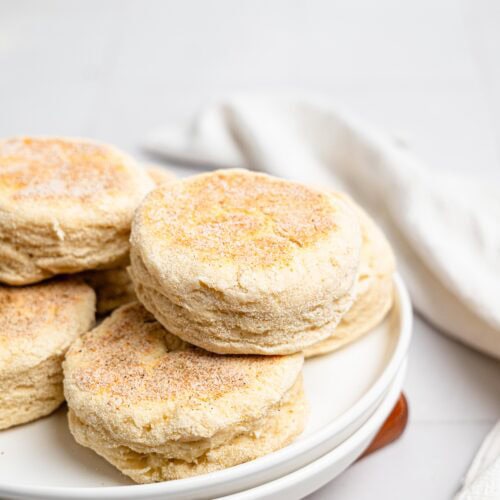
They cook up golden and slightly crisp on the outside, with a soft, fluffy middle that’s perfect for splitting open and toasting. Whether you spread them with butter and jam or use them as the base for a breakfast sandwich, they work with whatever you’re in the mood for.
Greek yogurt gives them a gentle tang and a nice boost of protein, making them feel a little more nourishing than store-bought options. No yeast or waiting involved – just mix, shape, and cook. They’re a great go-to for slow mornings, meal prep, or whenever you want something warm and homemade without the extra effort.
These muffins are also incredibly adaptable. Add herbs or spices to the dough, press in a little garlic salt with the semolina, or serve them sweet with honey and cinnamon. However you make them, they’ve got that satisfying, freshly-made feel, without the time or stress usually tied to homemade bread.

Why You’ll Love These English Muffins:
- Only 2 main ingredients – Made with just self-raising flour and Greek yogurt.
- No yeast, no kneading, no proofing – So much quicker and easier than traditional English muffins.
- Higher in protein – Thanks to the Greek yogurt, they’re more nourishing and satisfying.
- Soft and fluffy inside, golden outside – With the option to add semolina for that classic texture.
- Versatile and meal-prep friendly – Great for breakfast, brunch, or sandwiches any time of day.
- Customizable – Enjoy them sweet or savory, toasted or fresh from the pan.
What Makes These English Muffins Healthy?
Quick and homemade = fewer processed choices – Making your own muffins at home means you skip the additives, preservatives, and hidden ingredients found in most store-bought options. It’s a simple way to eat more whole foods with fewer compromises.
Balanced carbs for steady energy – These muffins provide slow-digesting carbohydrates that give you sustained energy, perfect for breakfast or a mid-day snack without the crash.
Supports blood sugar balance – The combination of protein from the yogurt and complex carbs from the flour helps reduce blood sugar spikes, especially when paired with healthy toppings like eggs, avocado, or nut butter.
No need for added oils or butter – Unlike traditional muffins or breads, this recipe doesn’t rely on added fats for moisture or richness. The yogurt does all the work naturally, keeping the fat content lower.
Great base for nutrient-dense toppings – Use them as a base for toppings like mashed avocado, hummus, greens, or almond butter and banana. It’s an easy way to pack in more vitamins and minerals without extra effort.
Ingredients Needed:
These are the ingredients you’ll need to make these Greek Yogurt English Muffins. You can find the exact measurements in the recipe card at the bottom of this page.
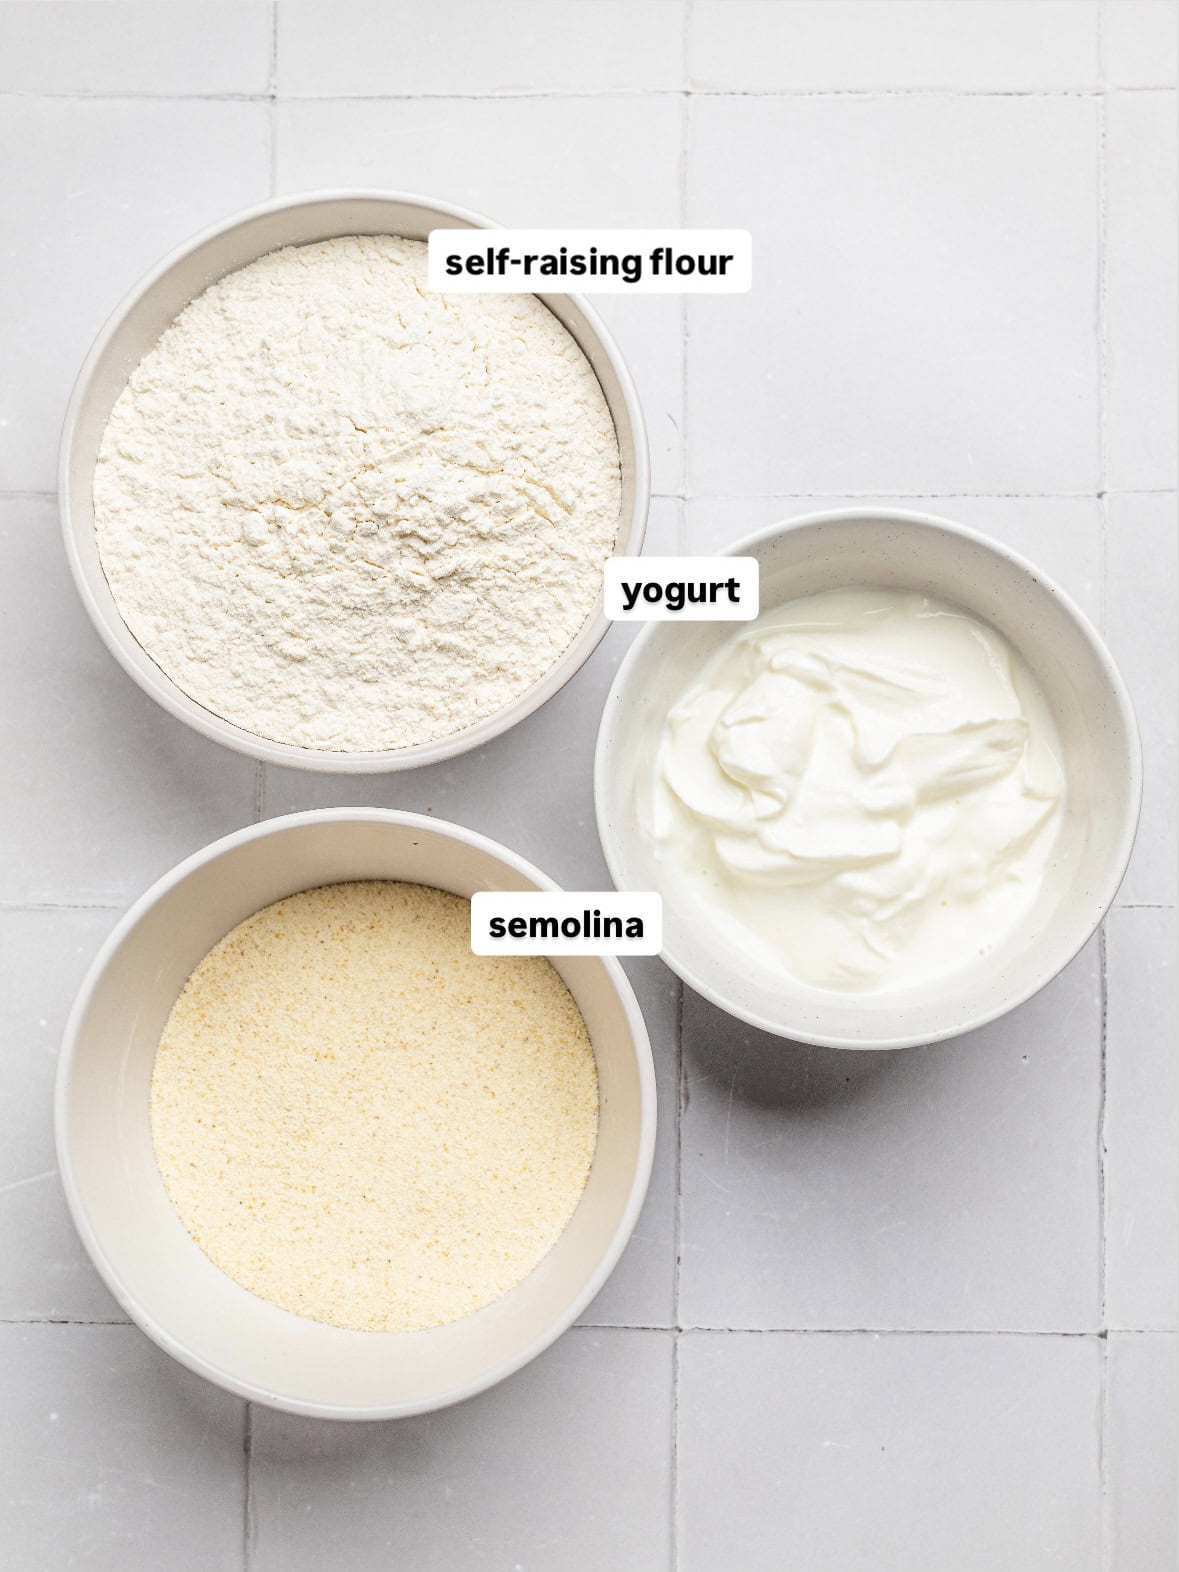
Self-Raising Flour: Self-raising flour is a blend of all-purpose flour, baking powder, and a touch of salt. It’s a convenient way to add lift to baked goods without needing to measure out separate leavening agents. In this recipe, it helps the English muffins rise and stay soft and fluffy – no yeast required.
Greek Yogurt: Greek yogurt adds moisture, protein, and a slight tang to the dough. It gives the muffins a soft, tender texture while boosting their nutritional value. Its natural creaminess also helps bind the dough without the need for eggs or oil.
Semolina (optional): Semolina is a coarse flour made from durum wheat. It’s traditionally used to coat English muffins for that classic golden crust and slightly crisp exterior. While optional, adding a dusting of semolina can give your muffins that signature texture and bakery-style finish.
Ingredient substitutions:
Self-Raising Flour – If you don’t have self-raising flour, you can use all-purpose flour plus 1½ teaspoons baking powder and a pinch of salt for every 350g flour called for. For a gluten-free option, try a gluten-free self-raising flour blend.
Greek Yogurt – You can swap in dairy-free yogurts like coconut, almond, or soy-based varieties to make these muffins vegan or dairy-free. Just choose a thick, creamy yogurt for the best texture.
Semolina – If you don’t have semolina, you can use fine cornmeal or polenta to dust the muffins for a similar crunch. Alternatively, regular flour works fine but won’t give the classic crispy texture.
Note: Substitutions may affect texture or flavor, so you may need to slightly adjust quantities to maintain the best consistency.

Equipment Needed:
- Rolling pin – to gently roll your dough out to the perfect thickness. No rolling pin? A clean bottle will do the trick just fine.
- Round cutter or glass – about 7 to 8 cm wide, to shape those lovely muffin rounds. It’s the little step that makes your muffins look bakery-worthy.
- Plate or shallow bowl – for holding semolina or flour to dust the muffins, giving them that signature golden crust and texture.
- Non-stick pan with a lid – essential for cooking the muffins low and slow, trapping steam to keep them soft and perfectly cooked all the way through.
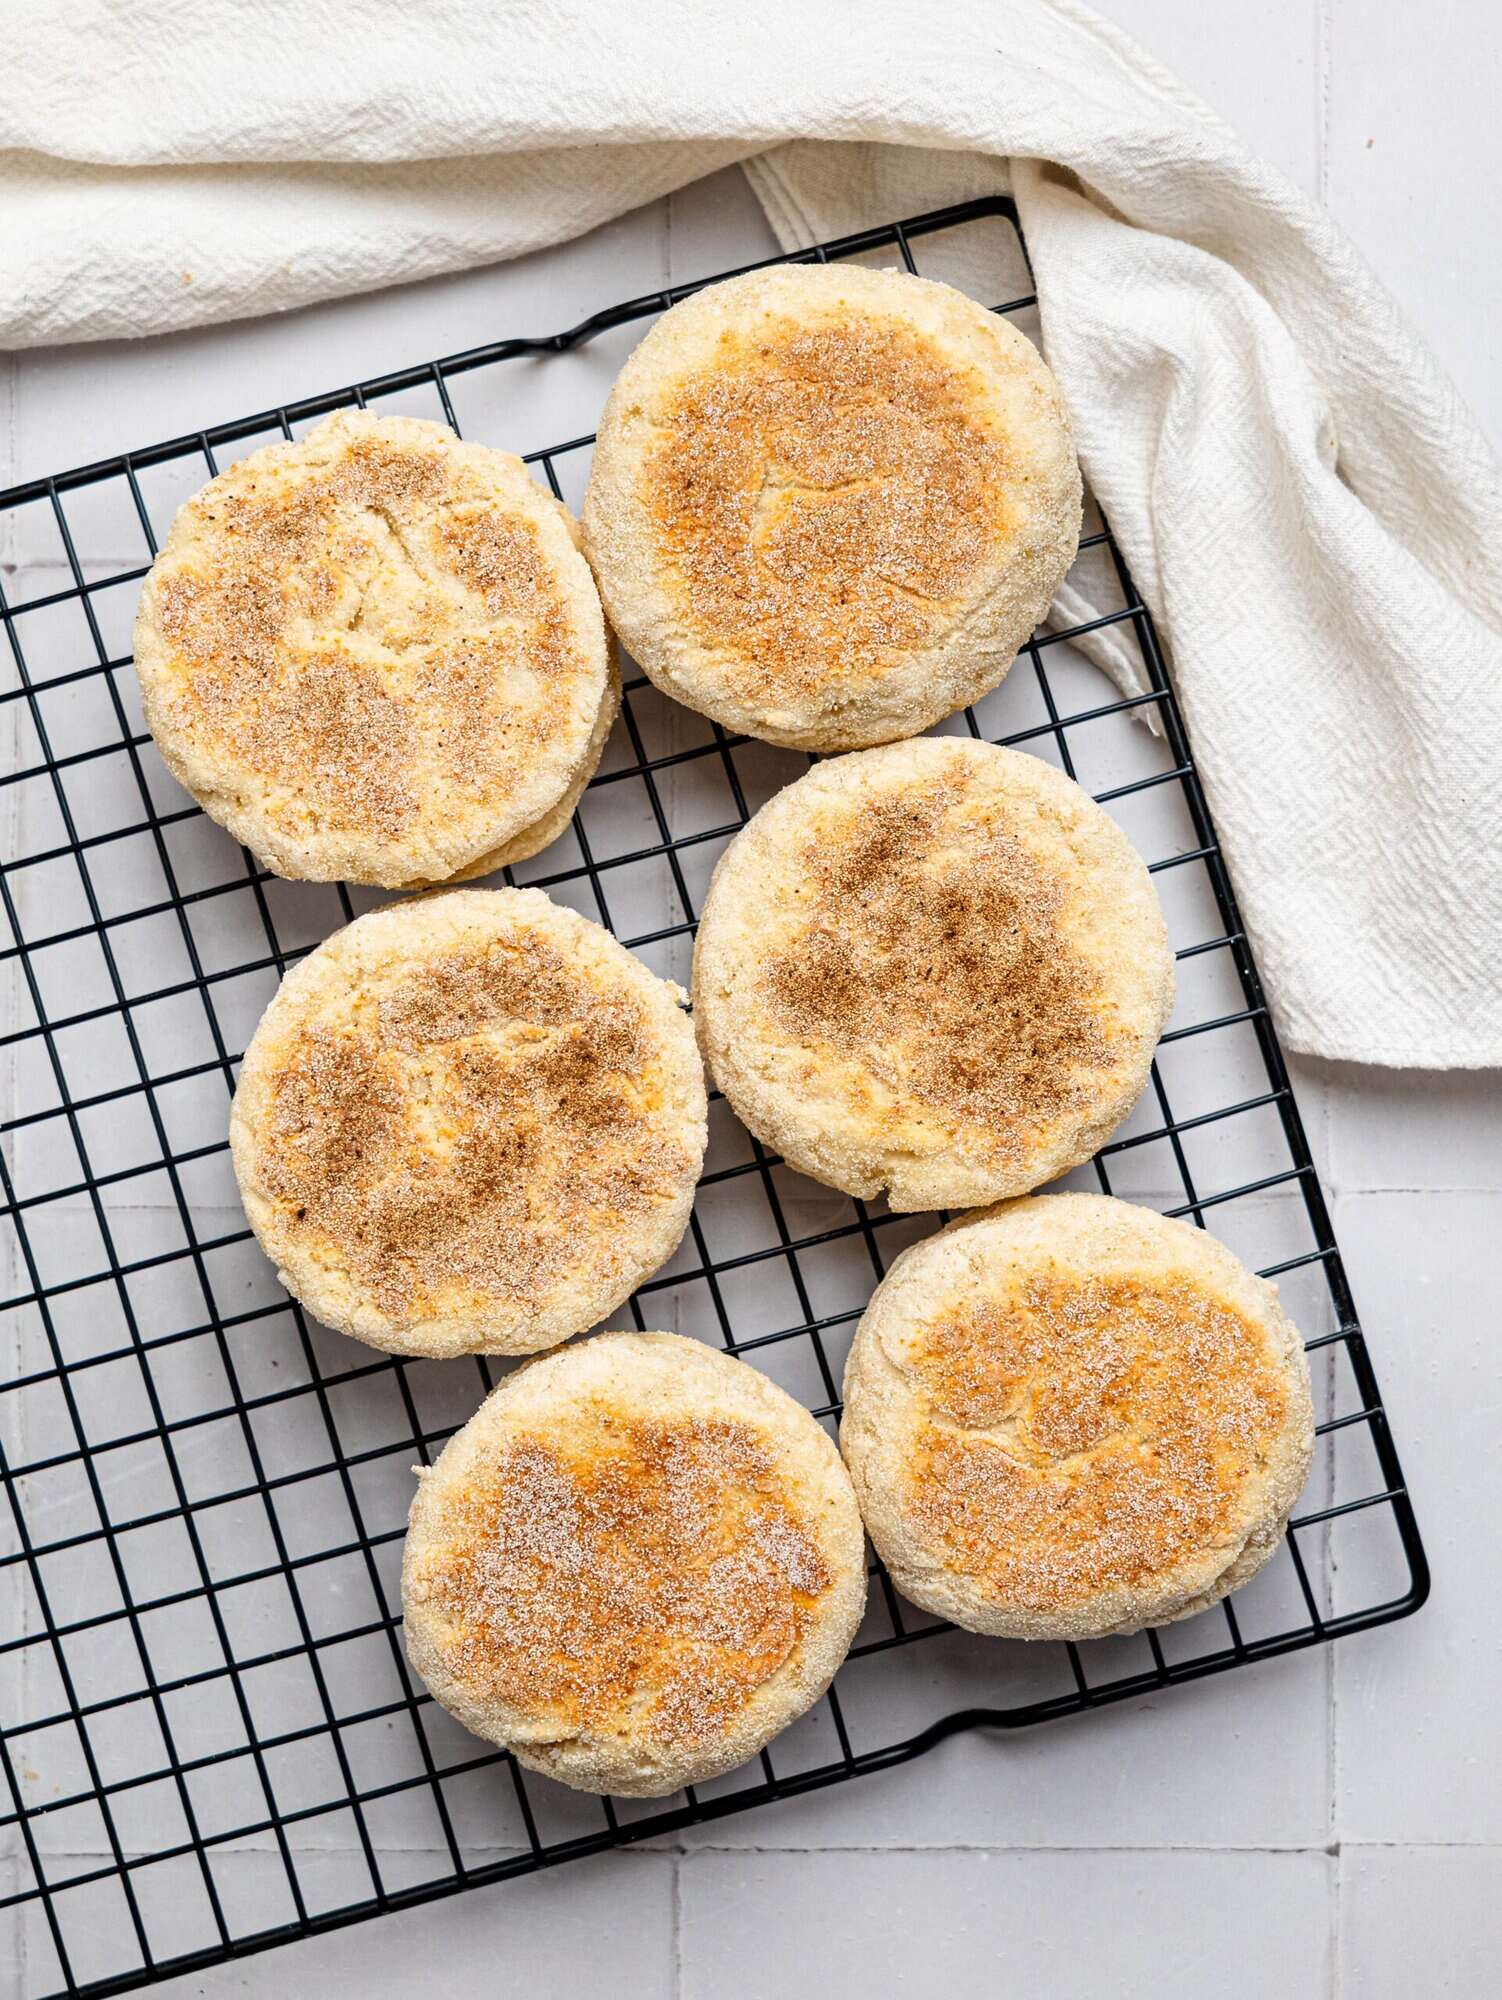
- Wire rack – to cool the muffins just right, so they stay fluffy and don’t get soggy.
How to make Greek Yogurt English Muffins:
These are the ingredients you’ll need to make this recipe. You can find the exact measurements in the recipe card at the bottom of this page.
Step One:
In a mixing bowl, combine the self-raising flour and Greek yogurt. Use a spoon or spatula to mix until a rough dough forms. Then switch to your hands and gently bring the dough together into a ball. It should be soft but not sticky – add a little extra flour if it’s too wet, or a touch of yogurt if too dry.


Step Two:
Let the dough rest for 5–10 minutes at room temperature. This helps the flour hydrate fully and makes the dough easier to handle.
Step Three:
Lightly flour your work surface and rolling pin. Roll the dough out to about 1.5–2 cm (½–¾ inch) thick. Use a round cookie cutter, glass, or jar (about 7–8 cm wide) to cut out your English muffins. Gather any scraps, re-roll, and cut again until all the dough is used. If you prefer, divide the dough into 6 pieces, roll each into a ball, and flatten into thick discs.


Step Four:
If using semolina, sprinkle some onto a plate or bowl. Press each dough disc lightly into the semolina to coat both sides. This gives the muffins their signature golden crust. I like to add some garlic granules and salt for extra flavor.

Step Five:
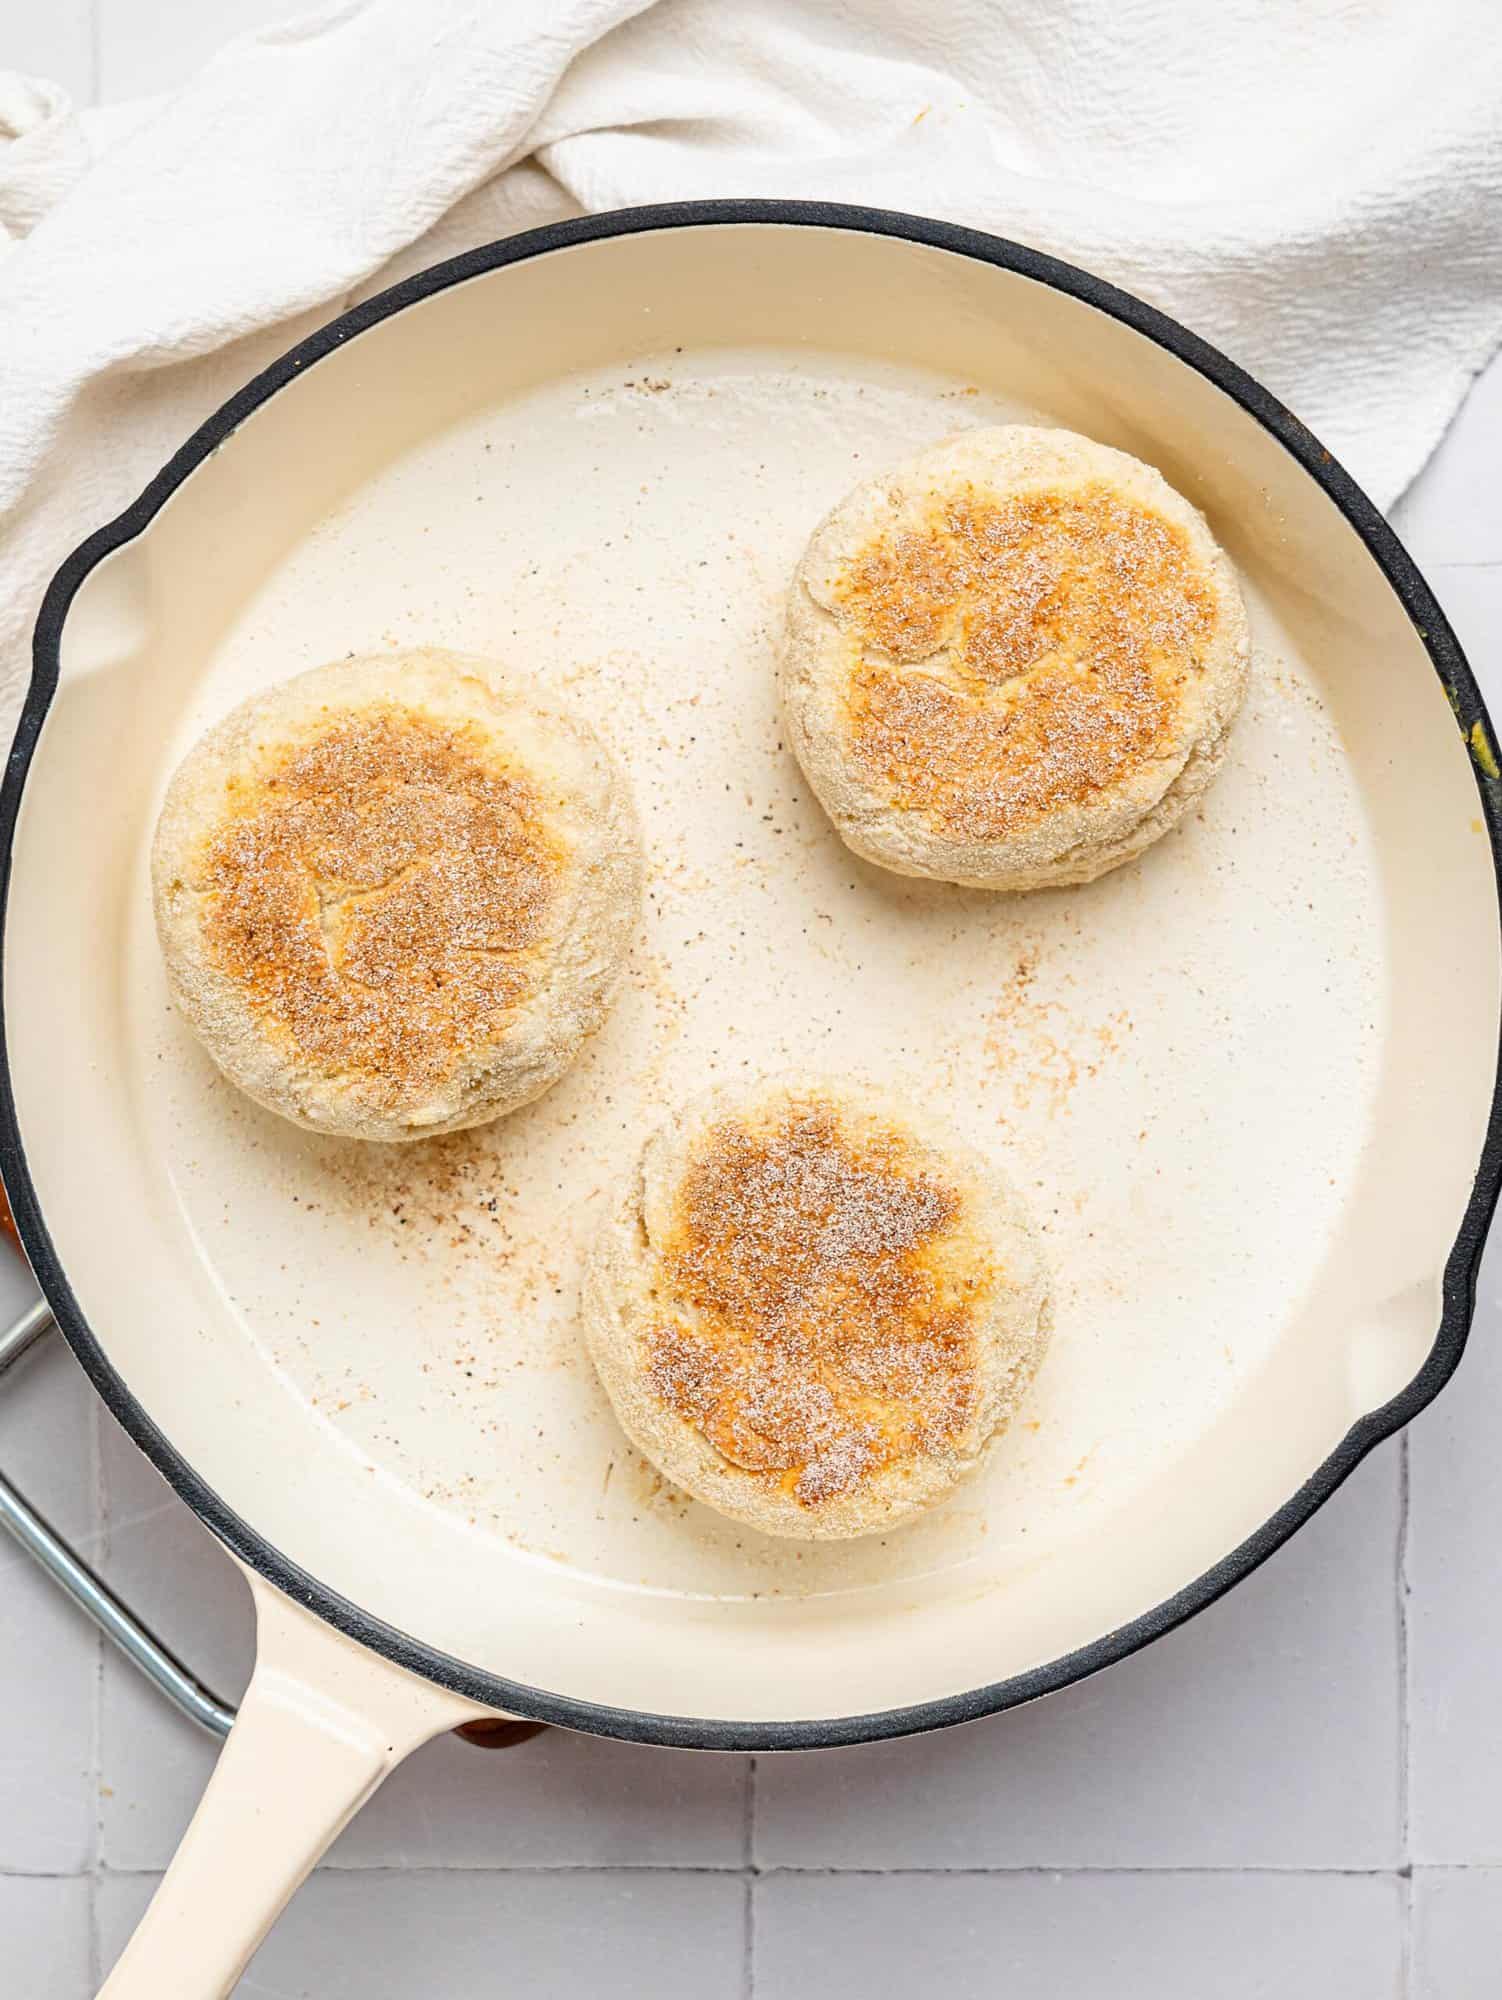
Heat a large non-stick pan or skillet over low to medium-low heat. You want a gentle, even heat to cook the muffins through without burning the outside.
Step Six:
Place the muffins in the dry pan (no oil needed), leaving space between each. Cover the pan with a lid (this helps trap steam and cook them through) and cook for about 5–6 minutes on the first side, until golden brown. Flip and cook for another 4–5 minutes on the second side. If they’re browning too quickly, lower the heat.

Step Seven:
Transfer the cooked muffins to a wire rack to cool slightly. Use a fork to split them open for that classic nooks-and-crannies texture, or slice with a serrated knife. Serve toasted with your favorite toppings – sweet or savory!
Tips and Notes:
- Make it dairy-free – Swap Greek yogurt for a thick coconut or almond yogurt to keep the muffins creamy and tender without dairy. Just make sure it’s not too runny!
- Get creative with coatings – If you don’t have semolina, try dusting your muffins with cornmeal, fine polenta, or even a light sprinkle of oats for a different texture.
- Add flavor boosts – Mix herbs like rosemary, thyme, or chives into the dough for a savory twist. Or stir in cinnamon and nutmeg for a warm, cozy vibe.
- Add a little crunch – For extra texture, press in some seeds like sesame, sunflower, or flax before cooking. It’s a subtle way to up the nutrition and add interest.
- Perfect for meal prep – These muffins freeze beautifully. Just cool completely, then pop them in a freezer bag. Toast straight from frozen for a quick, nourishing snack.
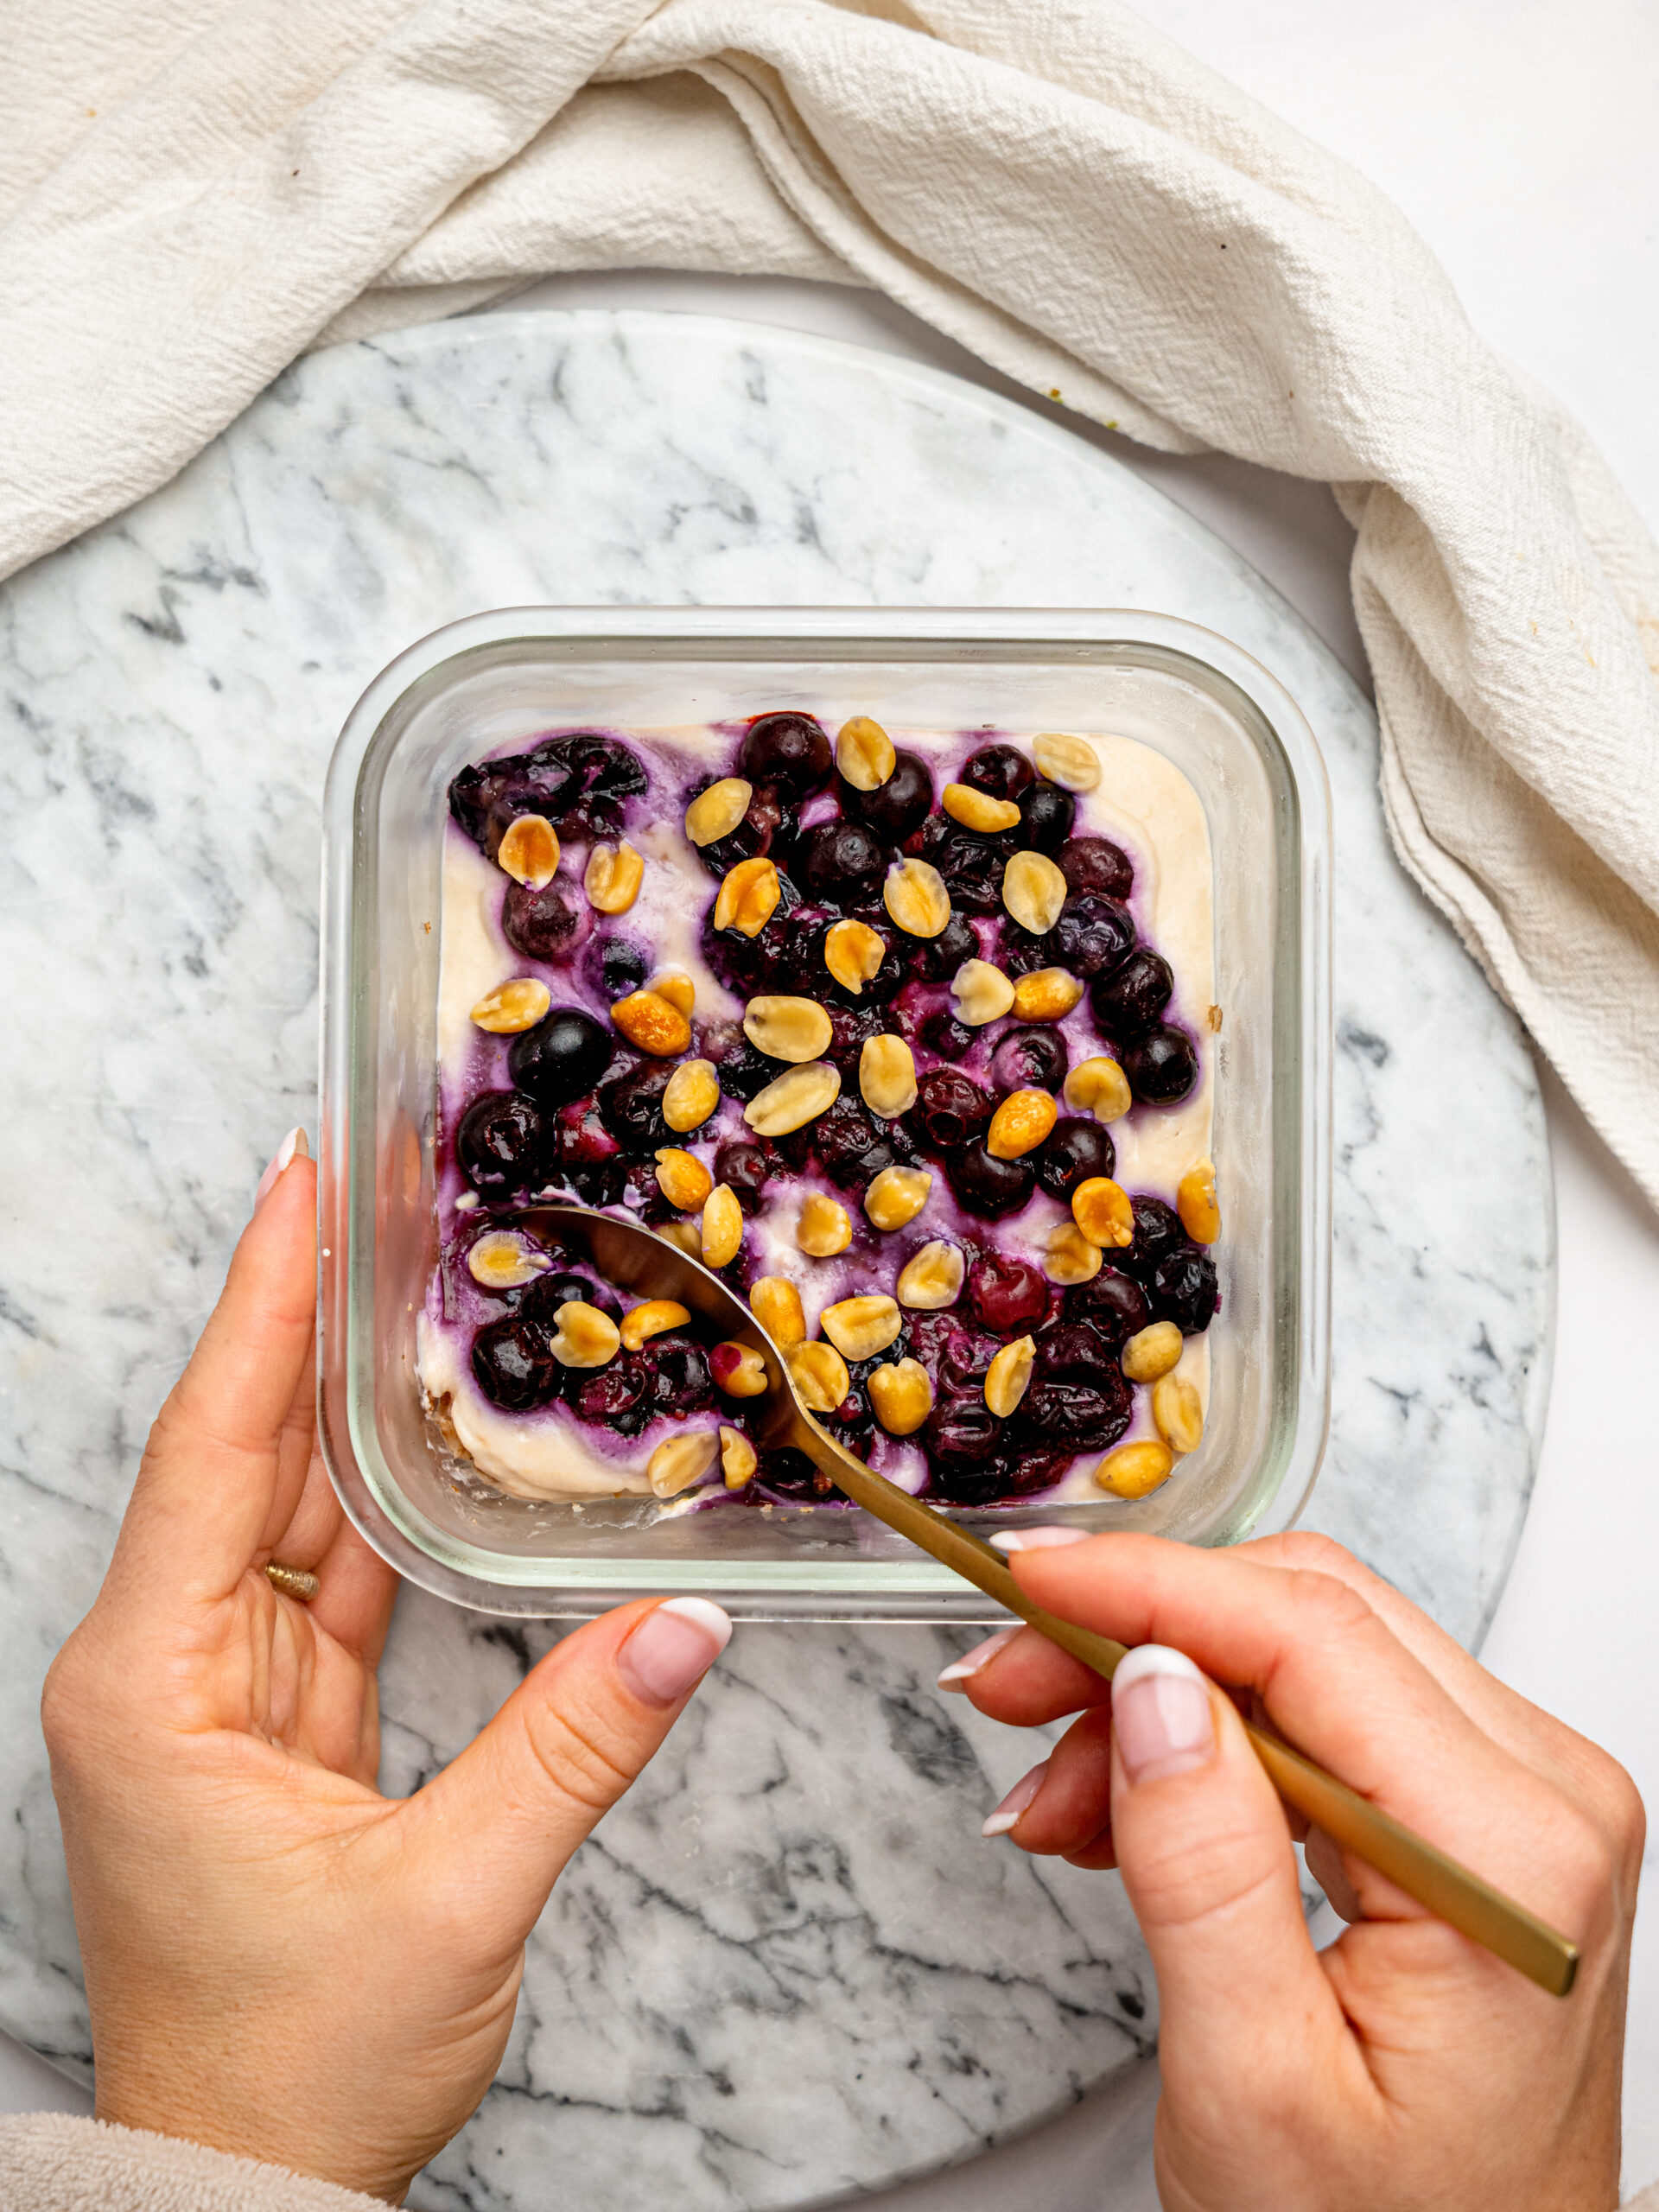
- Top with flair – Spread with nut butter and honey, mashed avocado and chili flakes, or cream cheese and smoked salmon. The options are endless and delicious!
- Don’t stress the shape – Muffins don’t have to be perfectly round to taste amazing. Embrace those rustic edges, they just mean homemade love.

How to Store These Greek Yogurt English Muffins:
Freezer: Store in an airtight container or freezer bag for up to 2 months. Let them sit at room temperature for a few minutes before eating for the best texture.
Fridge: If you prefer a softer bite, keep them in the fridge. They’ll stay fresh for up to a week.
Tip: Place parchment paper between layers to stop the muffins from sticking together.
Frequently asked questions:
Can I use regular yogurt instead of Greek yogurt?
You can, but Greek yogurt works best because it’s thicker and adds more protein. If you use regular yogurt, try straining it to remove some of the liquid for a firmer dough.
Do I have to use self-raising flour?
Self-raising flour is easiest since it already has baking powder and salt mixed in. If you only have plain flour, add 1½ teaspoons baking powder and a pinch of salt per 350g flour.
Can I make these muffins gluten-free or dairy-free?
Absolutely! Use a gluten-free self-raising flour blend for gluten-free, and swap Greek yogurt for a thick dairy-free yogurt like coconut or almond to keep the texture creamy
What if my dough is too sticky or too dry?
If sticky, add a little extra flour, a tablespoon at a time. If too dry or crumbly, add a small spoonful of yogurt until the dough comes together nicely.
Can I bake the muffins instead of cooking on the stove?
Yes! Bake at 180°C (350°F) on a parchment-lined tray for about 12–15 minutes until golden and cooked through.
How thick should I roll the dough?
Aim for about 1.5 to 2 cm (½ to ¾ inch) thick. This helps the muffins cook evenly and get that soft, fluffy texture inside.
more easy and healthy recipes you need to try:
- Easy High Protein Quiche (aka Tortilla Quiche)
- Easy Blueberry Bagel Recipe – Ready in 40 minutes! (no yeast)
- 3 Ingredient Bagels – Easy & Healthy; Ready in 30 Minutes
Hey! If you make this recipe, I would love it if you could leave me some feedback and a rating ⭐⭐⭐⭐⭐ in the comment section at the bottom of the page! Also let me know on Facebook, Instagram or Pinterest! I can’t wait to hear your thoughts and see your photos!
Greek Yogurt English Muffins
Equipment
- 1 Round cutter or glass
- 1 Plate or shallow bowl
- 1 Non-stick pan with a lid
- 1 Wire rack
Ingredients
- 350 g Self-raising flour – 2 ⅓ cups
- 300 g Greek yogurt – 1 ¼ cups
- 3 tbsp Semolina (optional, for dusting)
Instructions
- In a large mixing bowl, combine the self-raising flour and Greek yogurt. Mix until a rough dough forms, then use your hands to bring it together into a soft ball. Add a little extra flour if it’s too sticky.
- Let the dough rest for 5–10 minutes at room temperature to hydrate and become easier to work with.
- Lightly flour your surface and rolling pin. Roll the dough out to 1.5–2cm thick. Use a round cookie cutter or glass (about 7–8cm wide) to cut out muffins. Re-roll scraps as needed.
- Lightly press both sides of each disc into semolina for a classic texture and golden crust.
- Heat a non-stick pan over low to medium-low heat. Add the muffins and cover with a lid. Cook for 5–6 minutes per side, flipping once, until golden brown and cooked through. Reduce the heat if they brown too quickly.
- Transfer to a wire rack to cool slightly. Split open with a fork or slice with a serrated knife. Toast andserve with your favorite toppings!
Video
Notes
- Don’t overmix – Mix the dough just until it comes together for soft, fluffy muffins.
- Use full-fat Greek yogurt – It gives the best texture and richness.
- Flour your surface well – The dough can be slightly sticky, so use enough flour when rolling.
- Cook low and slow – A gentle heat ensures the muffins cook through without burning.
- No semolina? – Use cornmeal or skip it entirely—it’s just for texture.
- To split muffins – Use a fork to gently pull them apart for that classic craggy texture (great for toasting).
- Storage – Store in an airtight container at room temp for 1–2 days, or freeze for up to 3 months.