


These Protein Cheesecakes are a perfect way to add some extra protein to your diet in an easy, delicious, and healthy way! They’re made with simple, nourishing ingredients that will fuel your body and your soul, and I think you’re going to love them!

One of my favorite forms of self-care is meal-prepping a healthy, sweet snack for the week. These Protein Cheesecakes are a perfect recipe to batch prep ahead of the week to have as a quick snack or dessert so that you can stay on track with your protein goals.
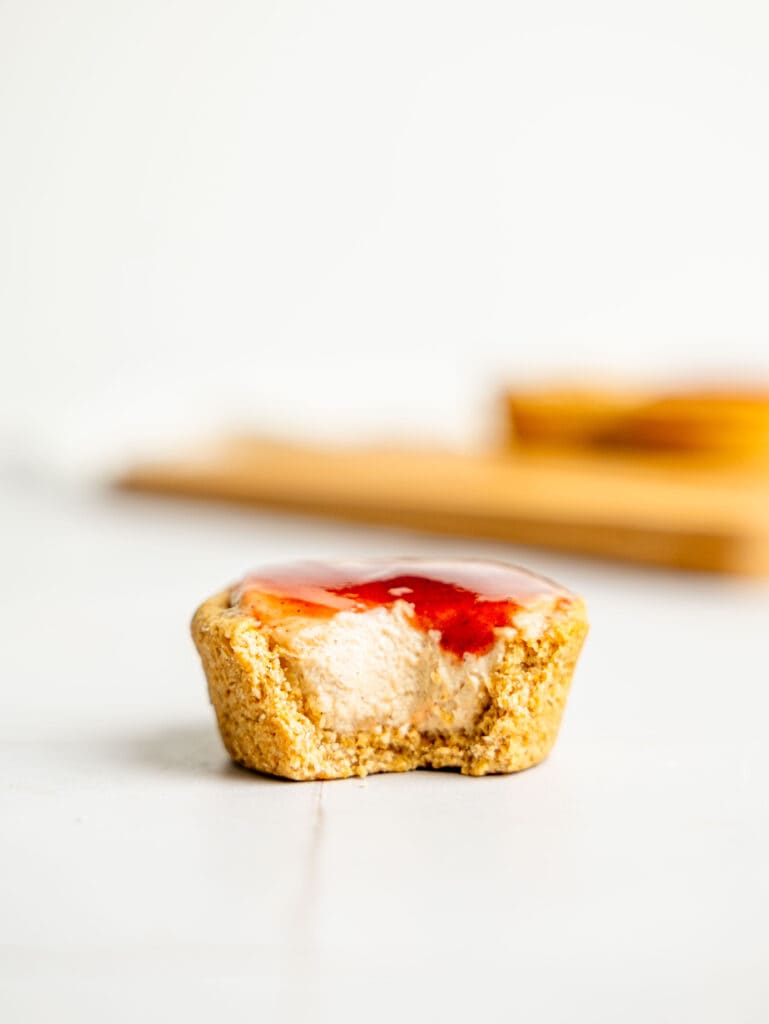
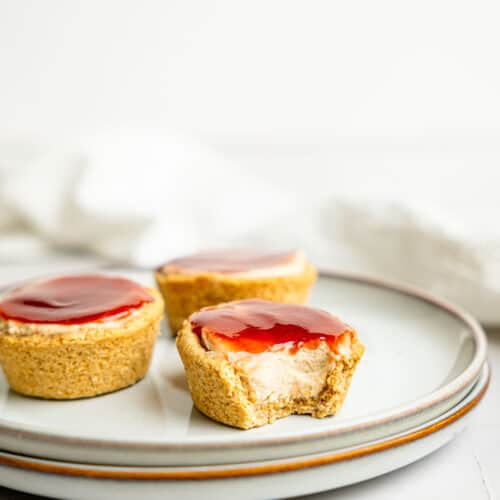
They consist of an easy, three-ingredient oat flour crust, filled with a creamy, protein-packed filling topped with strawberry jam. One thing I’ve noticed about recipes that contain protein powder is that sometimes it just tastes too much like protein powder, so if you’re not used to that flavor, it might not be very enjoyable. These protein cheesecakes, however, are seriously so delicious; the flavors are well-balanced, and the protein flavor is not overpowering.
While the cheesecake crust needs to be baked, the filling does not. However, if you’re looking for a no-bake protein cheesecake, I do give alternative options for the crust that do not need to be baked. So, this protein cheesecake recipe is very versatile and adjustable depending on your preferences. Let’s get into it!
Why You’ll Love These Protein Cheesecakes:
- They’re easy to make!
- Customizable to suit your cravings.
- Well-balanced flavors and macros.
- Contain over 10g of protein each!
- Naturally gluten-free, refined sugar-free, egg-free, and nut-free.
- Can be made dairy-free and vegan.
- A perfect snack, pre-workout snack, or dessert.
- They’re good for your soul and your body!
Ingredients Needed:
I’ve listed the eight ingredients below, as well as some substitutions just below this section. To see the measurements and full recipe, scroll to the recipe card at the bottom of this page!
For the Filling:
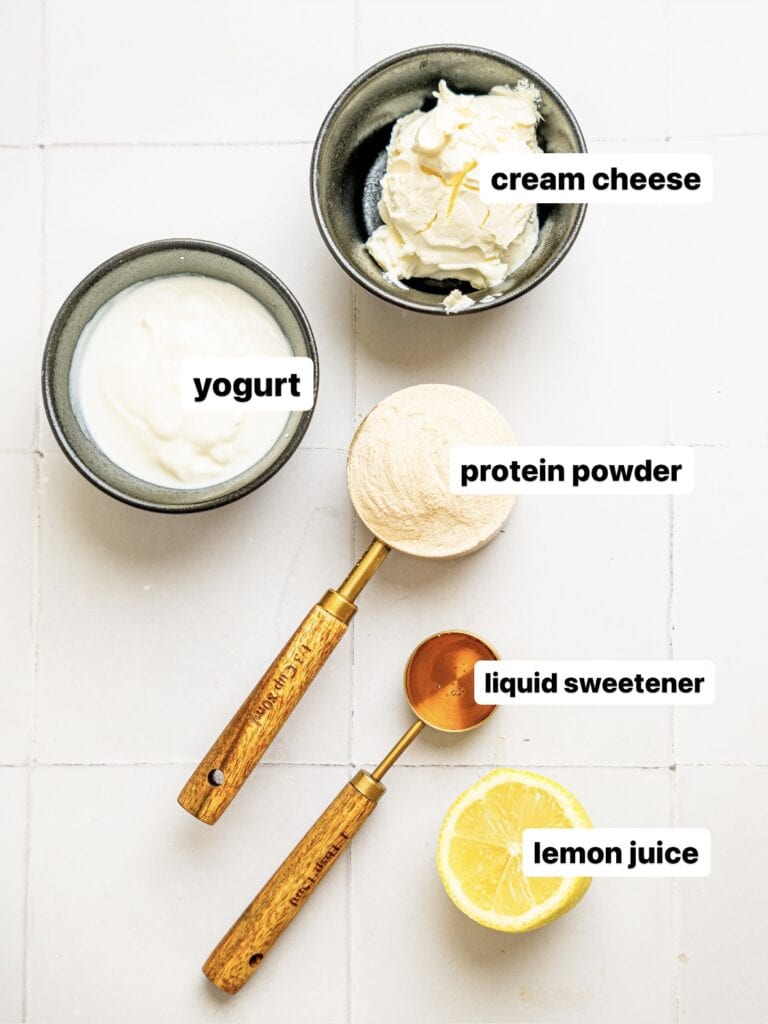
Smooth Cottage Cheese: I like to use smooth cottage cheese instead of cream cheese as it’s high in protein but lower in fats. It also helps to thicken the cheesecake filling, making it creamy and delicious. I recommend using cream cheese made with just milk and no extra additives, gums, or sweeteners.
Yogurt: I love adding yogurt to my cheesecake recipe as it adds volume, creaminess, and goodness. You will need to use a thick yogurt like Greek yogurt or a thick plain yogurt. Try to use one that is made with just milk and no extra additives, gums, or sweeteners. My favorite is Greek yogurt because it’s high in protein and probiotics.
Protein Powder: To add a good dose of protein to the cheesecakes, you will need some protein powder. I use a vanilla cinnamon whey protein. Read the “substitutions” and “tips” sections to learn more about how to choose the right protein powder.
Liquid Sweetener: Instead of powdered sugar, which is typically used in cheesecake, this recipe calls for a liquid sweetener like maple syrup, agave, or honey. These are refined sugar-free and better for you than processed sugar. This adds a touch of sweetness and helps to cut through the protein powder flavor.
Lemon Juice: Lemon juice helps to add that slightly acidic flavor that is typically found in cheesecake.
For the Crust:

Oat Flour: You can use shop-bought oat flour or make your own oat flour by blending rolled oats into a fine powder (in a blender or food processor). Oat flour is healthier than plain all-purpose flour – it’s a whole grain, so it contains more micronutrients, fiber, and protein. It’s also more satiating than regular flour.
Liquid Sweetener: To add a touch of sweetness to the cheesecake crust while keeping it refined sugar-free. Maple syrup, honey, or agave work well.
Butter: To bring the oat flour crust together and add a delicious buttery flavor. I recommend using grass-fed butter as it contains a lot more nutrients and is actually good for you!
How to Make a No-Bake Crust:
Cookies or Crackers: To make a no-bake cheesecake crust, you can use some crushed cookies or crackers. I use my Healthy Oat Flour Cookies (they’re chocolate chip!) and they work really well. You can use whatever biscuits you have.
Butter: To bring the cookie crust together and add a delicious buttery flavor. I recommend using grass-fed butter as it contains a lot more nutrients and is actually good for you!

Substitutions:
Yogurt: To make this protein cheesecake vegan or dairy-free, you can use coconut yogurt, soy yogurt, or any other plant-based alternative but try to use a thick yogurt if possible. Alternatively, you can substitute this with extra cream cheese or smooth cottage cheese.
Smooth Cottage Cheese: You can use a dairy-free alternative to make a vegan chocolate cheesecake. You can also substitute this with cream cheese or yogurt instead, but you won’t have that classic cheesecake flavor. To make a vegan protein cheesecake use a dairy-free cream cheese.
Protein Powder: As mentioned above, I use a vanilla cinnamon whey protein powder. You can use any flavor you like for this recipe. You can also use a plant-based protein powder if you want to make vegan protein cheesecakes. Take note that all protein powder brands are slightly different, so you may need to adjust the amount of yogurt used to reach the correct consistency.
Butter: If you would prefer not to use butter or if you want to make this cheesecake vegan or dairy-free, you can use melted coconut oil or olive oil. You can also use plant-based butter.
How to Customize the Flavors:
To customize the flavors of your protein cheesecakes, you can experiment with various additions and substitutions to create unique taste profiles. Here are some ideas to get you started:
Fruit Swirls: Add pureed fruits such as berries, mango, or pineapple to the cheesecake filling for a burst of fruity flavor. You can also swirl fruit preserves or compotes on top of the filling before chilling.
Chocolate: Incorporate cocoa powder or melted dark chocolate into the filling for a rich chocolatey taste. You can also sprinkle chocolate chips or chunks over the crust before adding the filling.
Nutty Delights: Mix chopped nuts like almonds, pecans, or walnuts into the crust or sprinkle them on top of the cheesecakes for added crunch and flavor. You can also use nut butter in place of butter for the crust or incorporate it into the filling.
Coffee Infusion: Incorporate instant coffee or espresso powder into the filling for a subtle coffee flavor.
Protein Flavors: Experiment with different protein powder flavors like chocolate, strawberry, caramel, etc.

Equipment Needed:
Digital Food Scale (for accurate measurements)
Blender or Food Processor (if making your own oat flour)
Mixing Bowl (to make the crust mixture and the filling)
Spatula and Fork
Muffin Tray (use a non-stick or silicone tray)
How to Make Easy and Healthy Protein Cheesecakes:
Here is a detailed summary of how to make these protein cheesecakes, I’ve also included some photos and you can watch the recipe video in the recipe card. At the bottom of this page is a summarized version that can be printed.
How to Make the Healthy Cheesecake Crust
If you’re making your own oat flour from scratch, add the whole oats to a blender or food processor and pulse until it turns into a fine powder.
Add the oat flour, liquid sweetener, and melted butter to a bowl and fold with a spatula until combined. The mixture should resemble cookie dough – slightly sticky but neither wet nor dry.

Divide the crust into six equal pieces, roll each into a ball, and place each into your muffin tray. Use your fingers or a measuring spoon to press the crust down and then up the sides, almost like a cup.
Bake for twelve minutes then leave to cool and crisp.


How to Make a No-Bake Cookie Crust
Start by crushing your cookies. You can do this by placing them in a food processor and pulsing them until they turn into crumbs. Alternatively, you can place the cookies in a ziplock bag and crush them with a rolling pin. There should be no chunks of cookie; it should be almost like bread crumbs.
Next, melt your butter in a small bowl or ramekin in short bursts in the microwave. Once melted, add it to the cookie crumbs (either in the food processor or in a bowl) and mix to combine.
Divide between six muffin holes and use your fingers or a measuring spoon to press the crust down and then up the sides, almost like a cup.
How to Make No Bake Protein Cheesecake Filling
Add all the ingredients for the filling to a mixing bowl and mix with a fork until smooth. Add more yogurt if the mixture seems too dry or add more protein powder if the mixture seems too runny (see the video for the correct consistency). Add a pinch of salt to balance the flavors.

Divide the mixture between your crusts, filling them to the top. Add a dollop of strawberry jam on top, then place in the fridge for at least half an hour to set.


Tips to Make the Best Protein Cheesecake
Ensure Room Temperature Ingredients: For a smooth cheesecake texture, let cream cheese, yogurt, and dairy items reach room temperature before mixing to prevent lumps and ensure even blending.
Choose Quality Ingredients: Opt for high-quality cream cheese and yogurt with minimal additives to enhance flavor and overall taste.
Accurately Measure Ingredients: Use a digital food scale for precise measurement, crucial for successful cheesecakes.
Firmly Press Crust: Whether baked or no-bake, firmly press the crust into the muffin tray for a sturdy base and easy removal.
Chill for Enhanced Flavor: Refrigerate assembled cheesecakes for at least 30 minutes to set properly and enhance flavors and textures.
Adjust Consistency: Depending on the protein powder used, adjust yogurt amount for desired filling consistency, adding more for thick fillings or more protein powder for runnier ones.
Balance with Salt: Add a pinch of salt to counteract any bitterness from the protein powder, enhancing overall flavor.

How to Store Protein Cheesecakes
Refrigeration: Once you’ve made your protein cheesecakes, store them in an airtight container or cover them tightly with plastic wrap. Place them in the refrigerator to keep them fresh. Properly stored, protein cheesecakes will last in the refrigerator for up to 3-4 days.
Freezing: If you’ve made a larger batch of protein cheesecakes or want to store them for longer periods, you can freeze them. Place the cheesecakes on a baking sheet lined with parchment paper and freeze them until they are firm. Once frozen, transfer them to a freezer-safe container or zip-top bag, removing as much air as possible before sealing. Frozen protein cheesecakes can last in the freezer for up to 1-2 months.
Thawing: When you’re ready to enjoy your frozen protein cheesecakes, transfer them from the freezer to the refrigerator and let them thaw overnight. This gradual thawing process will help preserve the texture and flavor of the cheesecakes. Once thawed, you can enjoy them cold or at room temperature.
FAQ
How can I adjust the sweetness level of the cheesecakes to suit my taste preferences?
To adjust the sweetness level of the cheesecakes, simply decrease or increase the amount of liquid sweetener used in the filling and crust. Alternatively, experiment with different sweeteners like stevia or monk fruit to find the right balance. Adjust the amount of sweet topping or opt for a tart fruit topping to offset sweetness. Taste the filling mixture before filling the crusts and adjust accordingly. Serving with unsweetened whipped cream or yogurt can also help balance sweetness levels.
Can I omit the protein powder altogether or substitute it with something else?
Yes, you can omit the protein powder altogether if desired. However, if you’re looking to maintain the protein content, you can substitute it with other protein-rich ingredients such as Greek yogurt, cottage cheese, silken tofu, or a plant-based protein powder. Keep in mind that substituting protein powder with other ingredients may alter the texture and flavor of the cheesecakes, so you may need to adjust the recipe accordingly.
Is there a specific reason behind using strawberry jam as a topping, and can I use other toppings instead?
The strawberry jam adds a delicious flavor that masks the taste of protein powder. It also adds a visual appeal. However, you can certainly use other toppings to suit your preferences. Consider options like fresh berries (such as strawberries, raspberries, or blueberries), fruit compote, chocolate sauce, caramel sauce, or a drizzle of honey. Feel free to get creative and experiment with different toppings to enhance the flavor and presentation of your protein cheesecakes.
Can I make the cheesecake in a different baking tray?
Yes, you can make the cheesecakes in a different vessel if you prefer. While the recipe suggests using a muffin tray to create individual cheesecakes, you can also use other types of bakeware such as a mini cheesecake pan, small ramekins, or even a larger pie dish for a single large cheesecake. Adjust the baking time accordingly based on the size and depth of the vessel you choose. Just ensure that whatever vessel you use is oven-safe and suitable for baking.
Can I make one large cheesecake instead of mini protein cheesecakes?
Yes, you can definitely make one large cheesecake instead of mini protein cheesecakes. Simply press the crust mixture into the bottom of a springform pan or pie dish, ensuring it’s evenly distributed then bake the crust for 10-15 minutes. Once baked, pour the cheesecake filling over the crust and spread it out evenly.
How can I make vegan protein cheesecake?
For the crust, use a dairy-free butter alternative. For the filling you can use dairy-free cream cheese and yogurt, and a plant-based protein powder.
more easy and healthy protein powder recipes
- easy protein poptart (single-serve)
- Homemade Rocky Road Protein Bars
- Homemade Protein Ice Cream Bars (so easy!)
- 4-ingredient protein scones (without butter)
- Easy and Healthy Baked Protein Donuts
view all my protein-packed recipes here
Hey! If you make this recipe, I would love it if you could leave me some feedback and a rating ⭐⭐⭐⭐⭐ in the comment section at the bottom of the page! Also let me know on Facebook, Instagram or Pinterest! I can’t wait to hear your thoughts and see your photos!
Protein Cheesecakes Recipe
Equipment
- Blender or Food Processor if making your own oat flour
- Fork
Ingredients
For the Oat Flour Crust (see notes for a no-bake option)
- 120 g Oat Flour** (1 cup)
- 20 g Liquid Sweetener (1 tbsp)
- 30 g Grass Fed Butter, melted (2 tbsp)
For the Filling
- 90 g Smooth Cottage Cheese (or cream cheese) (⅓ cup)
- 90 g Yogurt (⅓ cup)
- 40 g Vanilla Protein Powder*** (⅓ cup)
- 20 g Liquid Sweetener 1 tbsp
- Juice of half a lemon 1 tbsp
- Pinch of salt
- 6 tsp Strawberry Jam optional
Instructions
For the crust (see notes for a no-bake option)
- Preheat oven to 190℃ / 375℉ / 170℃ fan and lightly grease your muffin tray with some butter or cooking spray.
- Add oat flour (or blended oats), liquid sweetener and melted butter to a bowl and mix to combine. It should resemble a slightly sticky cookie dough.
- Divide between 6 muffin holes and press down and up the sides, with your fingers or a spoon, to create a cup.
- Bake for 12 minutes then leave to cool and crispen.
For the filling
- Add cream cheese, yogurt, protein powder, liquid sweetener, lemon juice and a pinch of salt to a bowl and use a fork to mix until smooth.
- Divide the filling between your cooled crusts, filling to the top.
- Add a teaspoon of jam on top.
- Refrigerate for at least 30 minutes.
Video
Notes
- 120g Cookies or Crackers
- 30g Grass Fed Butter
- Add cookies to your blender and pulse into crumbs. Alternatively, you can crush them with a rolling pin.
- Add to a bowl along with the melted butter and mix to combine.
- Press the mixture into your muffin tray, pressing down and up the sides.
- Place in the fridge to set.
Let me know below if you make these Protein Cheesecakes!
I love your recipes! I just found the option to double or triple the ingredience. But it doesn’t recount the measurements written (1tsp;1cup;…) just to let you know 😉 Iam gonna try these cheesecakes today!