


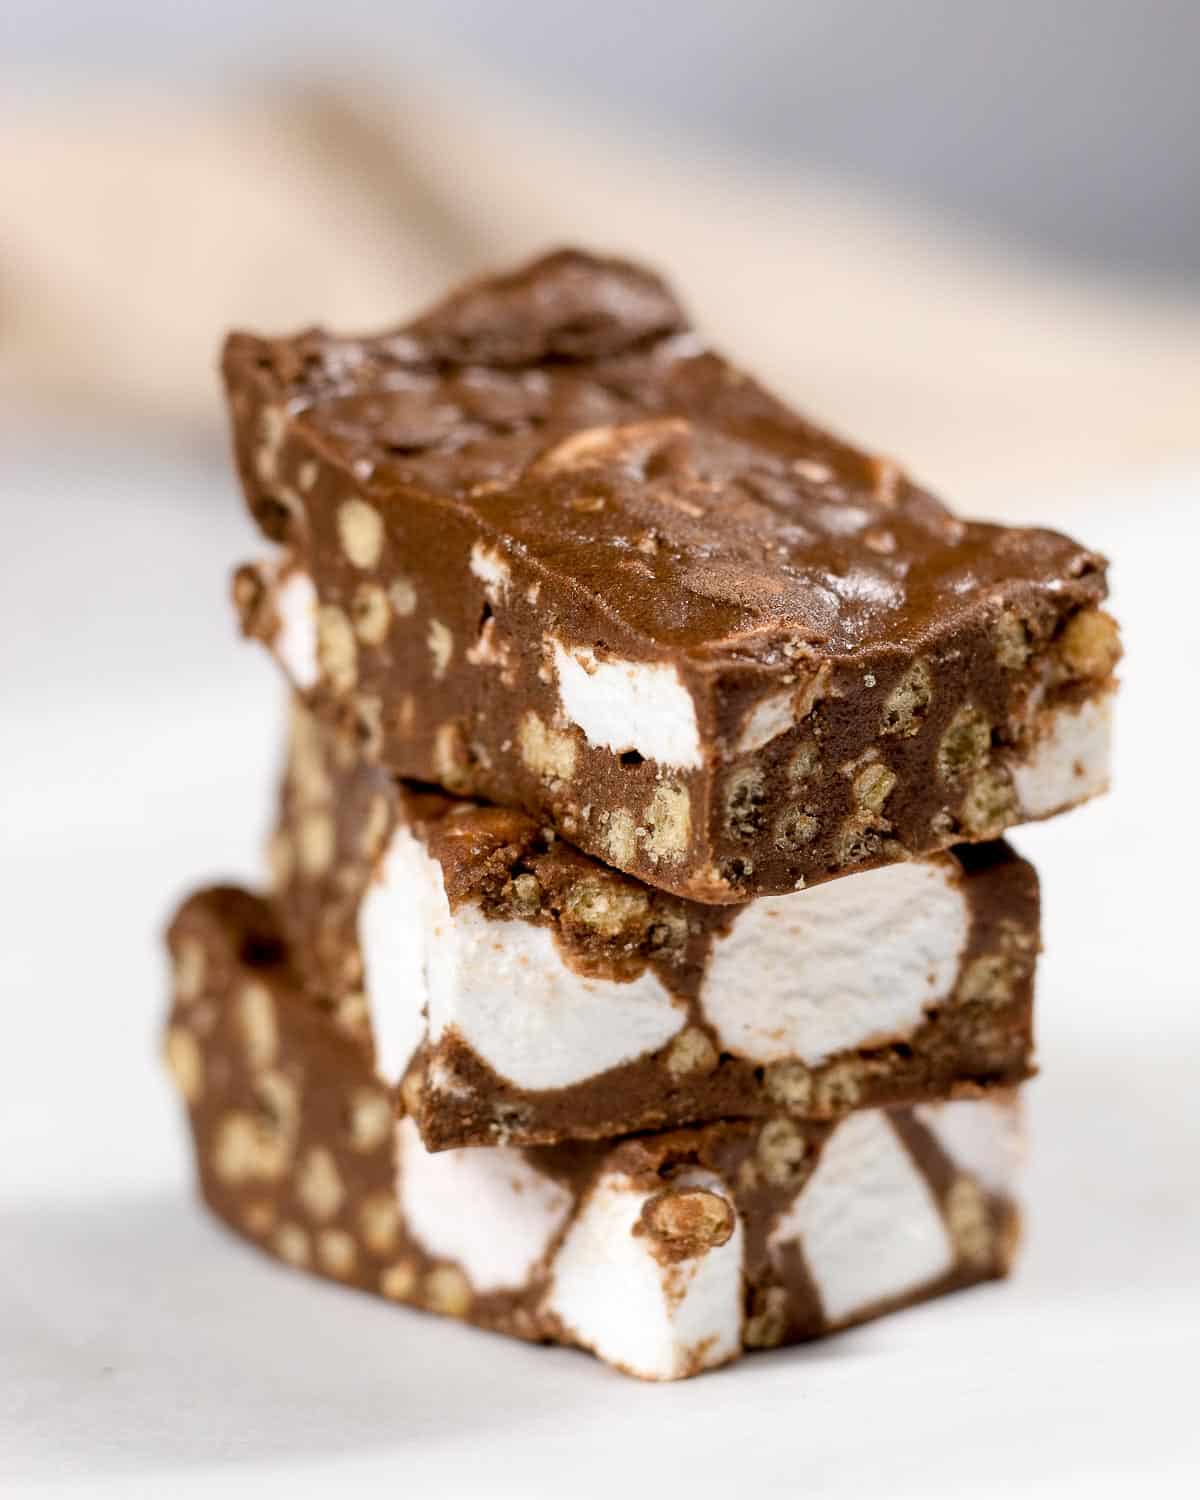
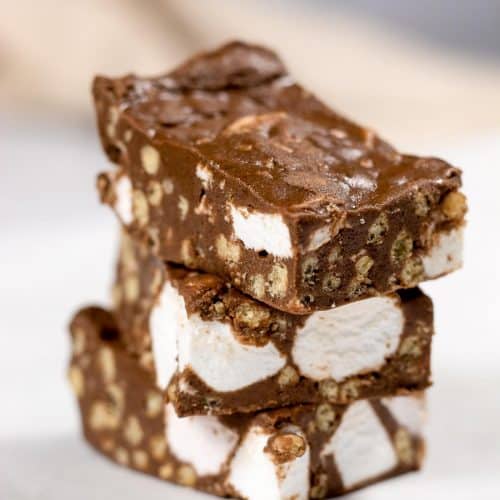
These homemade rocky road protein bars are so much better than shop-bought! They’re fully customisable, so you can make them healthier, gluten-free and vegan and they’re so much fun too! They’re made in just one bowl and come together in 10 minutes.
What is Rocky Road?
I am sure somewhere along the lines we have all heard the words “Rocky Road”. But, what is it? It is a very popular treat in America and Australia and also in England where it is sometimes known as “Tiffin”.
Rocky road is a no-bake treat, typically made using chocolate and marshmallows along with other ingredients like cereal, nuts, berries, coconut – basically anything your heart desires (or anything you’ve had in your pantry for a few hundred years that needs using).
While I’ve not tried it myself, Rocky Road is also a very popular ice cream flavour – now that sounds absolutely delightful.
Why you need this Rocky Road recipe
Other than them being an absolutely phenomenal dessert, they are 100% the best rocky road bars you will ever try. Here’s why:
- They taste like classic Rocky Road bars, but they’re healthier! They’re made using nourishing ingredients making them even more enjoyable knowing that you’re consuming a good amount of nutrients.
- They’re easily made gluten-free and vegan!
- You can add in some protein powder, making them an incredible pre-workout snack.
- They’re really quick, easy and fun to make – you can get your kids involved which is a great bonding activity (and you get some rocky road bars from it, bonus!)
- You only need 4 ingredients for the healthy chocolate slice, and then you can add in whatever mix-ins you want.
Ingredients
To make these healthy rocky road bars you only need four ingredients, then you can add any extra treats that you want. My top recommendations are marshmallows and crispy cereal!

- Chocolate: I recommend using high-quality dark chocolate as it’s lower in sugar and higher in cacao, which is packed with antioxidants! Dark chocolate is also almost always vegan (just check the packaging) so it’s quite simple to make this a vegan rocky road recipe. You can, however, use any chocolate you want.
- Nut Butter: You can use smooth or crunchy nut butter, but I recommend using one that is made using just nuts – no added sugar or oil! I love using cashew butter as it doesn’t taste like nuts, but you can use peanut butter, almond butter or even sunflower seed butter if you need these to be nut-free!
- Protein Powder: You can use any flavour protein powder, but I recommend something chocolatey! If you don’t want to use protein powder, you can use cocoa powder but you will have to add some extra sweetener if the mixture isn’t sweet enough. Use a plant-based protein powder if needed.
- Liquid Sweetener: To loosen up the mixture and make it even more indulgent, you’re going to need some liquid sweetener like maple syrup, agave, honey or sugar-free syrup. You can omit this if you want and add a splash of milk instead.
- Marshmallows: You can use mini marshmallows or cut up some big marshmallows.
- Crispy Cereal: To add a bit of crunch you can add in some crushed cereal, rice crispies, quinoa puffs or granola. I used these vanilla soy protein crispies.
Variations
You can literally add in whatever you want, but here are some ideas:
- Chopped nuts
- Dried berries (goji berries or mulberries are great!)
- Glace cherries
- Turkish delight
- Crushed biscuits
- Desiccated coconut
- Cacao nibs

How to make allergen-friendly Rocky Road Protein Bars
Because these rocky road protein bars are so forgiving, they are easily customisable to suit any dietary needs.
*Please always do your own research on your ingredients to make sure they are suitable for your dietary requirements.
Gluten-free Rocky Road
While most chocolate, nut butter, protein powder and maple syrup are already free from gluten, ALWAYS check the packaging to see if they are gluten-free certified if baking for someone with a severe allergy or celiac disease. Some products are made in facilities that handle gluten-containing products and are therefore not suitable for celiacs.
Use gluten-free marshmallows and cereal.
Dairy-free / Vegan Rocky Road
Use dark chocolate or vegan chocolate, plant-based protein powder (like pea-protein or soy protein) and vegan marshmallows.
Step-by-step instructions
These rocky road protein bars are truly very easy to make, but I’ve provided a recipe video in the recipe card at the bottom of this page to help you.
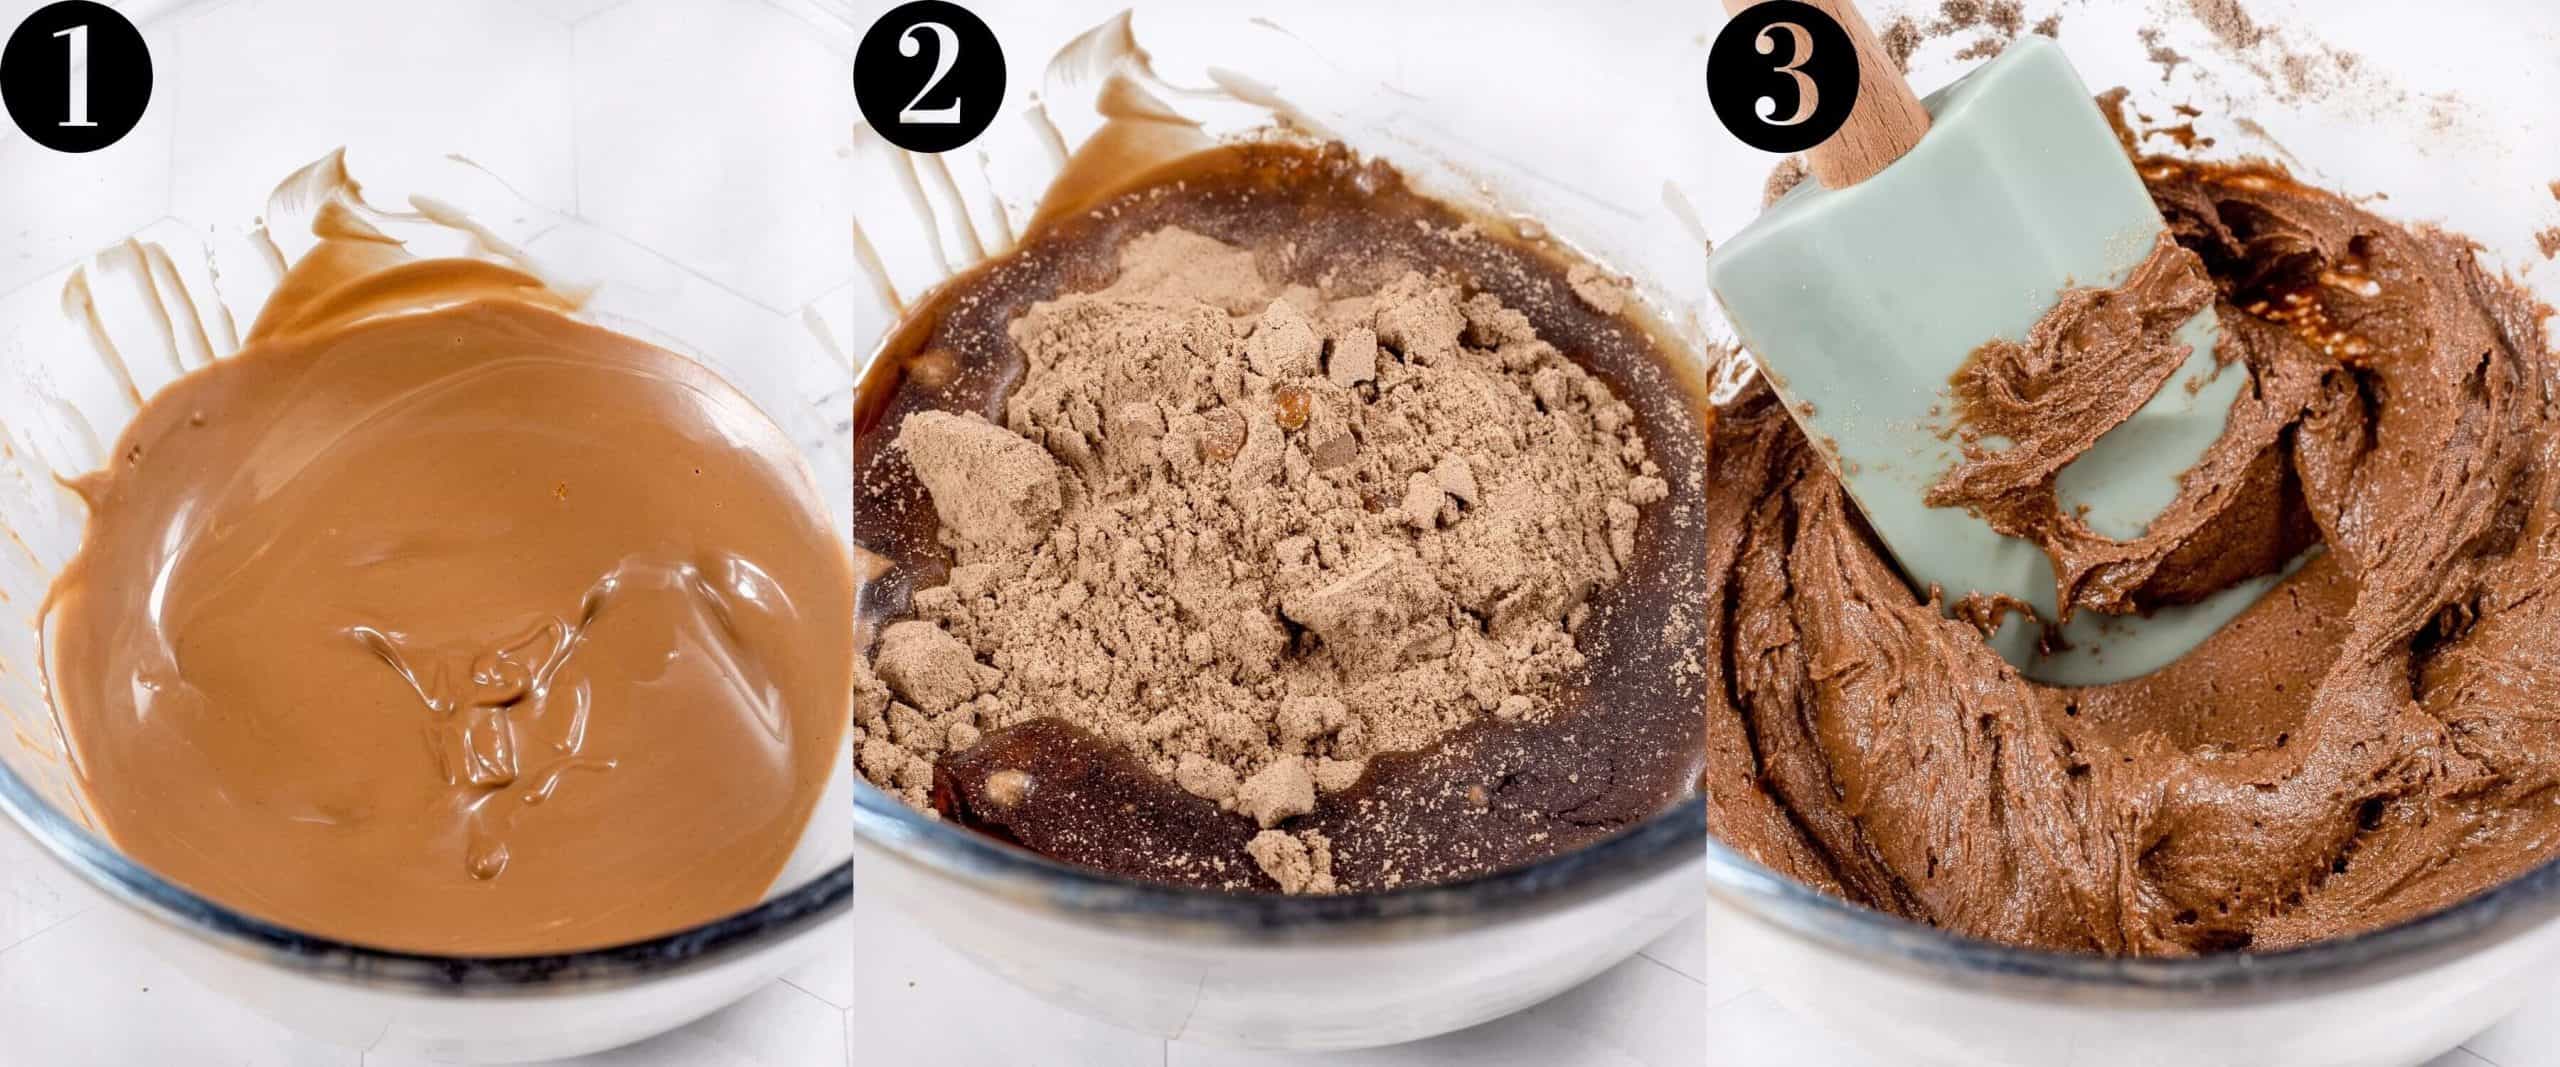
Jump to VideoStep 1: Melt your chocolate and nut butter (image 1). You can do this in the microwave or by using the double boiler method which is my personal favourite. See this article on How To Melt Chocolate.
Step 2: Add your protein powder and sweetener (image 2) and mix until combined (image 3)
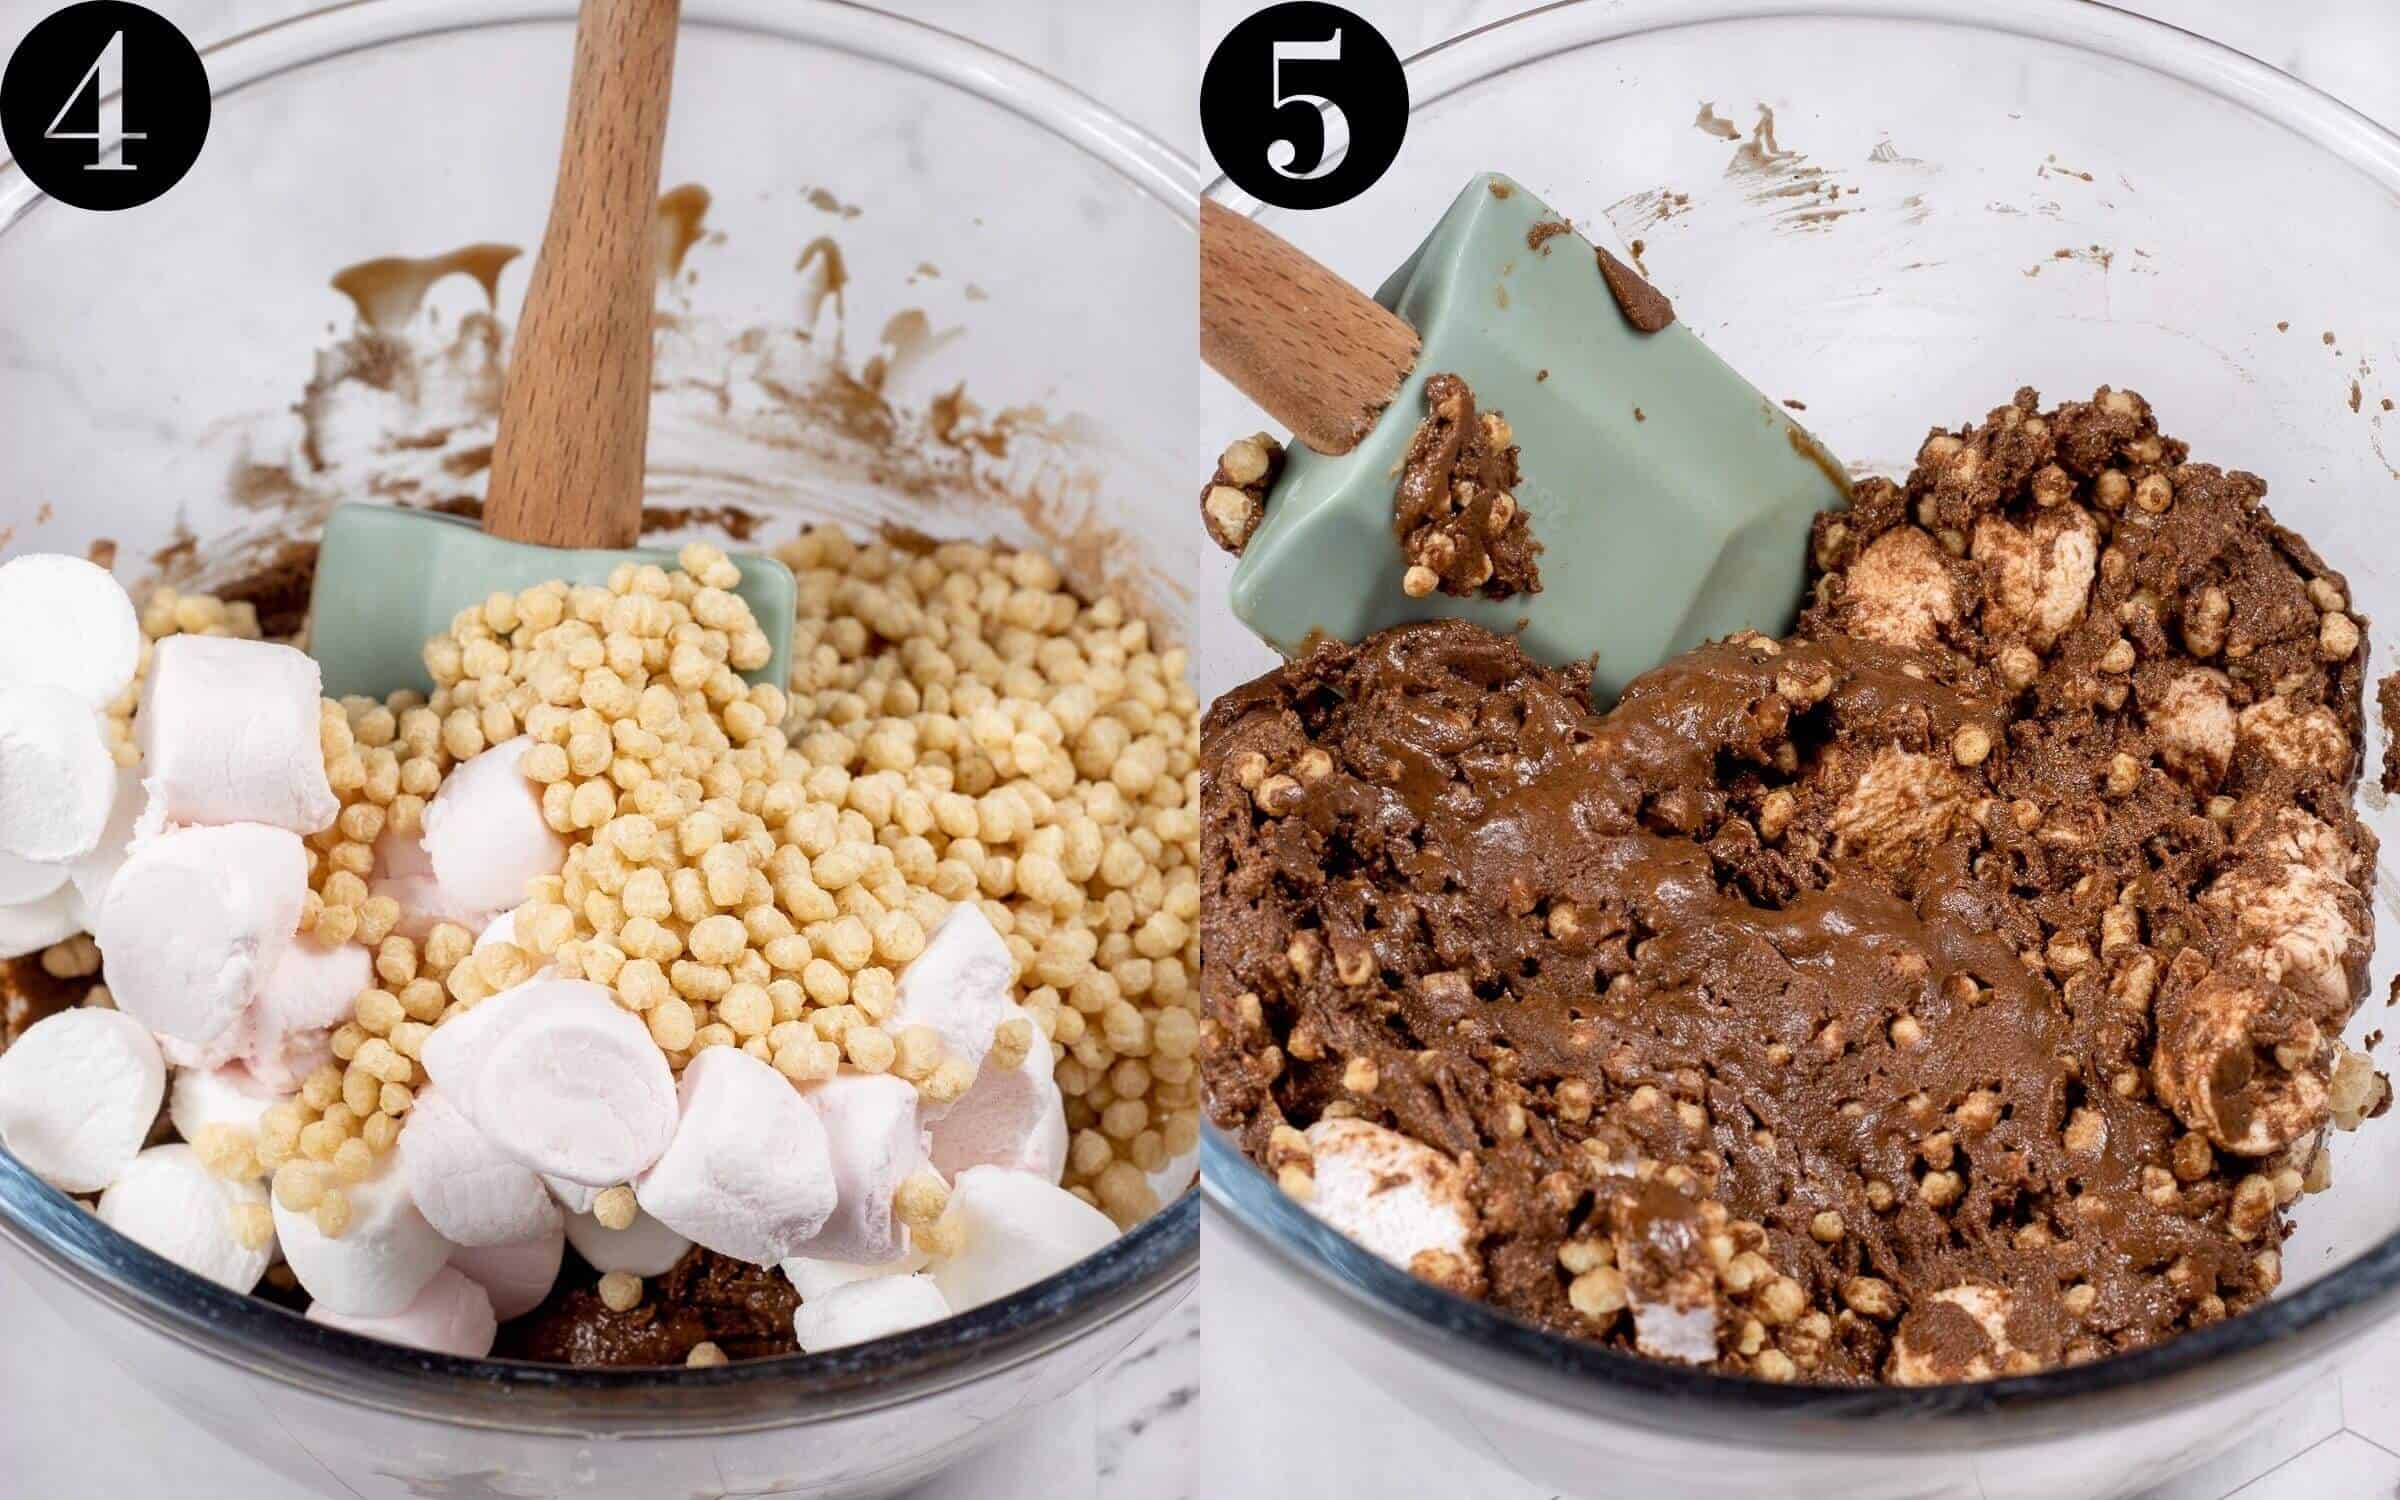
Step 3: Add in your mix-ins (image 4) and fold until they’re evenly distributed (image 5).
Step 4: Transfer to a loaf tin or Tupperware lined with parchment paper, this makes it easy to remove once set (image 6). Pop it in the fridge for at least one hour.
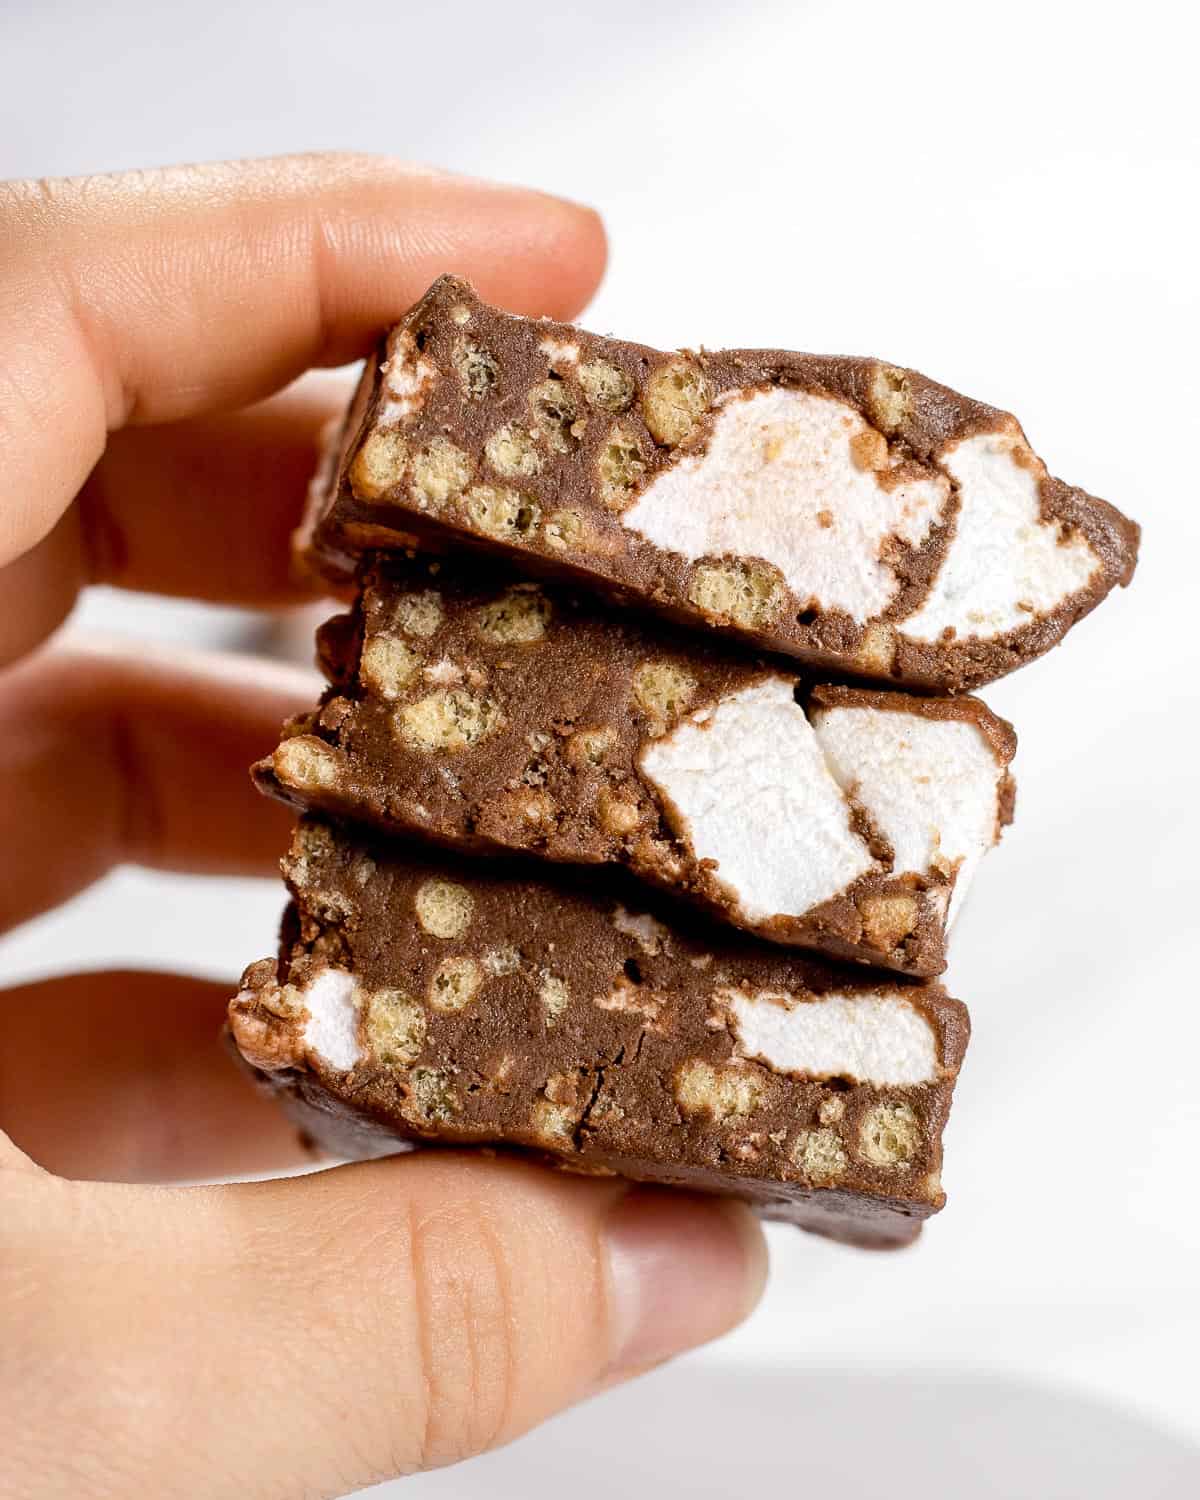
Step 5: Once set, remove from the fridge and lightly run a knife around the edge to loosen from the tin (image 7). Slice it up with a sharp, clean knife and enjoy!

Expert Tips:
- I make mine in a loaf tin, but you can use a smaller tin or Tupperware to make thicker bars.
- I slice mine into 12 bite-sized portions, but you can cut them into fewer, bigger slices. I always end up having more than one, anyway!
- You can easily double this recipe to make a bigger batch, just press the X2 or X3 button in the recipe card.
Storing and Serving
I feel like these rocky road protein bars would last forever in your fridge, yet they definitely won’t because they’ll be devoured within two days. Yes, I’m speaking from experience.
Nevertheless, store them in a zip-lock bag or Tupperware in your fridge.
You can also keep these in a freezer bag in your freezer for up to three months. Leave them to thaw at room temperature for around an hour.
I enjoy these most when they are cold, as the chocolate is still set and they’re really fudgy!
More high-protein recipes for you to try
- 4-ingredient Protein Scones
- Protein Ice Cream Bars
- Chocolate Chip Protein Cookies
- Easy and Healthy Baked Protein Donuts
- Easy Chickpea Protein Bars
BAKING IN GRAMS
All of the recipes I create are tried and tested a few times until it has been perfected. My goal is to develop recipes that are simple to make and easy to follow so that anyone can make them – even if you’ve never baked before!
One very important thing that will ensure that you get the best results is to measure your ingredients by weight! I recommend purchasing a kitchen scale, they are very affordable and it will honestly change your baking game for good! Not all measuring cups are made equally – for example, a cup of flour to me weighs 120g, but for you, it may be anywhere between 100g and 200g – that’s a BIG difference!
I do provide cup measurements, but for best results, I recommend using the weighted ingredients provided.
If you don’t have a kitchen scale yet, you can use this Ingredient Weight Chart as a guideline to convert the ingredients to help you!
Now – dust your apron off and get baking! X
Hey! If you make this recipe, I would love it if you could leave me some feedback and a rating ⭐⭐⭐⭐⭐ in the comment section at the bottom of the page! Also let me know on Facebook, Instagram or Pinterest! I can’t wait to hear your thoughts and see your photos!
Homemade Rocky Road Protein Bars
Equipment
- Heat-proof Mixing Bowl
- Loaf Tin or Tupperware
Ingredients
- 75 g Dark Chocolate (¾ cup)
- 3 tbsp Nut Butter
- 45 g Chocolate Protein Powder (⅓ cup)
- 2 tbsp Liquid Sweetener
- 1 cup Mix-ins: Marshmallows, Crispy Cereal, Nuts, Dried Berries, Coconut etc.
Instructions
- Add your chocolate and nut butter to a heat-proof mixing bowl. Melt it in the microwave or using the double boiler method. See how to melt chocolate.
- Next, add in your protein powder and sweetener and fold until combined.
- Fold in your mix-ins.
- Transfer the mixture into a loaf tin or Tupperware lined with parchment paper. Press the mixture down into your tin and refrigerate for at least one hour.
- Carefully remove the rocky road from the tin and slice with a sharp, clean knife.
Video
Notes
- I make mine in a loaf tin, but you can use a smaller tin or Tupperware to make thicker bars.
- I slice mine into 12 bite-sized portions, but you can cut them into fewer, bigger slices. I always end up having more than one, anyway!
- You can easily double this recipe to make a bigger batch, just press the X2 or X3 button on the recipe card.
- Read the blog content for more information about making these allergen-friendly.
- See the blog contents for ingredient substitutions and storage advice.

This recipe not only looked good but was easy to make. I made mine slightly different using ingredients i had at home but for the most part it was the same. Really great homemade protein bar!
Thank you so much for your kind comment and for making these rocky road protein bars! I am so happy you enjoyed them xx
Oh my gosh I love all of your recipes!! I also have a blog where I post healthier desserts with gluten free, low sugar, and plant based options. It’s so cool to see other peoples recipes, and you truly have a gift for photography. Thank you so much for posting this.
Hi, is it one cup total of mix-ins, or one cup per mix-in? Looks delicious and I can’t wait to make it!
Where to find vegan marshmallows?