


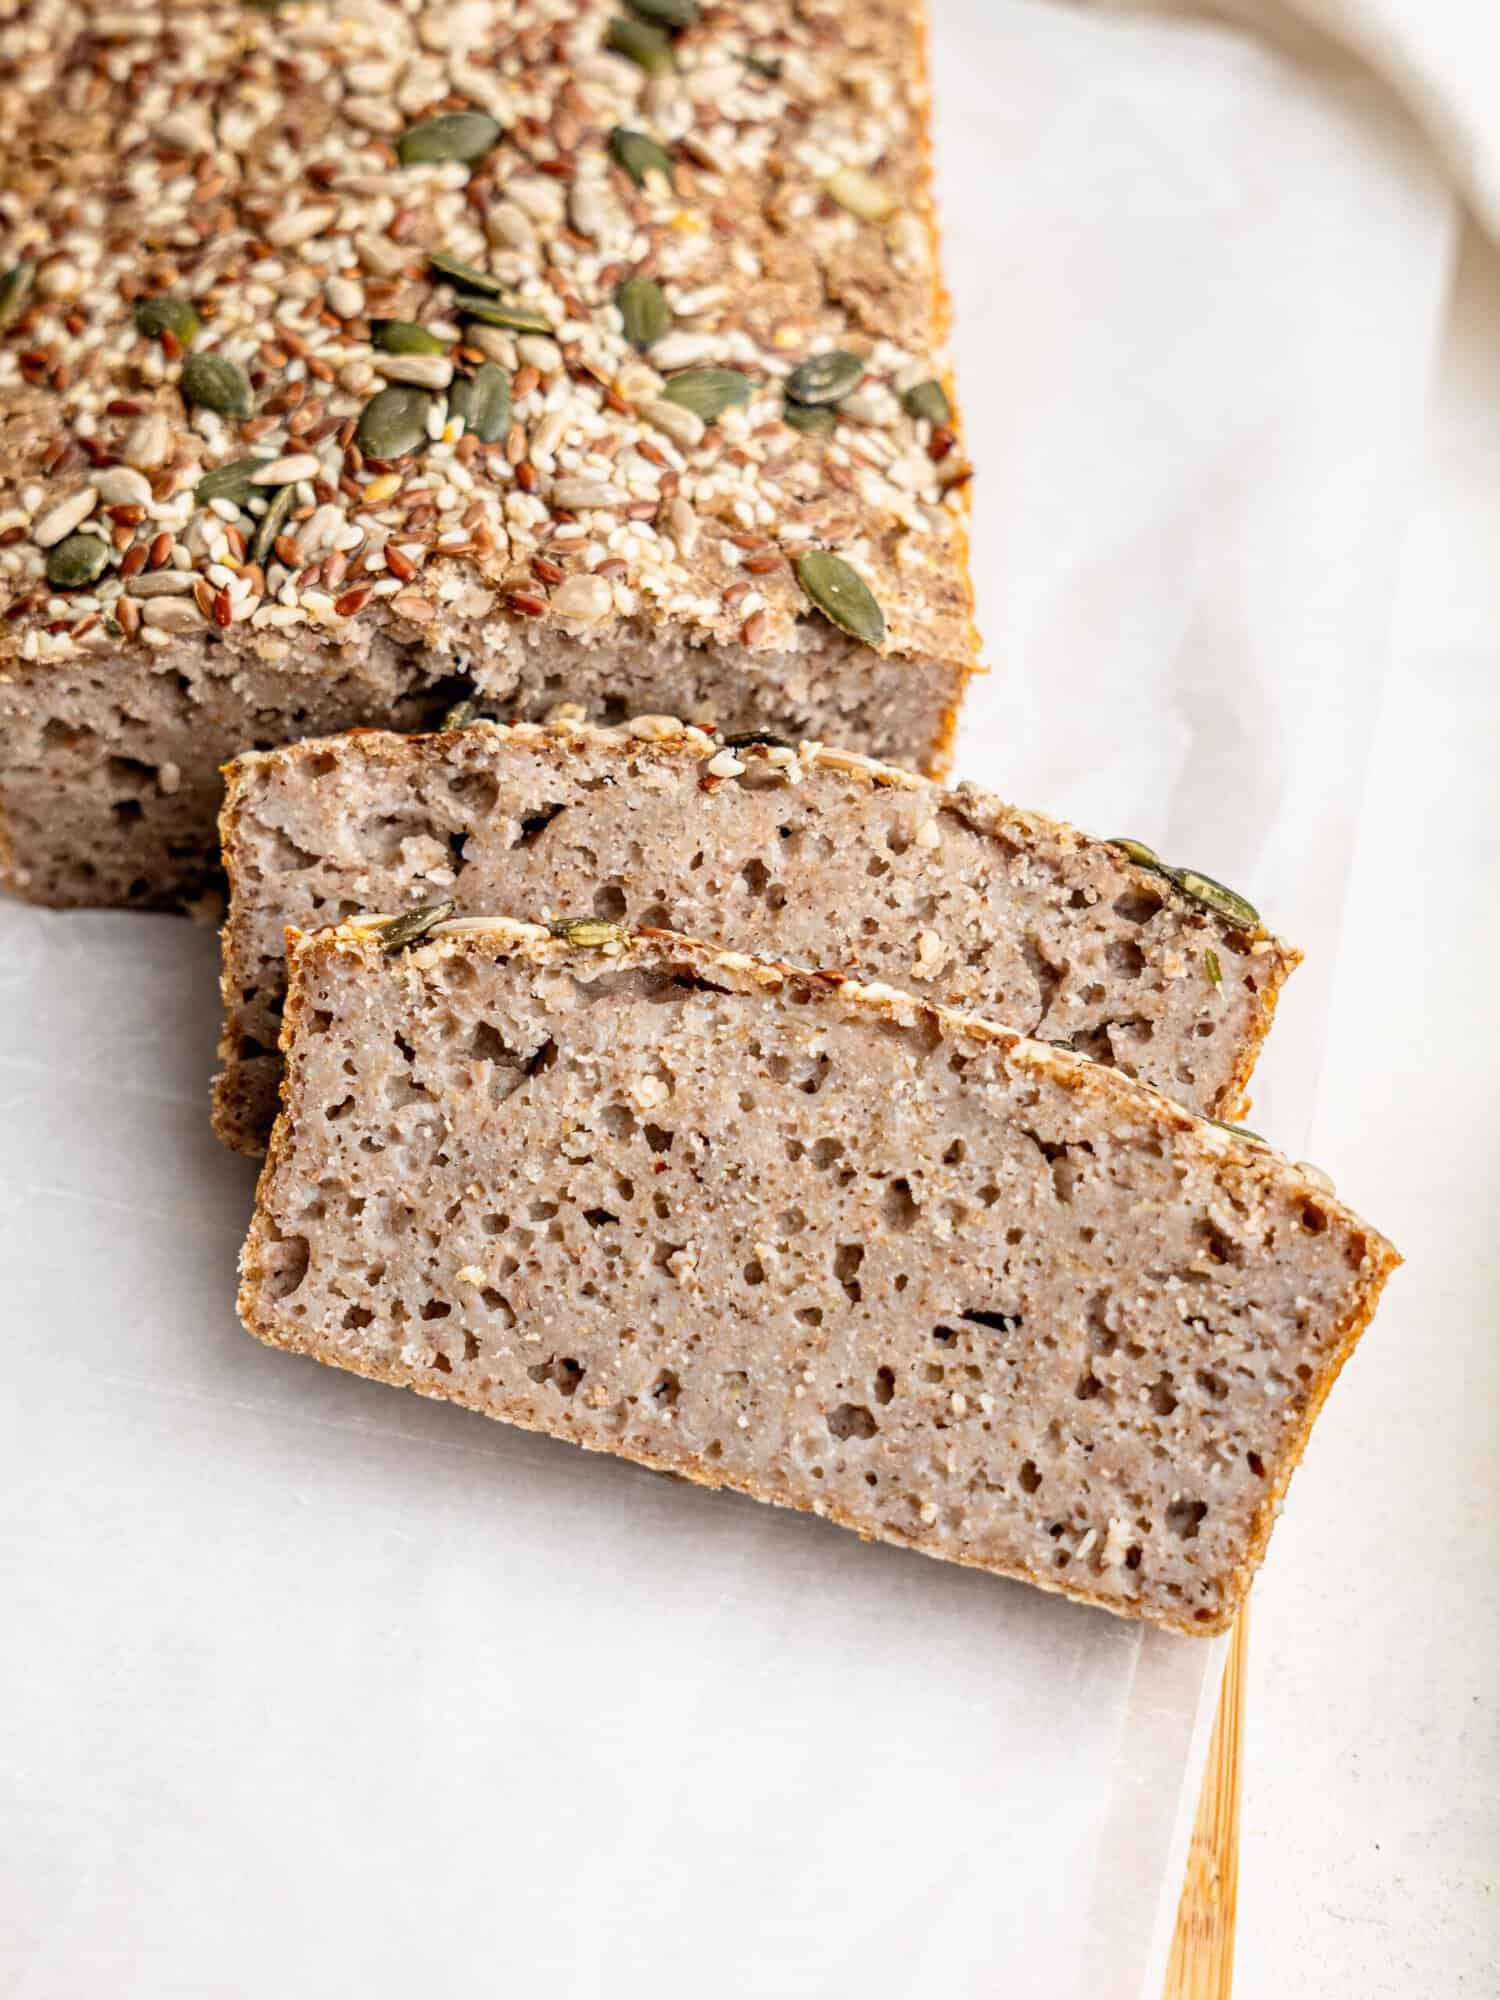
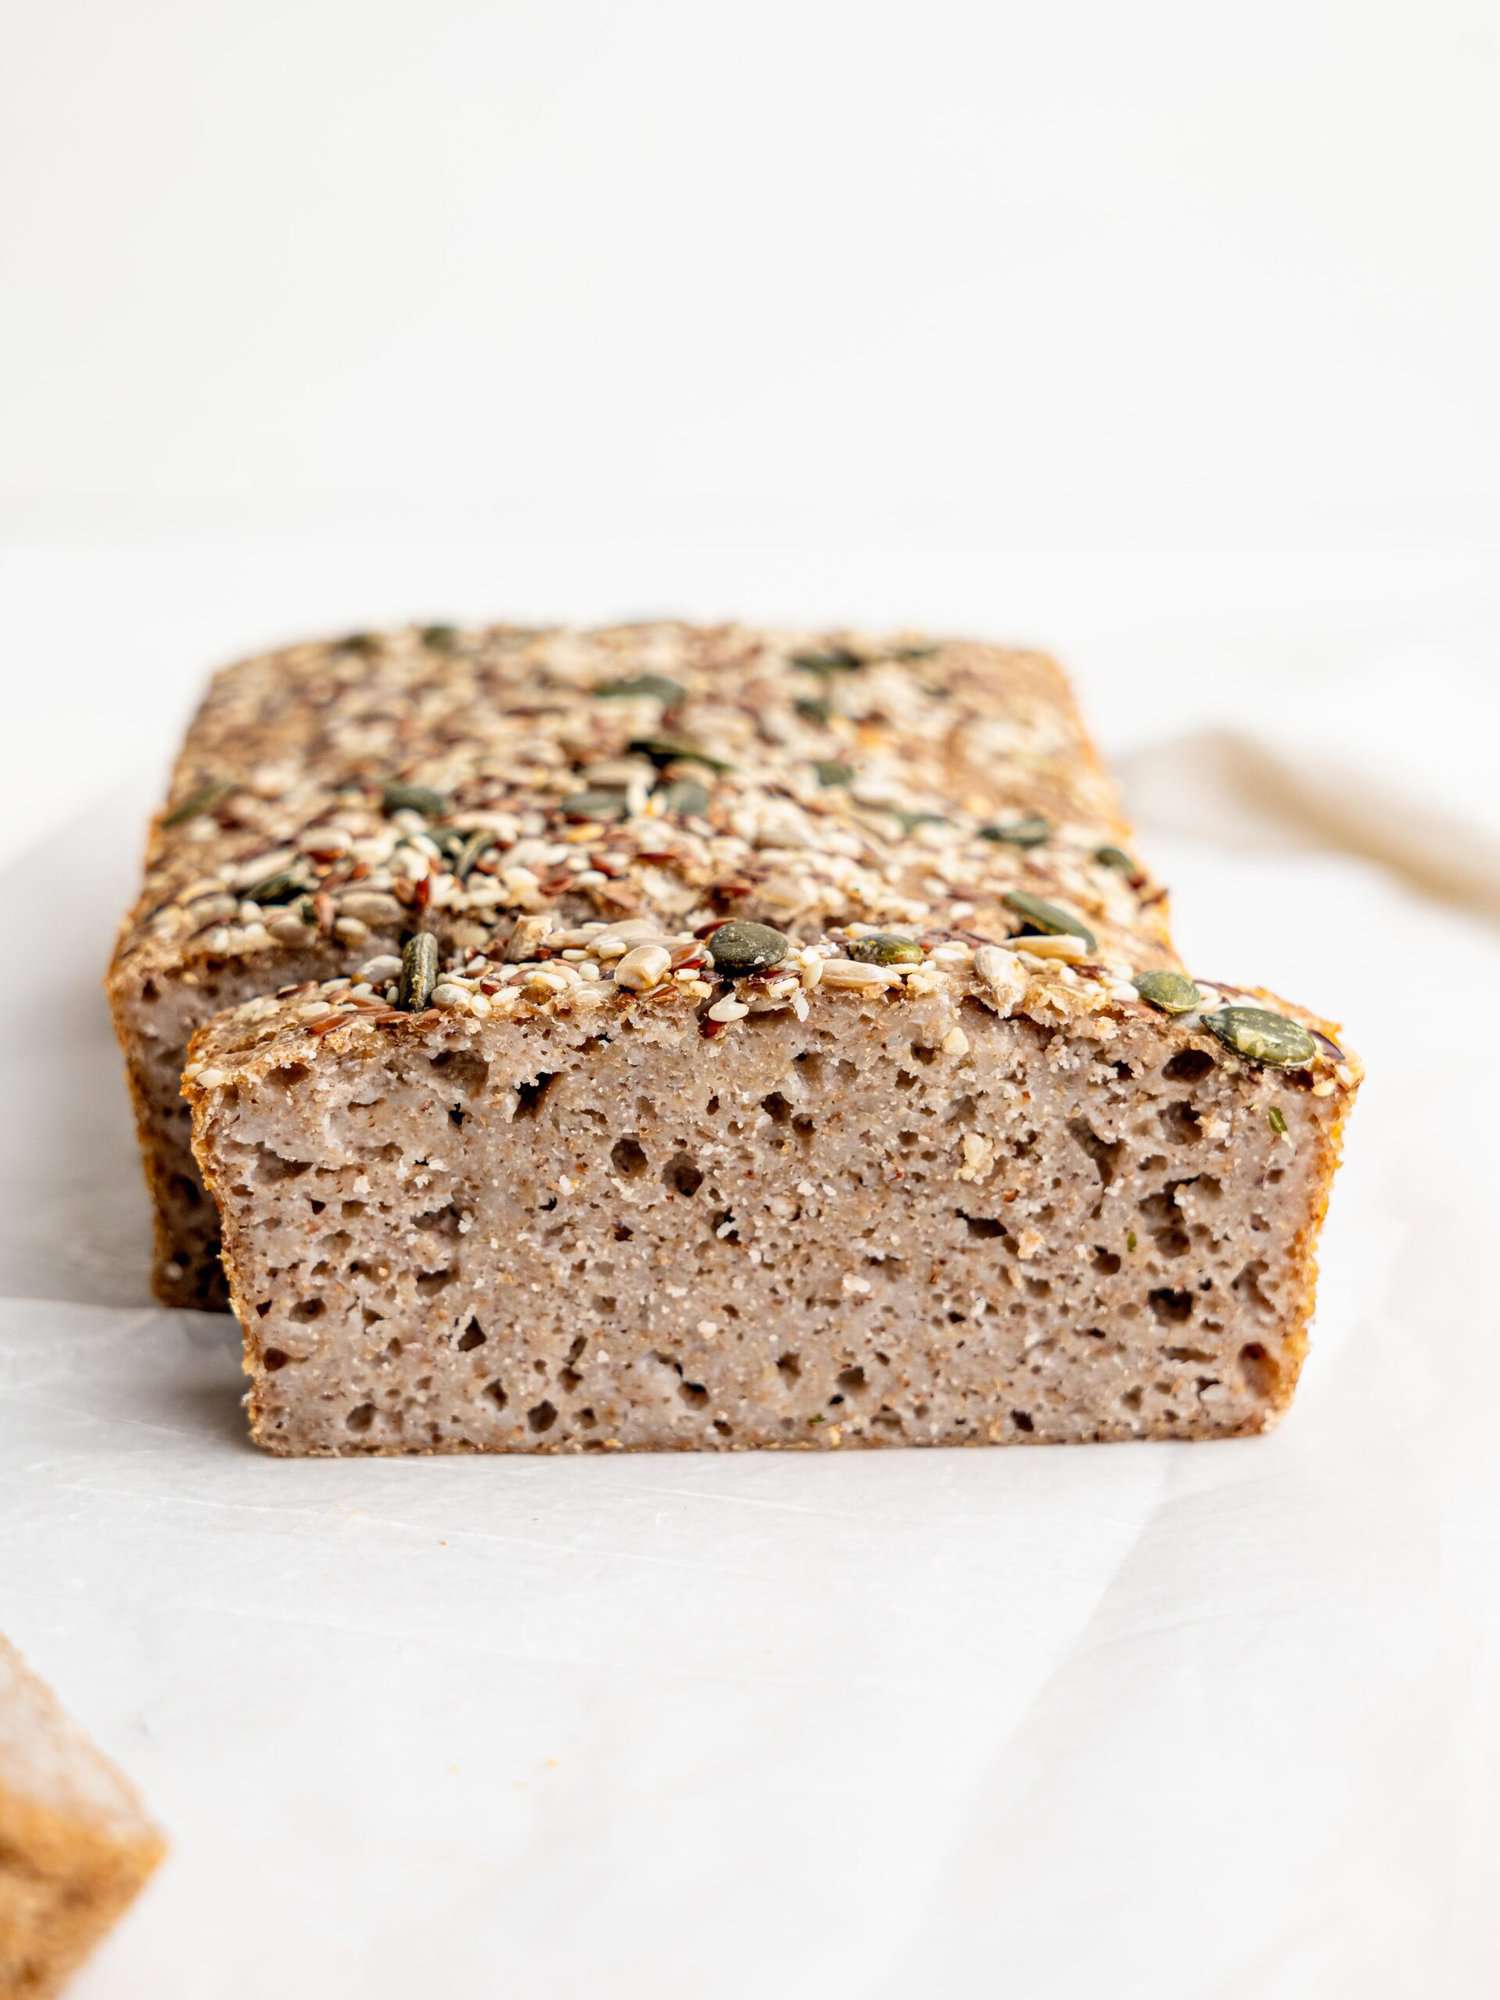
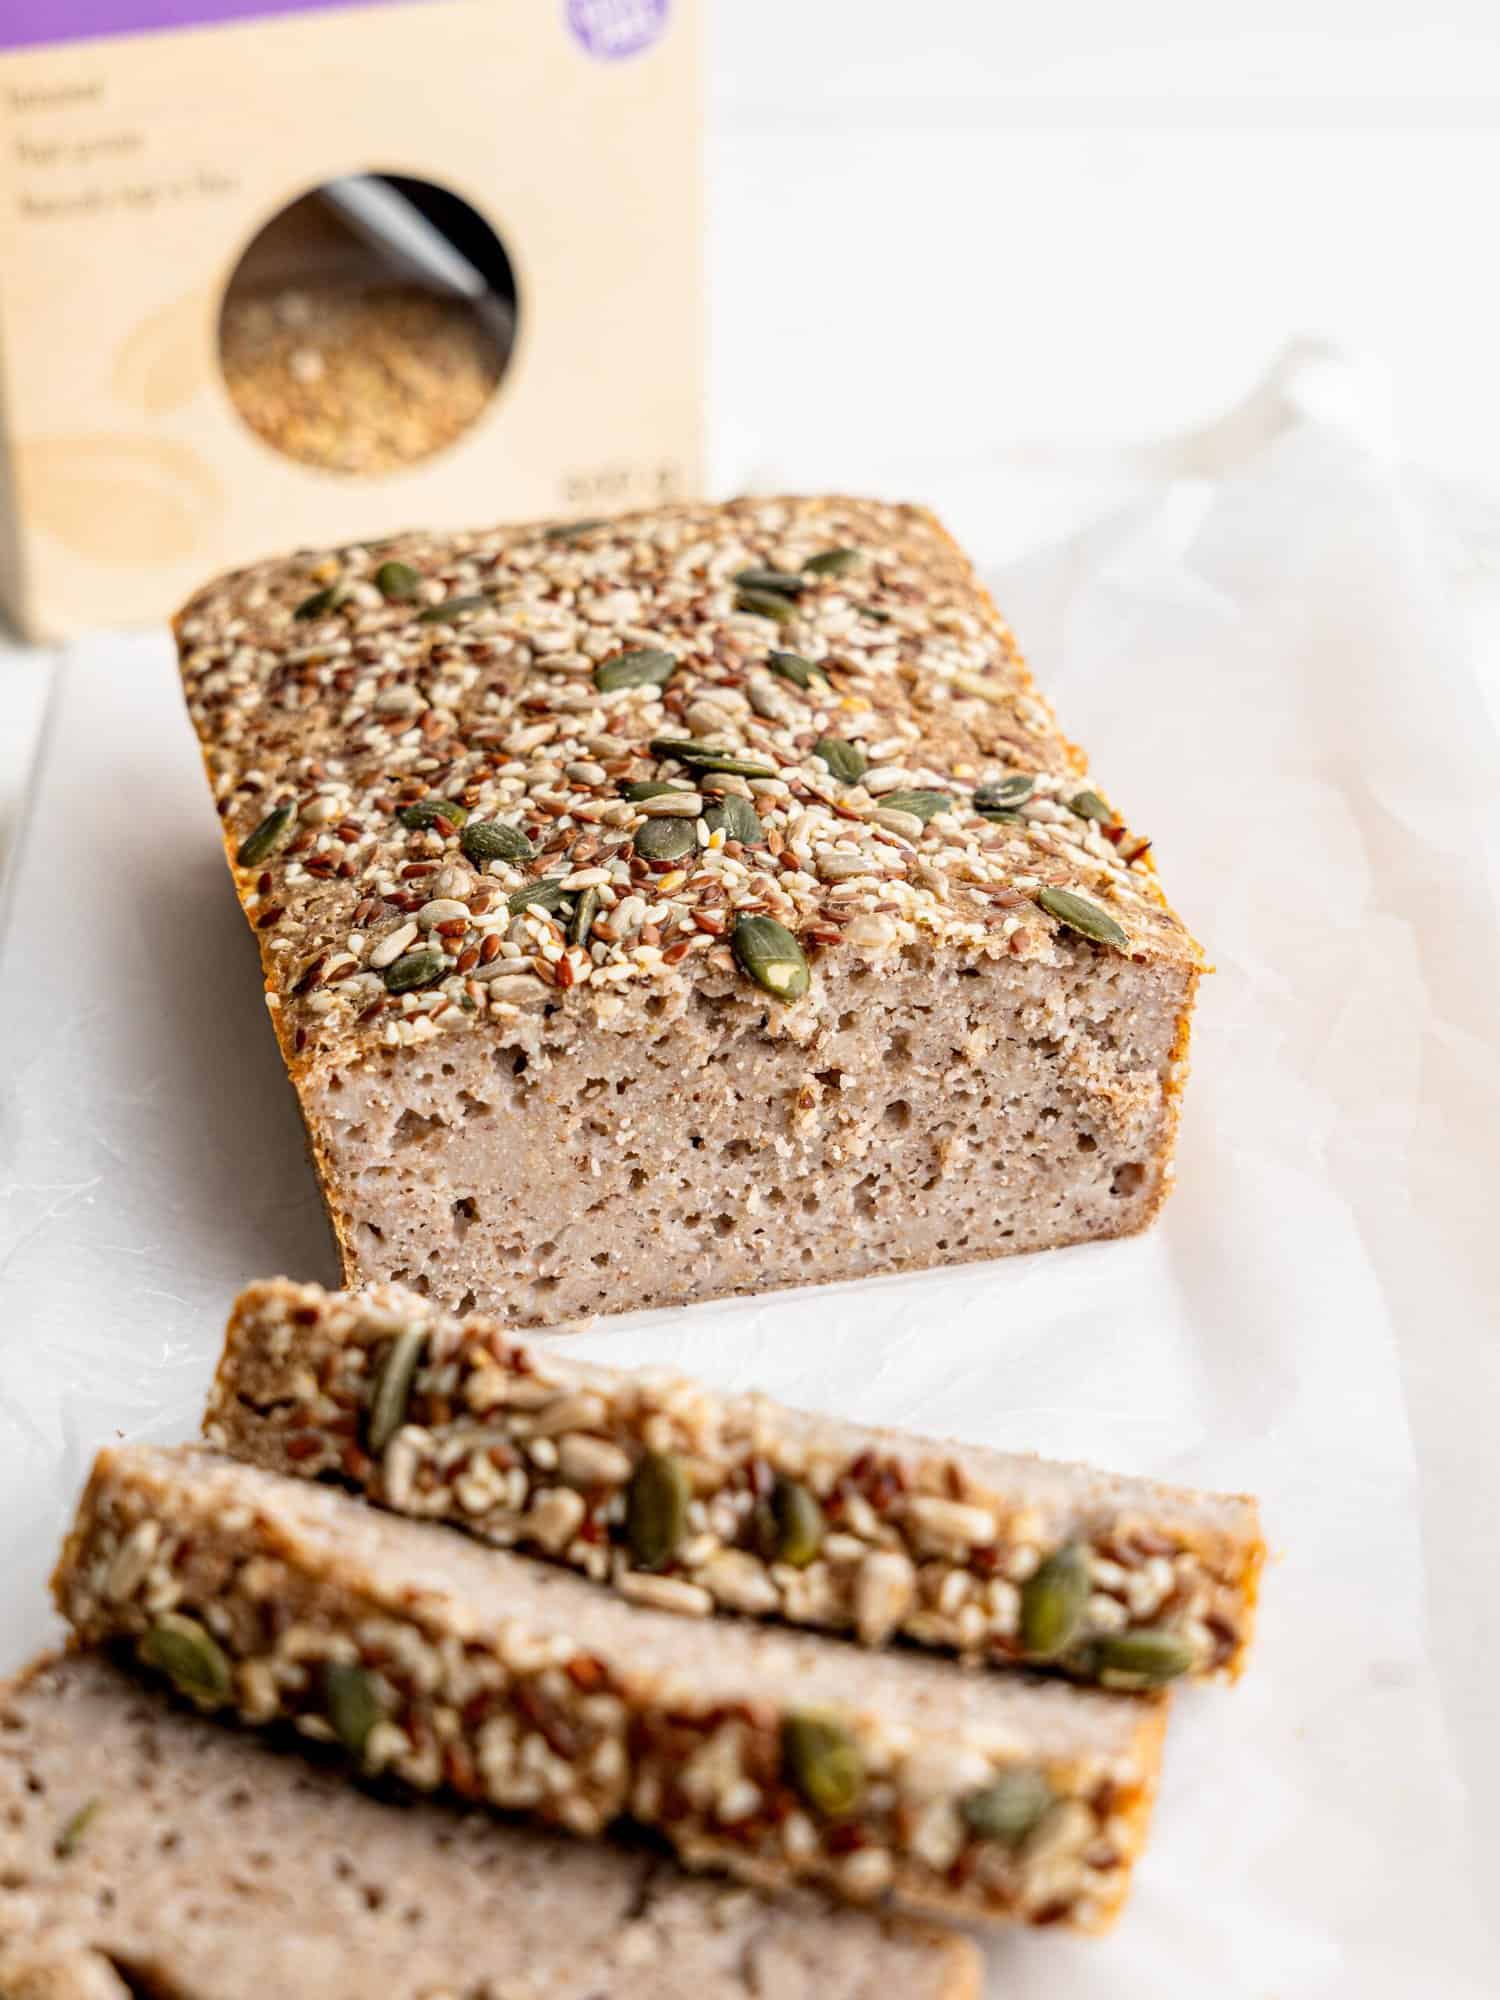
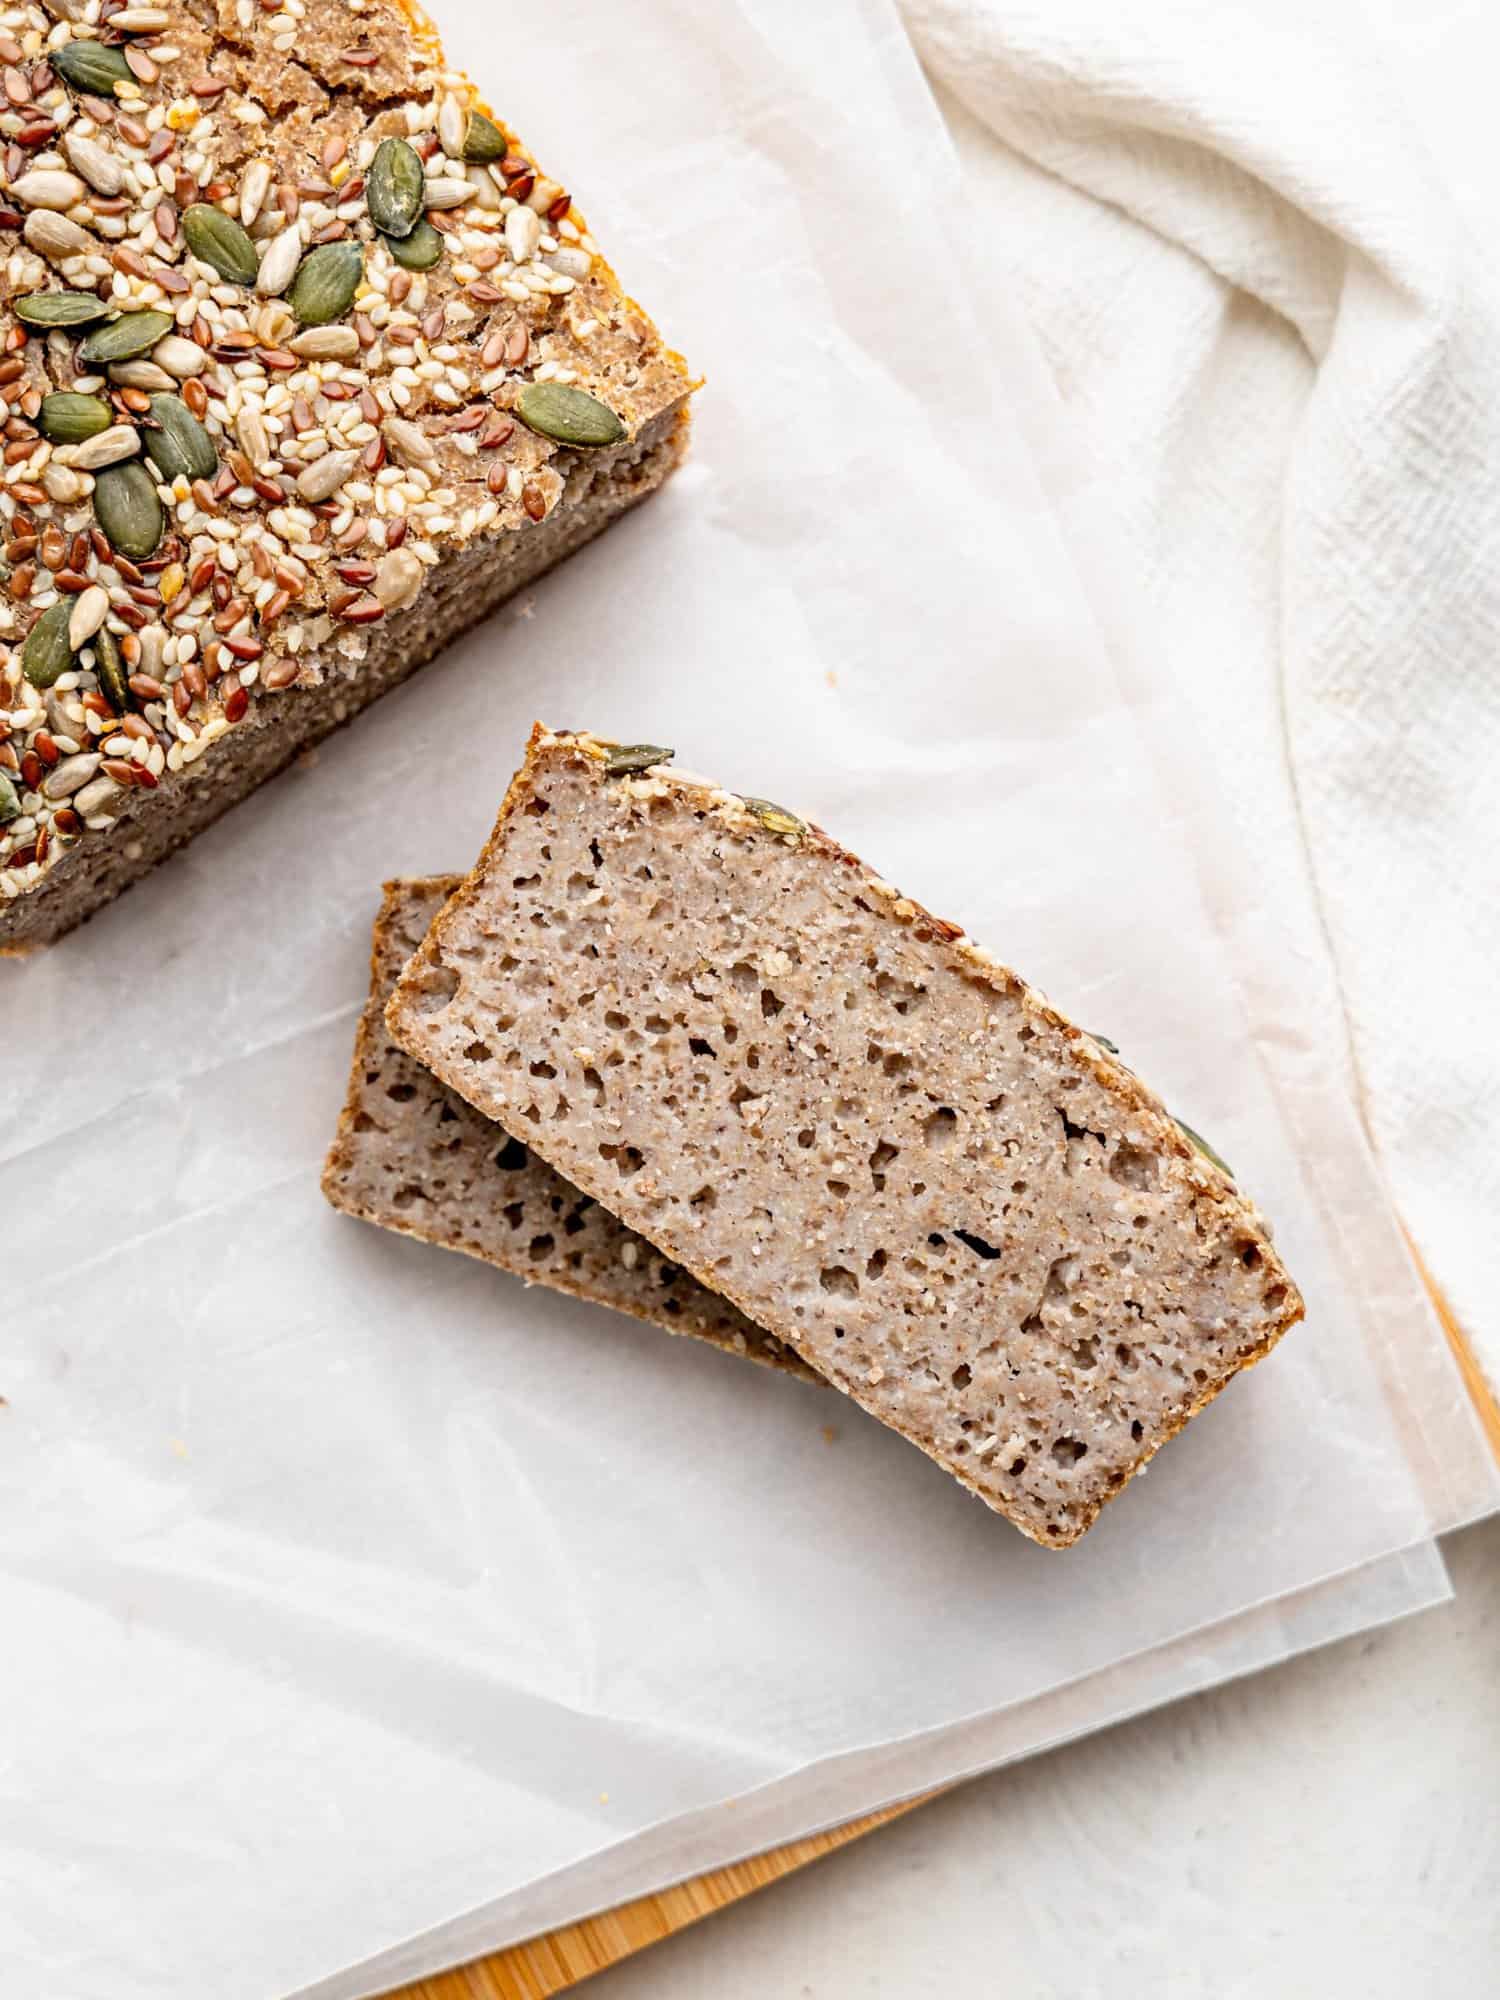
I call this “magical” Buckwheat Bread because it truly is magic. This bread is made with just buckwheat groats and water and it will blow your mind. This yeast-free, vegan, and naturally gluten-free buckwheat bread recipe is incredibly easy to make, and it’s soft, moist, and healthy, too!
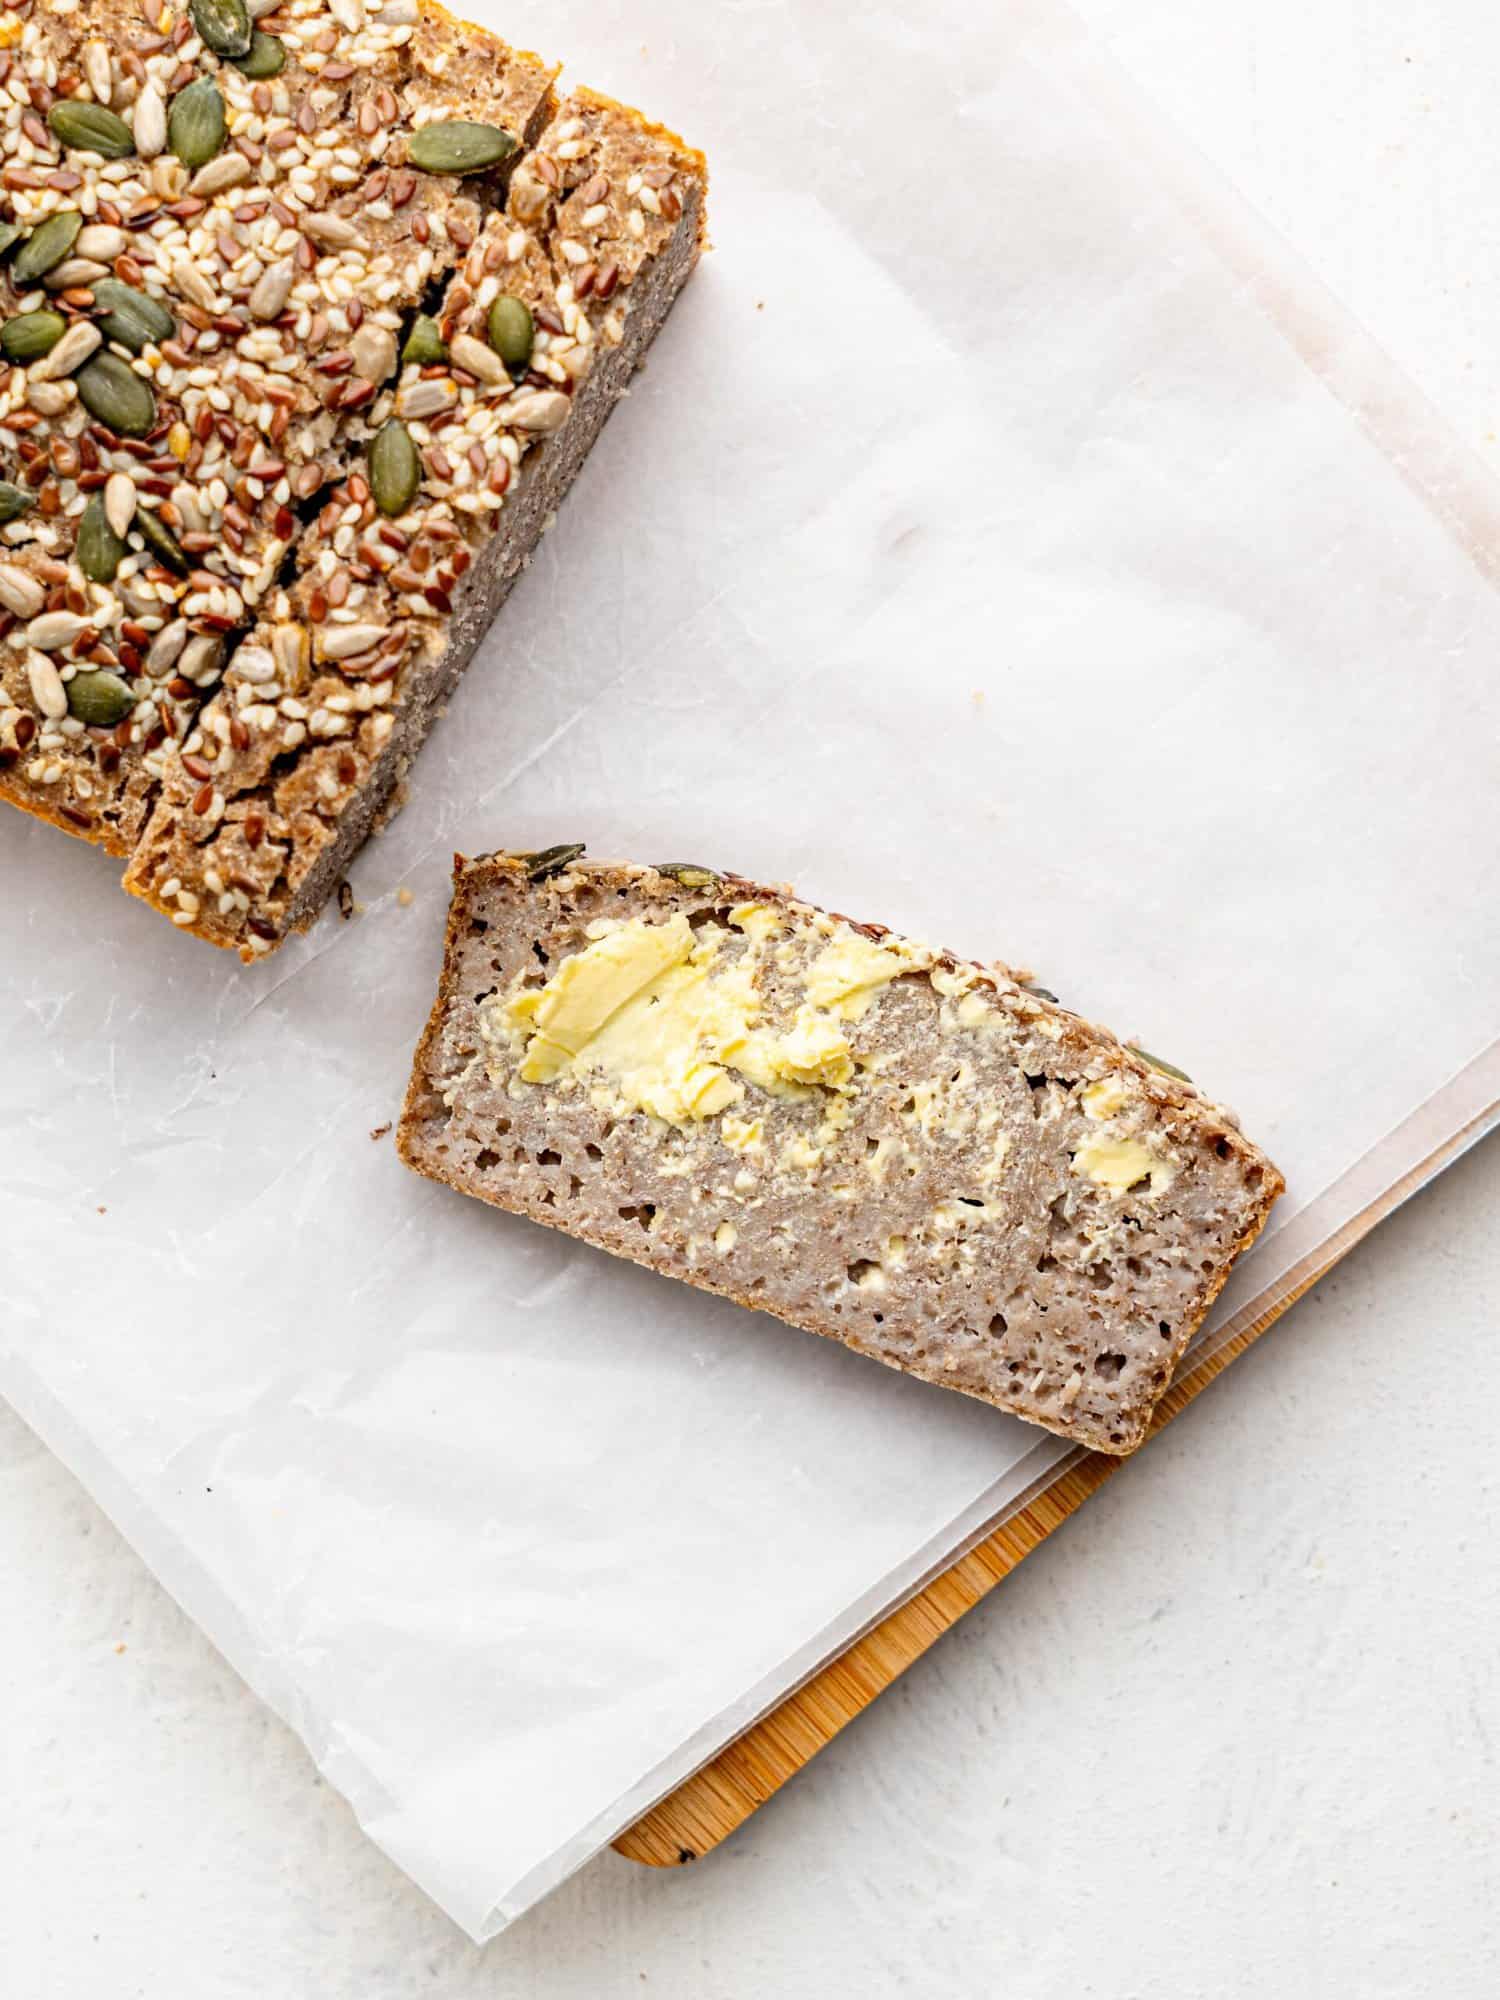
When someone asks me: “What’s your favorite food?” – my first instinct is to say bread. I just can’t think of anything more enticing than a thick slice of freshly baked bread with an equally as thick layer of salted butter on it. You know the way the butter melts and sinks into the crevices of the bread? THAT.
As you can probably tell, I’m rather passionate about bread. The only problem is that I’m honestly not very good at baking with yeast. For some reason, I really struggle with the science of it and always seem to get it wrong. However, THIS gluten-free buckwheat bread kind of changed my life the first time I made it.
Similar to making sourdough, this gluten-free bread does require some time to ferment, but the good thing is that it doesn’t take a week or two, but merely a day and a half! And I promise it’s worth the wait. The hardest part about making this buckwheat bread is the wait – the process is actually very straightforward and simple!
I’m still rather taken aback by the fact that this bread is made from only buckwheat groats and water. I can’t wait for you to try it, because I believe it’s going to change your life (a bit dramatic, but validly so).
** While I have made some adjustments to this buckwheat bread recipe, all credit for this magical bread goes to Melissa at Breadtopia.com. Check out her Gluten Free Fermented Buckwheat Bread.
Why you’ll love this buckwheat bread recipe
- Simple: Made with just buckwheat groats and water, this recipe is a minimalist’s dream, yielding a gluten-free, vegan bread that’s both easy and delicious!
- No-Knead, Easy Process: Perfect for both novice and seasoned bakers, this recipe requires no kneading and takes advantage of the natural fermentation process, simplifying traditional bread-making.
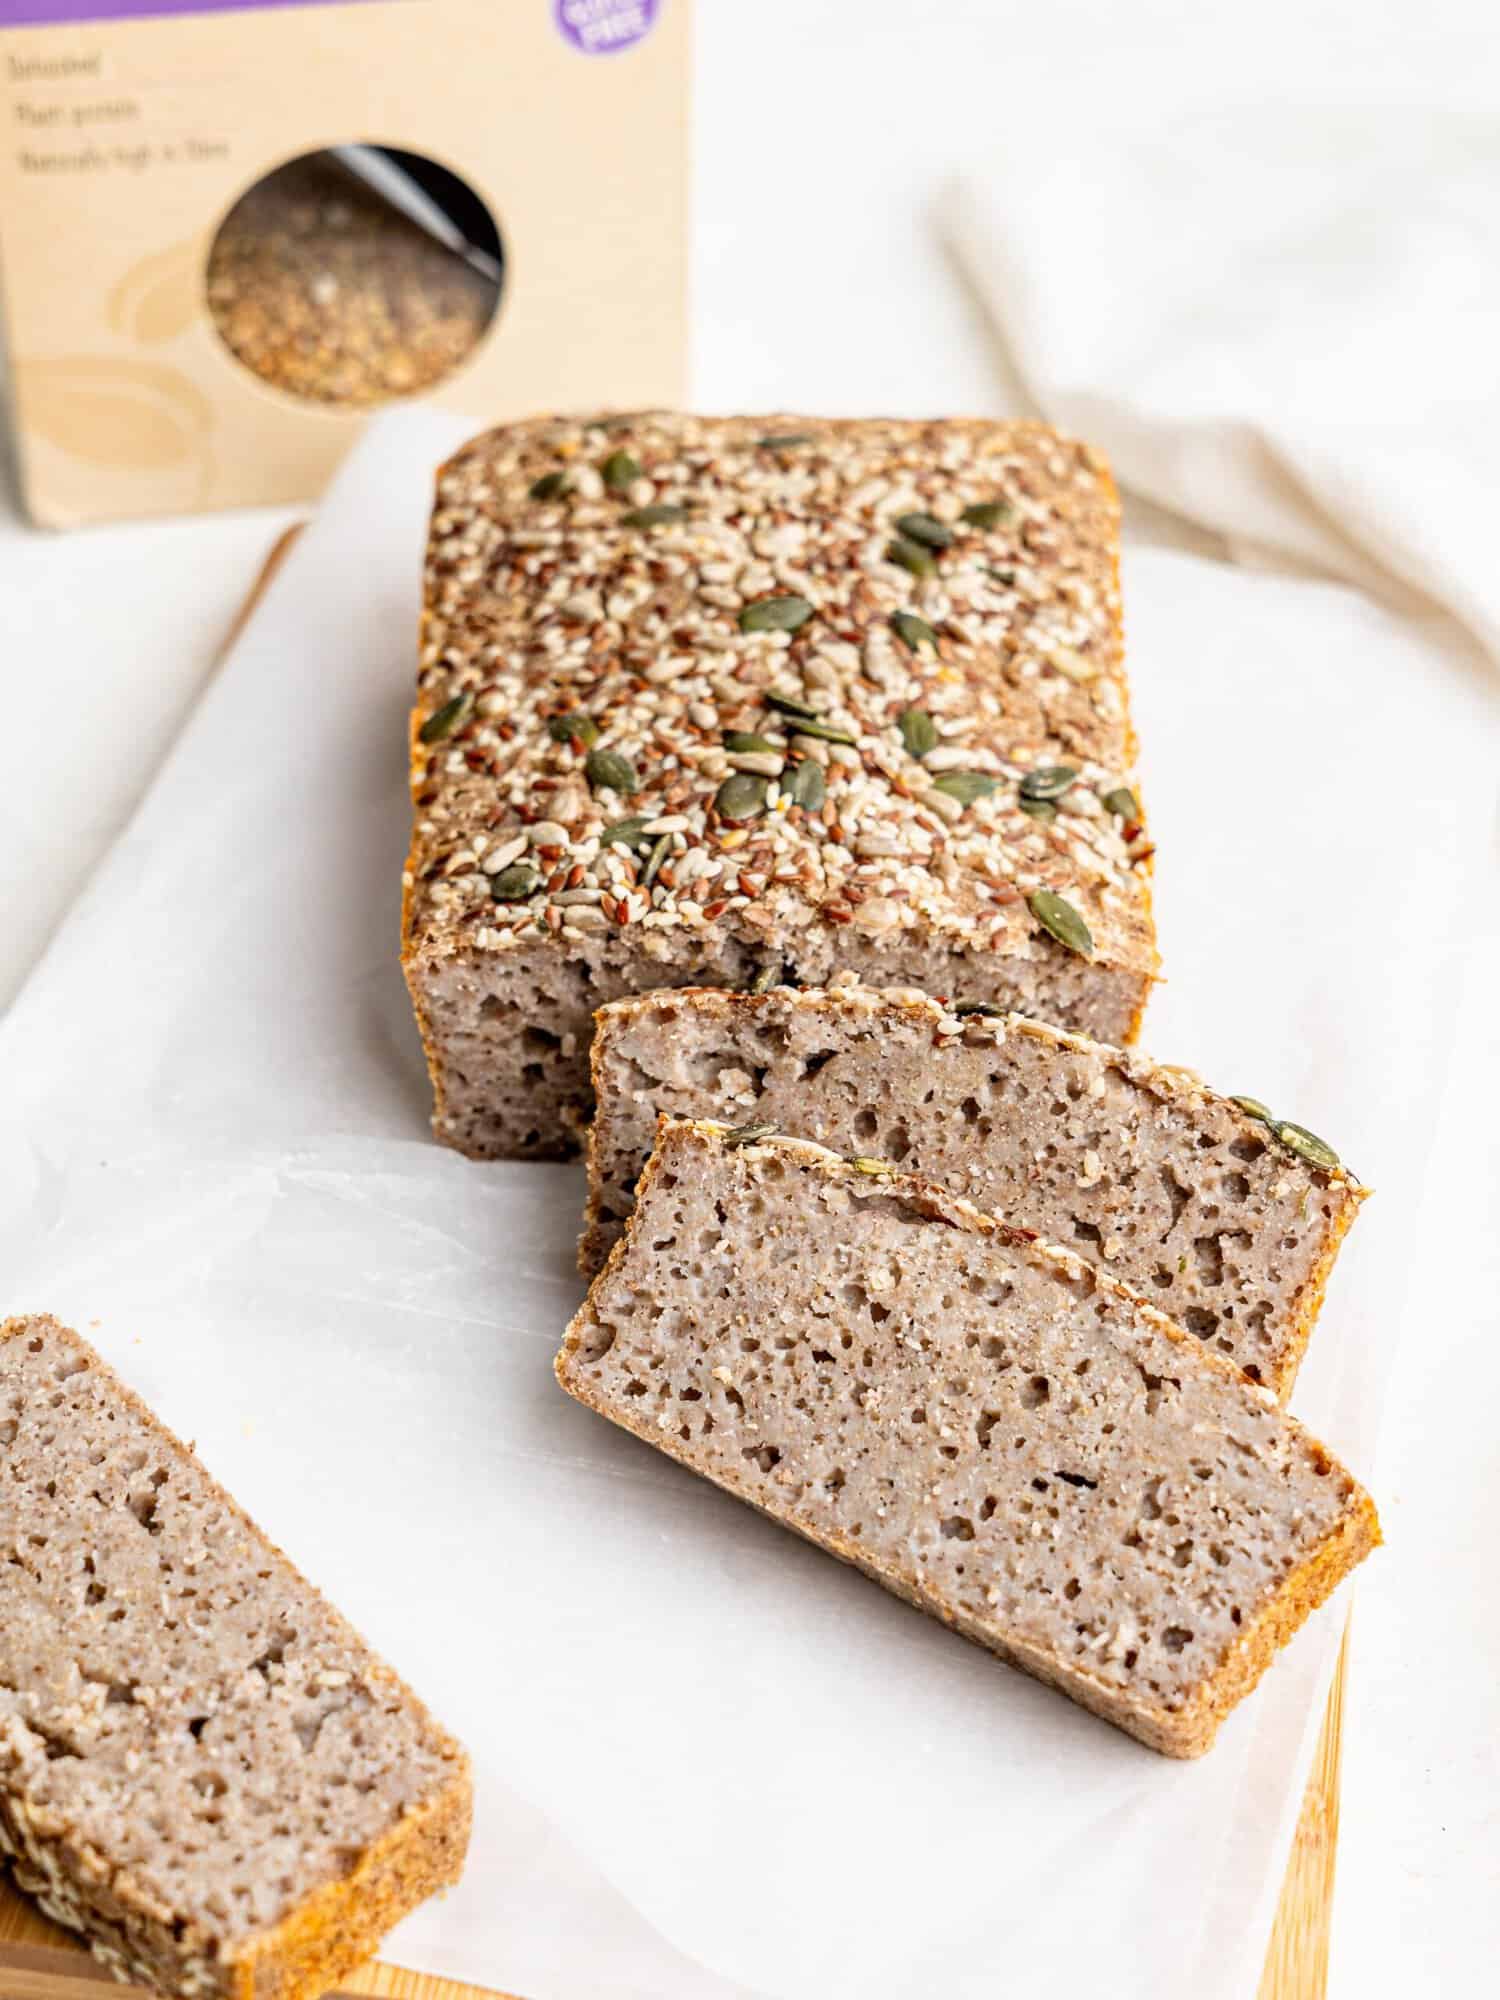
- Customizable Flavor: You can personalize your bread by mixing in some seeds, seasonings, herbs, or whatever else you fancy – get creative!
- It’s Healthy: This buckwheat bread is made with just buckwheat and water, so no processed flours, gums, or additives, making it healthy, nourishing, and delicious all at the same time!
- It’s great for meal prep: I love making a loaf every week to enjoy for breakfast, lunch, or snacks!
How is this Buckwheat Bread Healthy?
This fermented buckwheat bread is not just delicious—it’s packed with health benefits. Here’s why:
- Naturally Gluten-Free: Buckwheat is naturally gluten-free, making this bread a safe and nutritious option for those with celiac disease or gluten sensitivities, without the need for processed gluten-free flours or additives.
- High in Fiber: Buckwheat groats are rich in dietary fiber, which aids digestion, promotes gut health, and helps maintain balanced blood sugar levels, making it a great choice for sustained energy.
- Rich in Protein: Despite being a seed, buckwheat contains all nine essential amino acids, making it a complete plant-based protein source. This makes the bread an excellent addition to vegan or vegetarian diets.
- Nutrient Dense: Buckwheat is loaded with essential vitamins and minerals, including magnesium, manganese, copper, and B vitamins, all of which support overall health, including heart health and energy metabolism.
- Fermentation Benefits: The fermentation process enhances the bioavailability of nutrients and makes the bread easier to digest. It also promotes the growth of beneficial bacteria, supporting gut health.
- Low in Processed Ingredients: Made with just two ingredients—buckwheat and water—this bread is free from refined sugars, oils, and preservatives, offering a whole food alternative to store-bought options.
Ingredients Needed
These are the ingredients you’ll need to make this Buckwheat Bread. You can find the exact measurements in the recipe card at the bottom of this page.
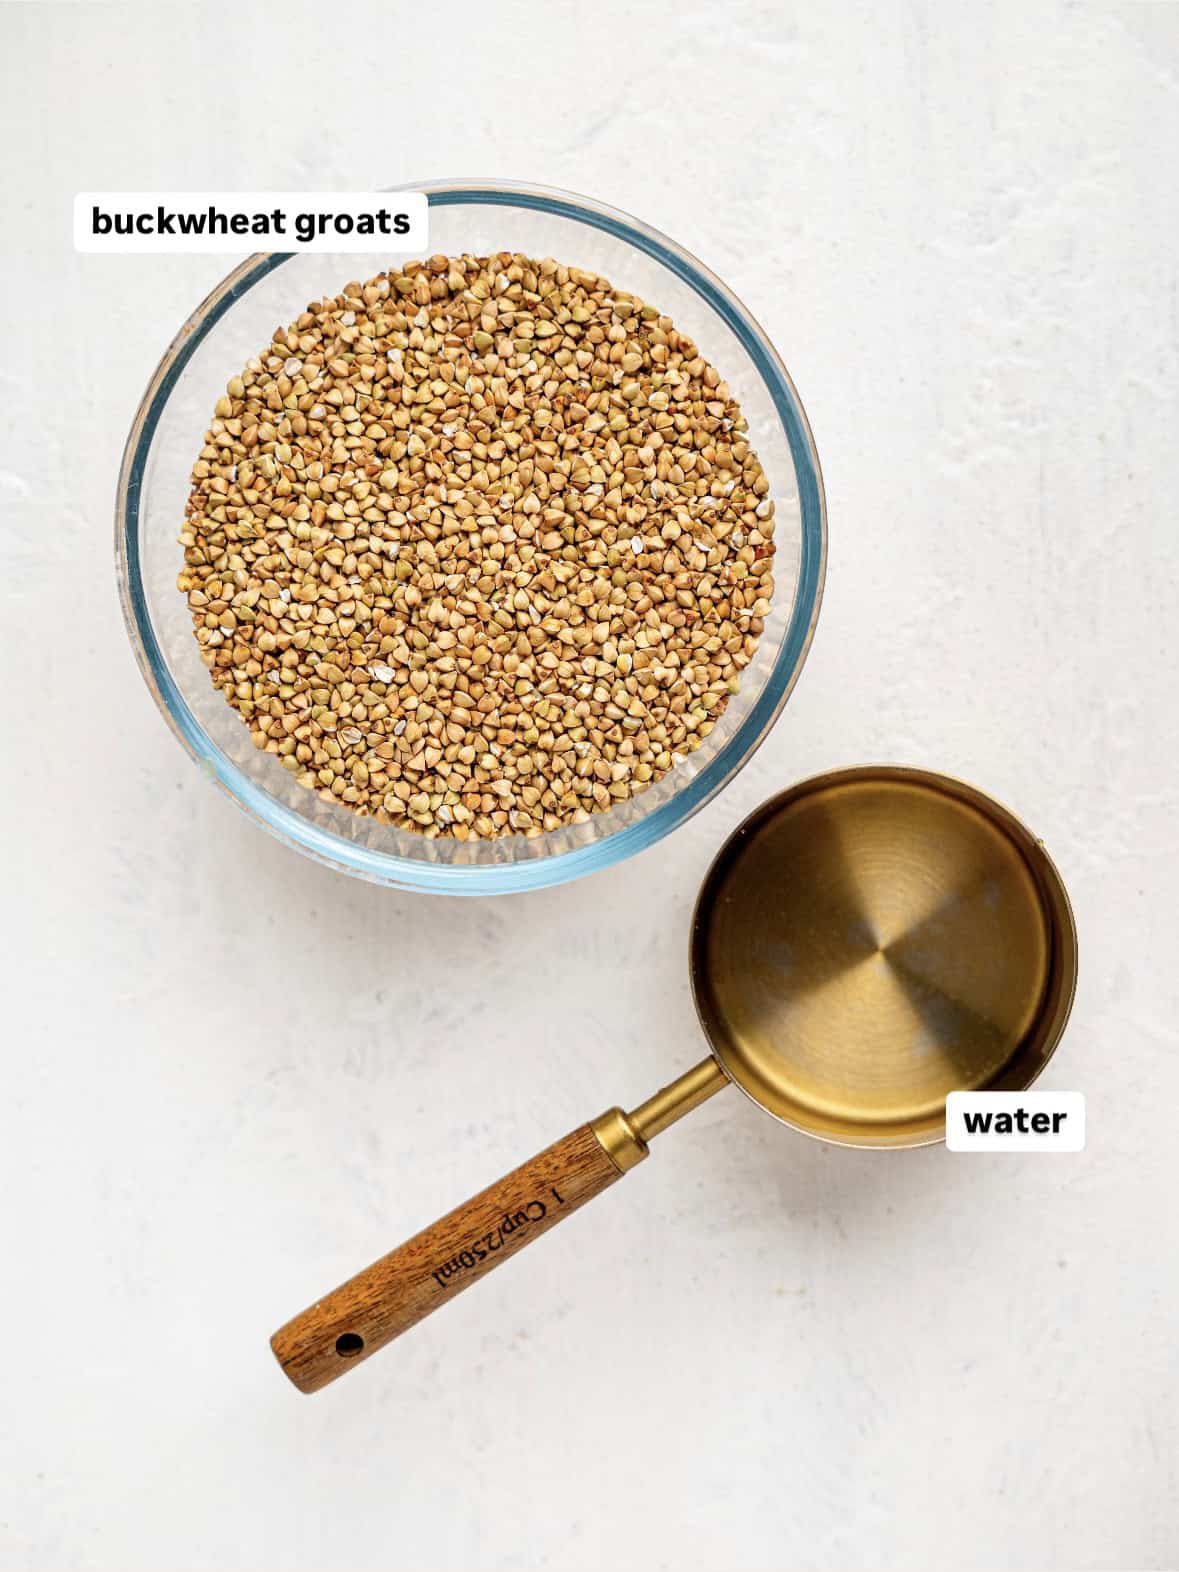
- Buckwheat Groats: You need unroasted, dehusked (dehulled) buckwheat groats. Buckwheat groats are the perfect base for fermented buckwheat bread, offering a naturally gluten-free option with a rich, earthy flavor. When soaked and fermented, the groats transform into a tangy, nutritious dough that’s packed with fiber, protein, and essential minerals. This process not only enhances their digestibility but also gives the bread a pleasantly chewy texture and subtle sourdough-like taste.
- Water: You’ll need water to soak the buckwheat groats as well as for blending. Room temperature tap water works fine.
- Optional Extras: You can add in some salt, seeds, herbs, or anything else you fancy to add extra flavor. I’ll provide a section below with ideas.
Equipment Needed:
- Digital Food Scale: For accurate measurements and perfect results.
- Mixing Bowl: To soak the buckwheat and ferment the dough in. Make sure the bowl is big enough as the bread “dough” does inflate a bit.
- Blender or Food Processor: To blend the buckwheat and water into a smooth consistency.
- Loaf pan: I use a 2lb loaf pan. This results in a wider, lower loaf. You can use a smaller loaf pan (1lb) to make a taller loaf, but you may need to adjust the cooking time – read the “notes” section.
How To Make This Fermented Buckwheat Bread Recipe
This recipe may seem a bit daunting at first, but once you make it you will see just how straightforward it really is. Stick with me, I promise it will be worth it!
Here is a detailed summary of how to make this bread. I’ve also included some photos, and you can watch the recipe video in the recipe card.
Step One:
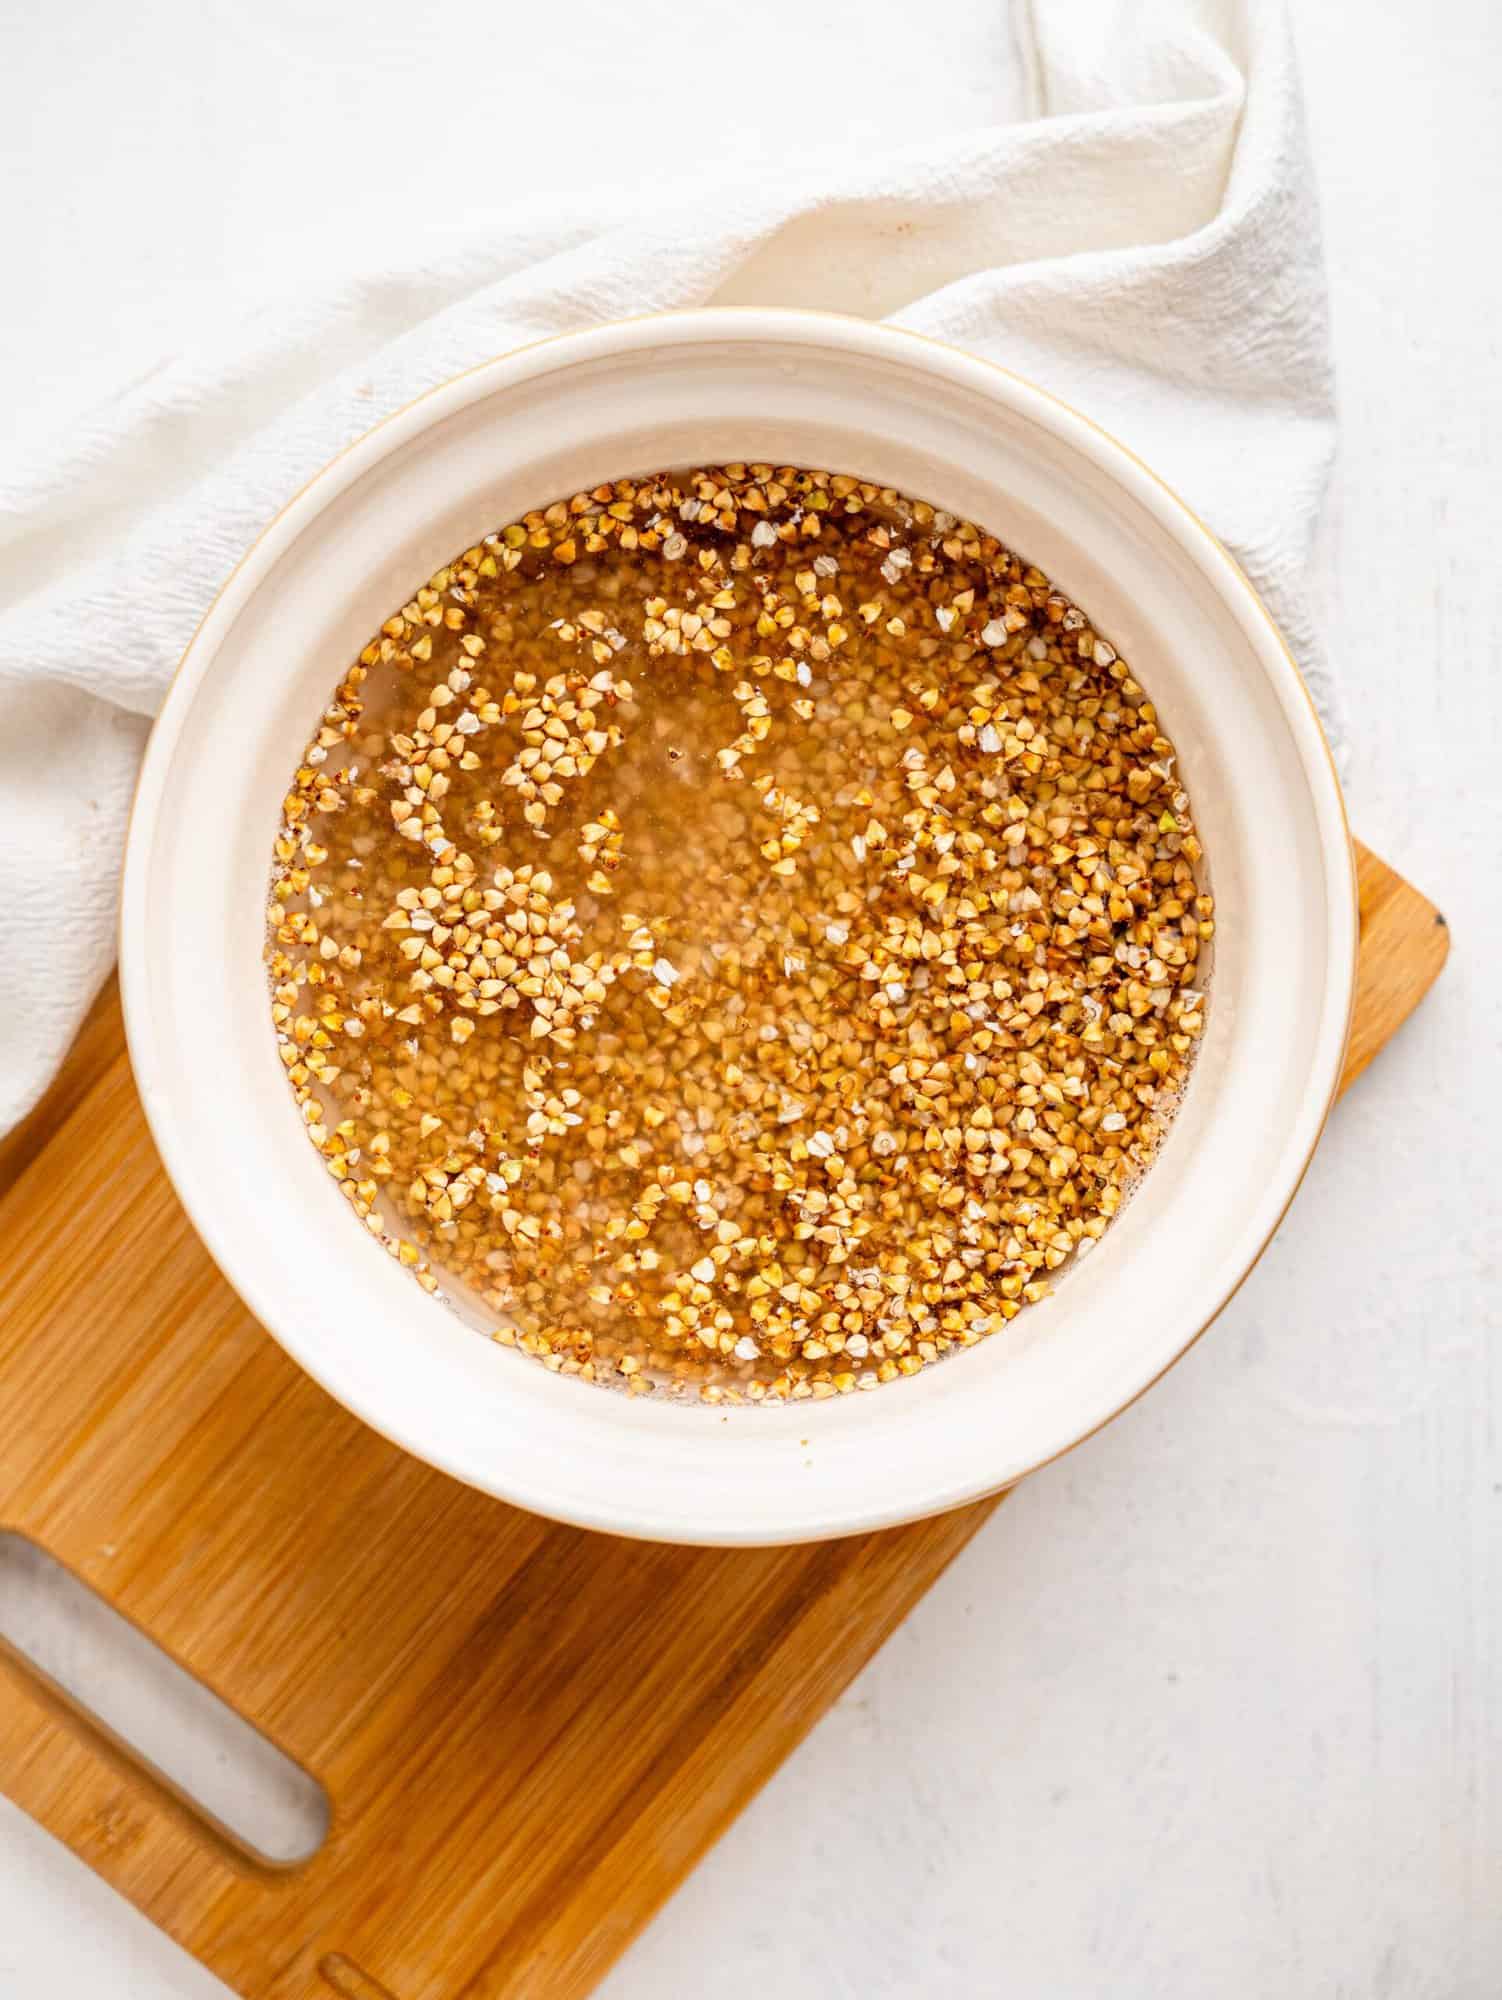
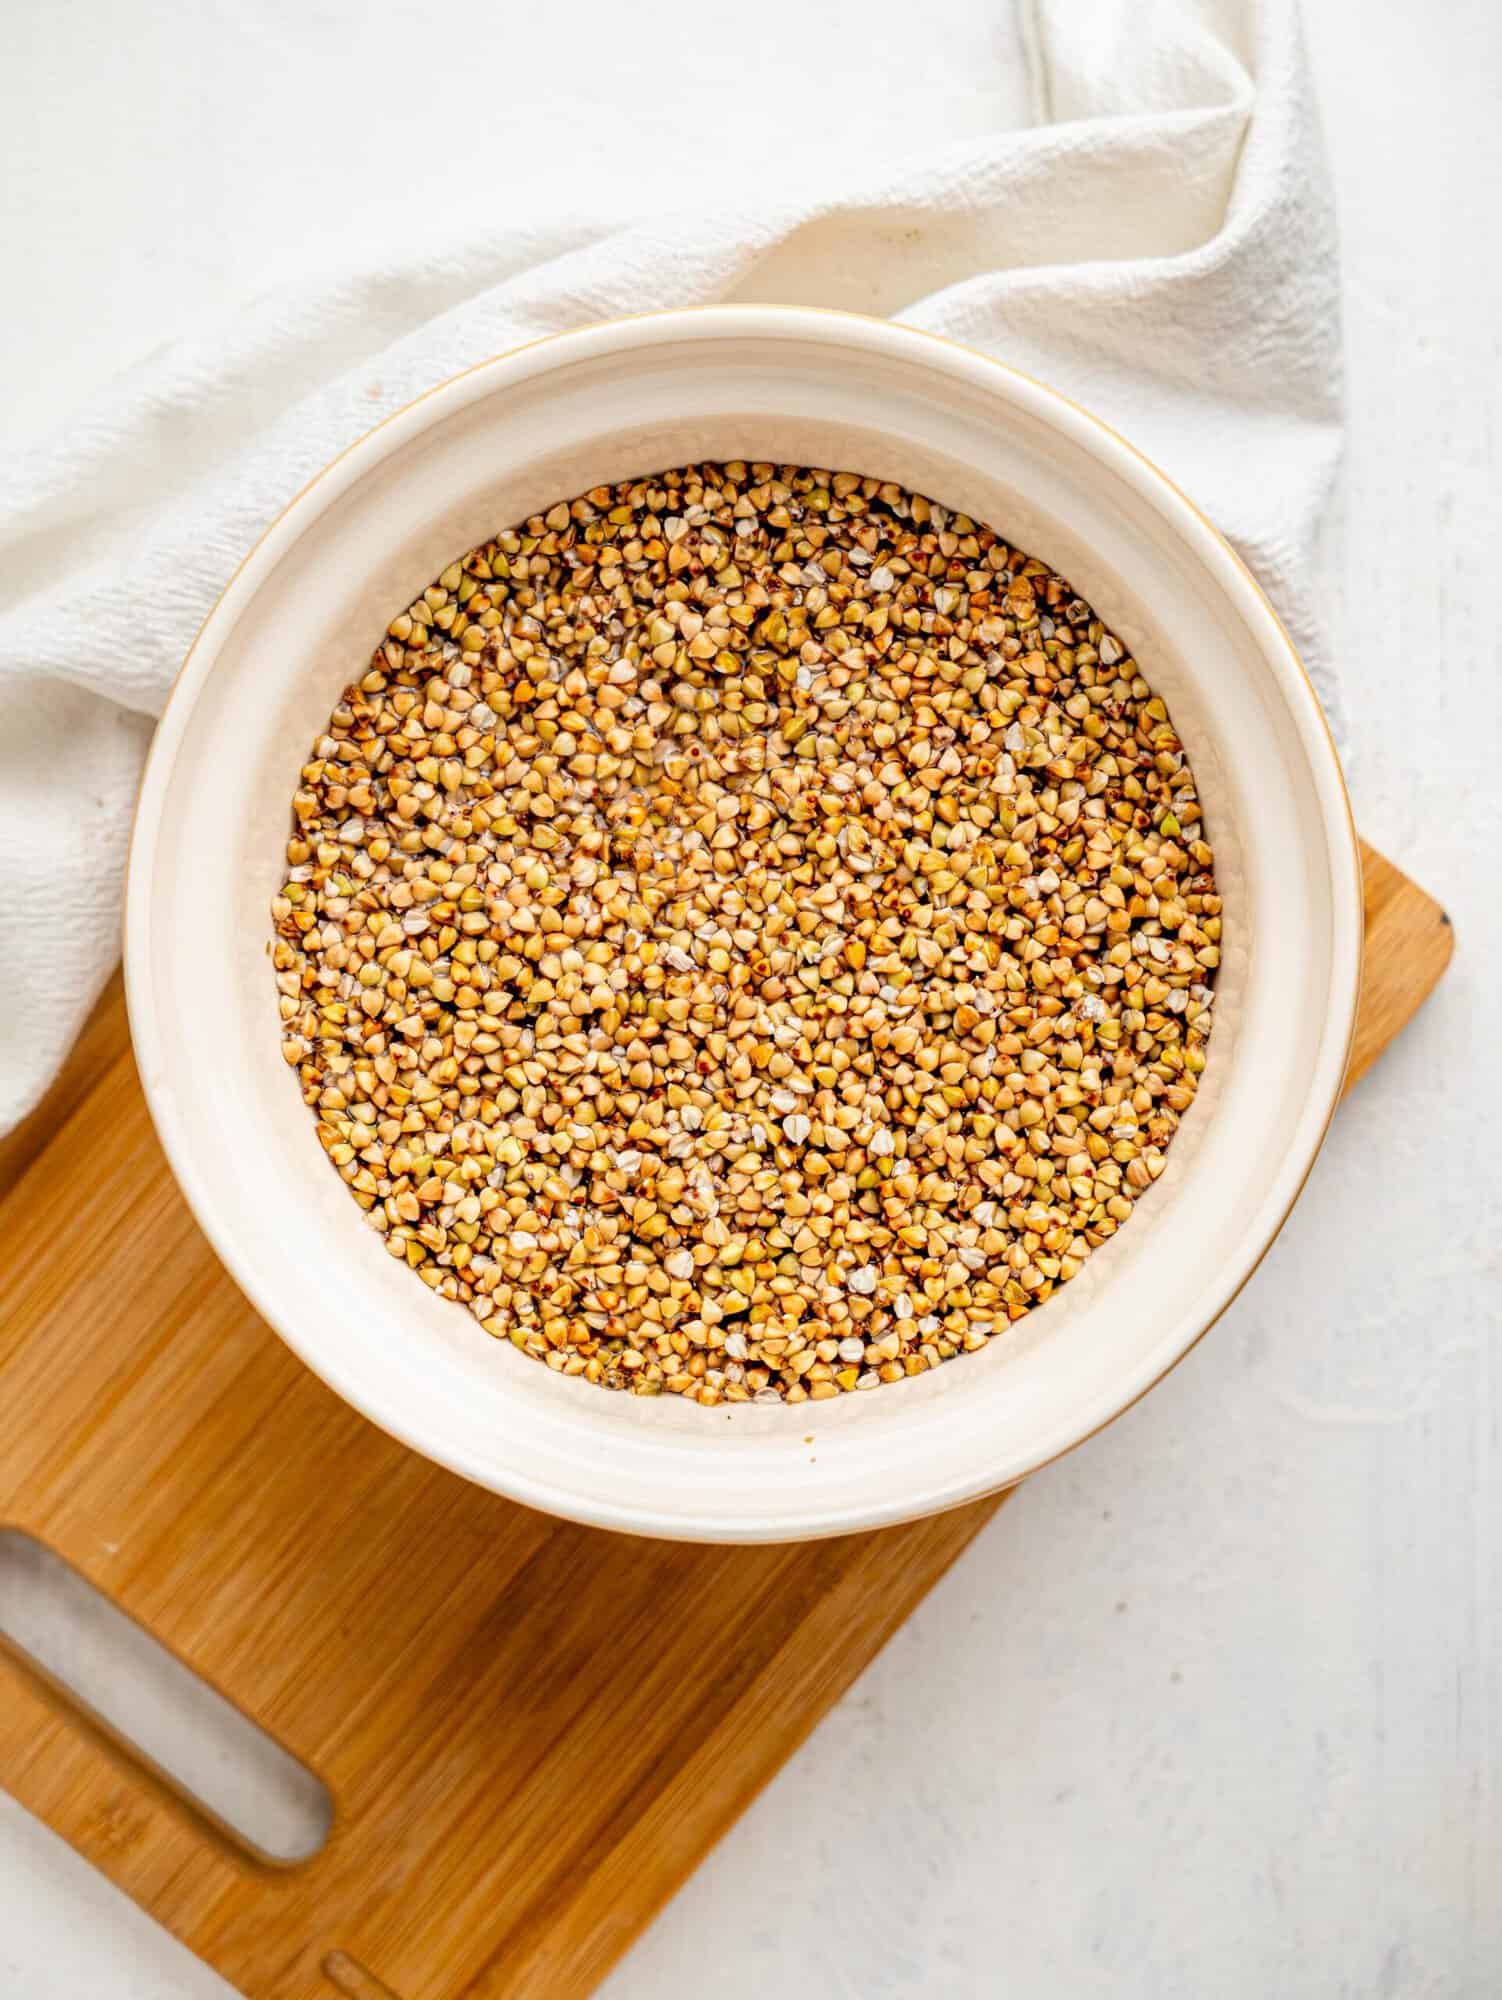
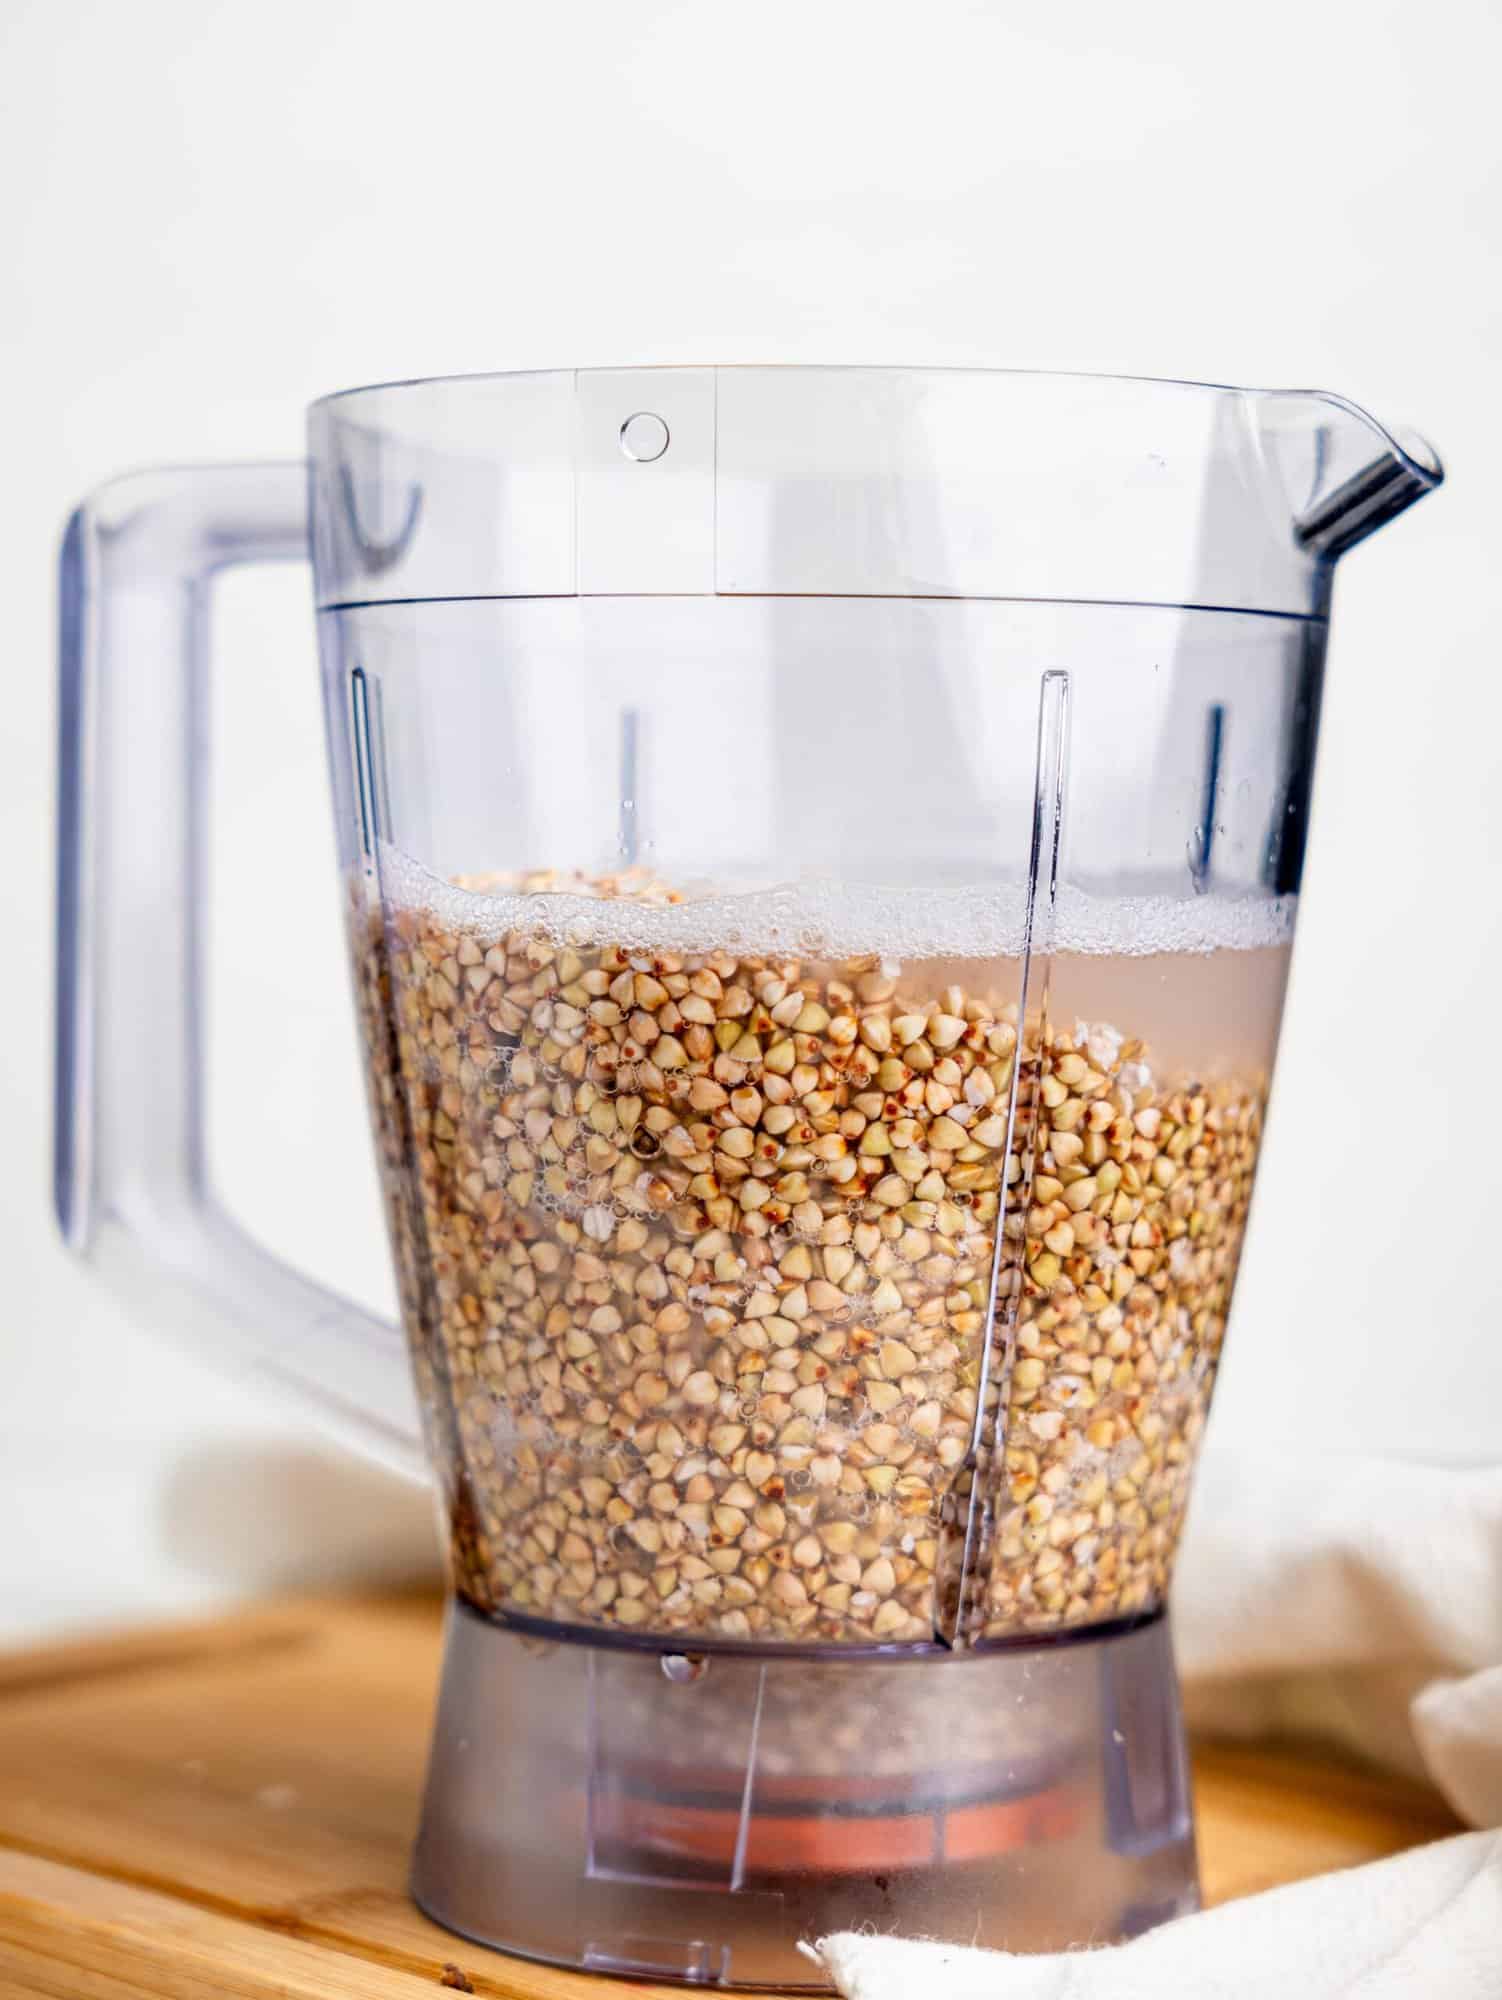
To start the fermentation process, you need to soak the buckwheat groats in water for 12 hours. Add the groats to a glass or ceramic bowl, and cover with water. There should be at least 3 cm of water above the top of them as they absorb some of the water and will ‘grow’ a bit. Cover the bowl with a tea towel and leave it on the counter for at least 12 hours.
Step Two:
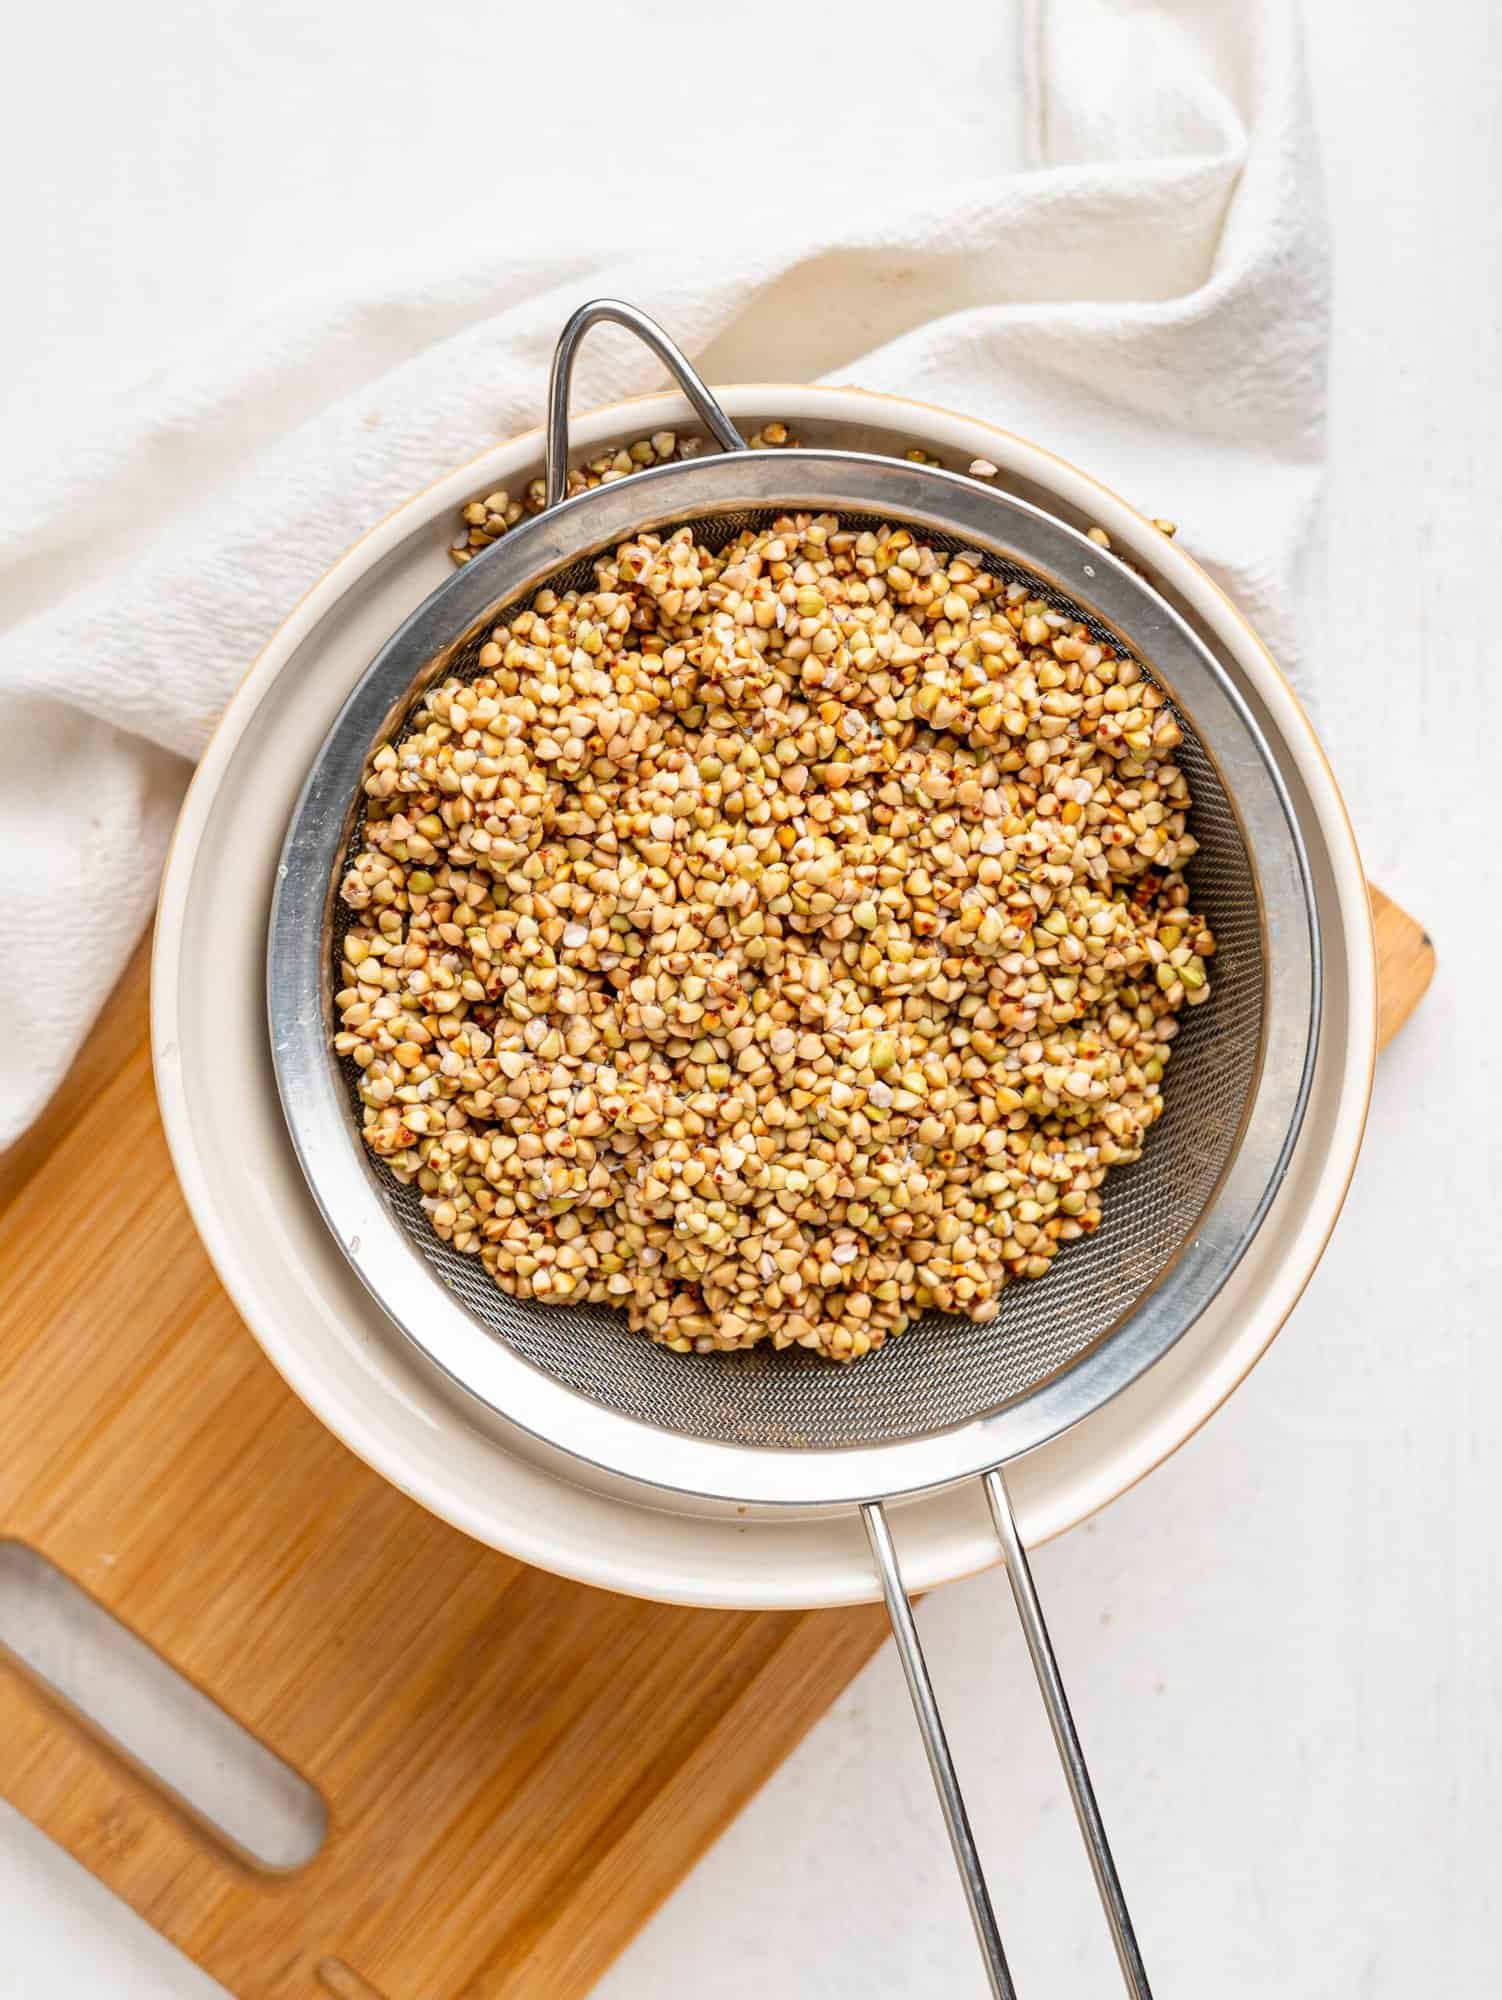
After the twelve hours have passed, tip the contents into a sieve or colander and leave to drain for 5 minutes. DO NOT RINSE!
Step Three:
Place the drained buckwheat in your blender or food processor along with the fresh tap water. Blend until smooth!

Step Four:
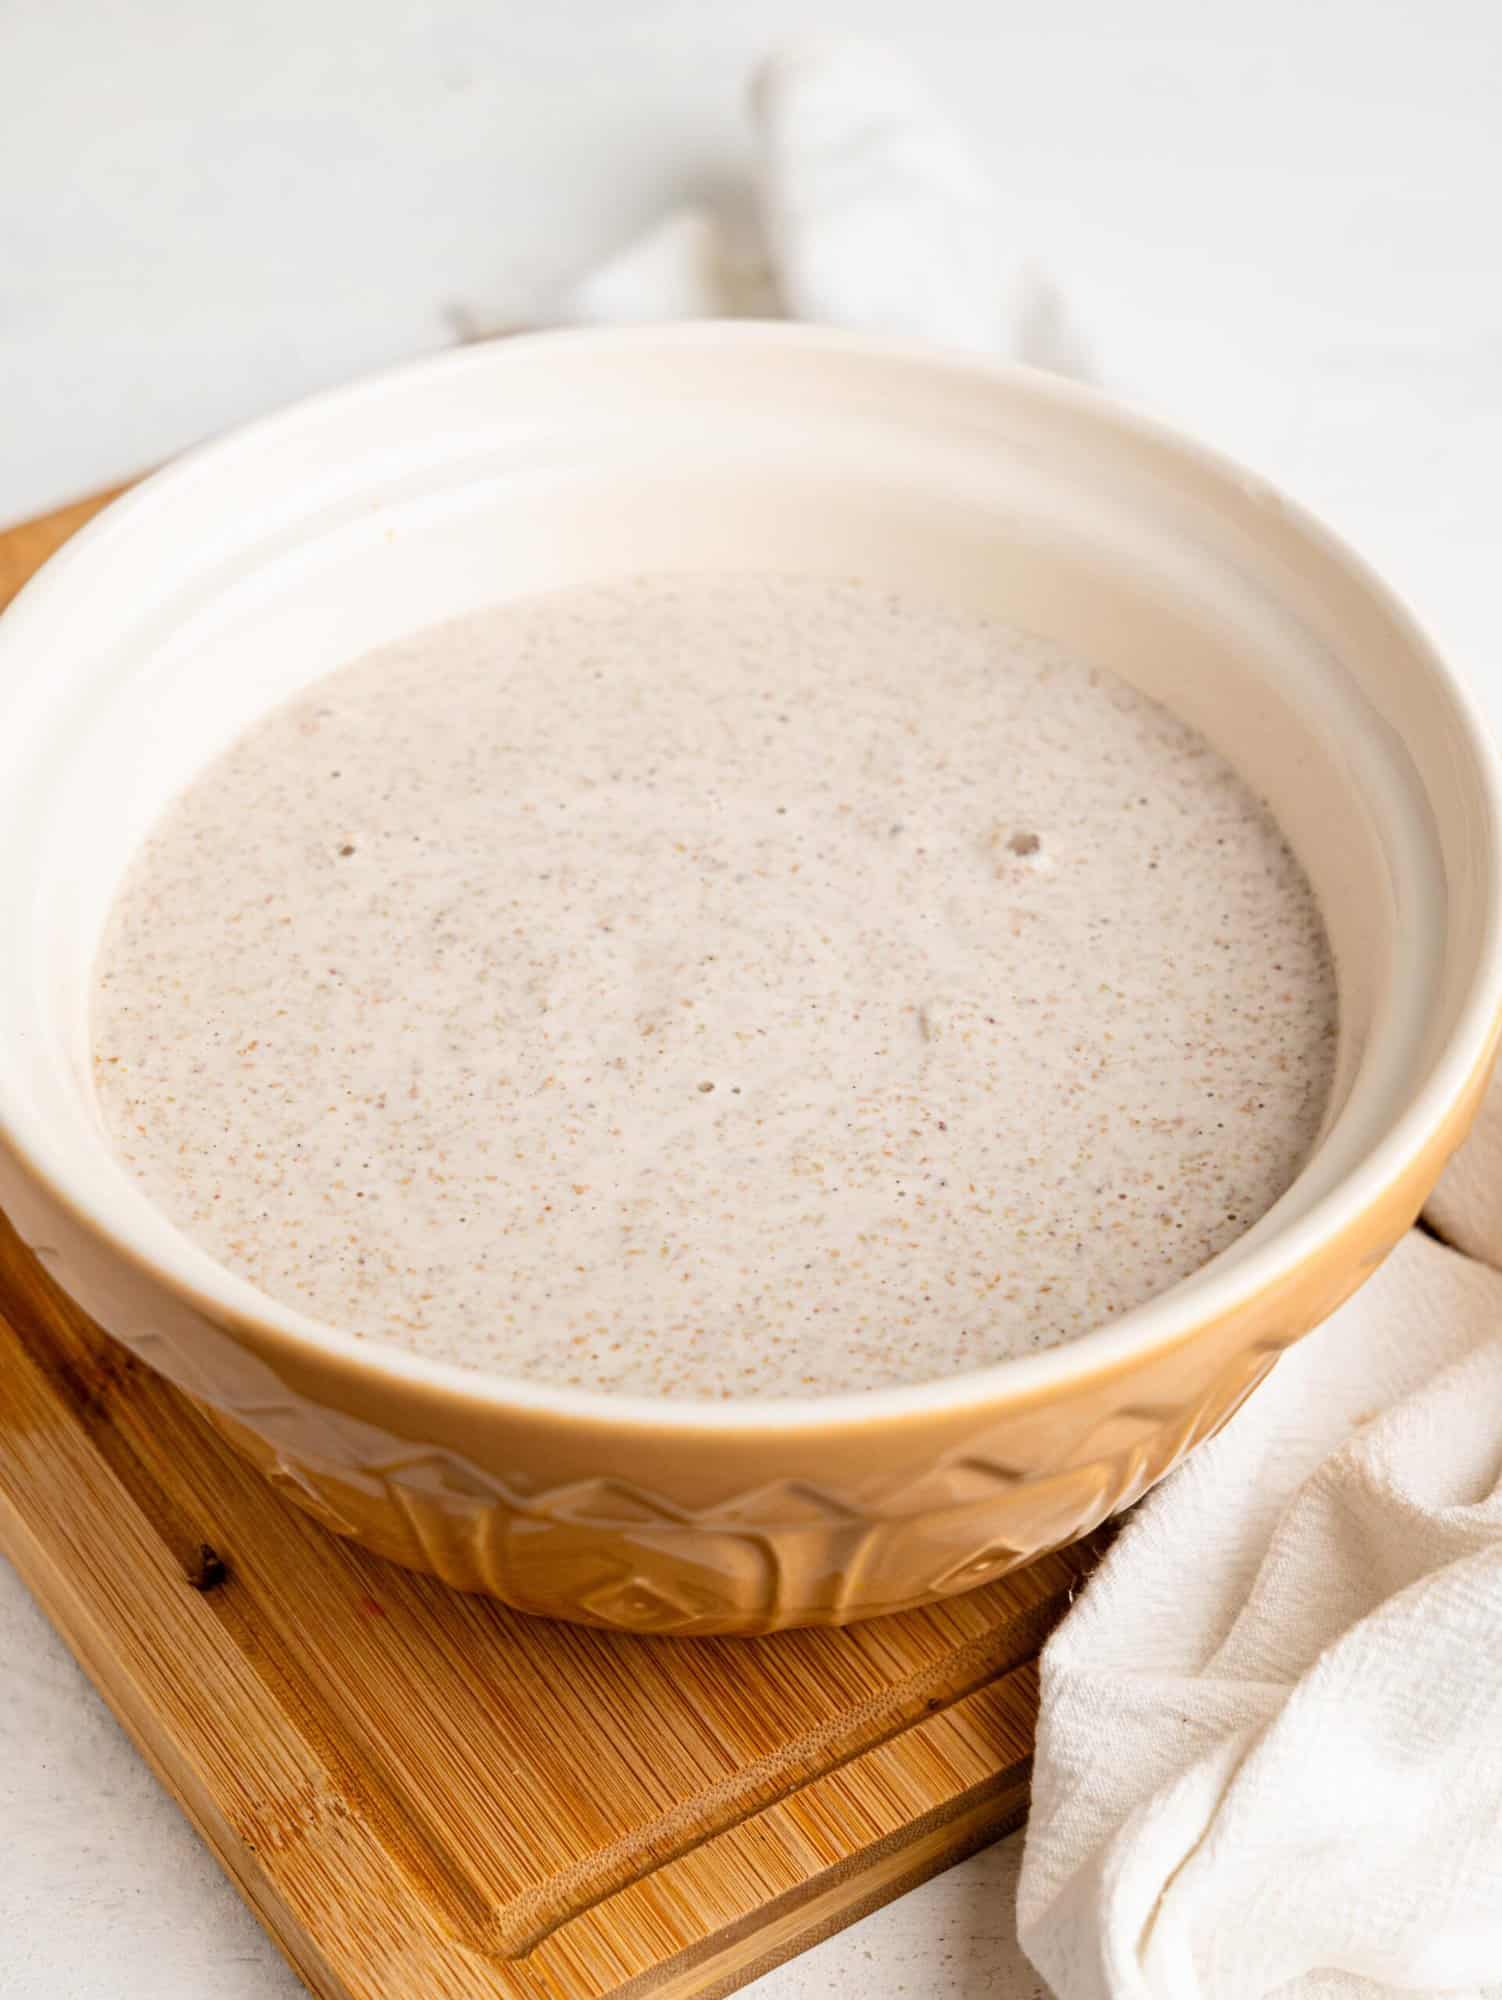
Once the mixture is smooth, pour it into a clean bowl, cover it again, and set it aside on your counter for 24 hours. Yes, I know this seems like a lengthy process but I promise it’s worth it! Make sure there is enough room in your bowl for the mixture to rise a bit as it ferments.

Step Five:
Once the fermentation process is over, preheat your oven and grease a non-stick loaf pan, or line your loaf pan with parchment paper.
Step Six:
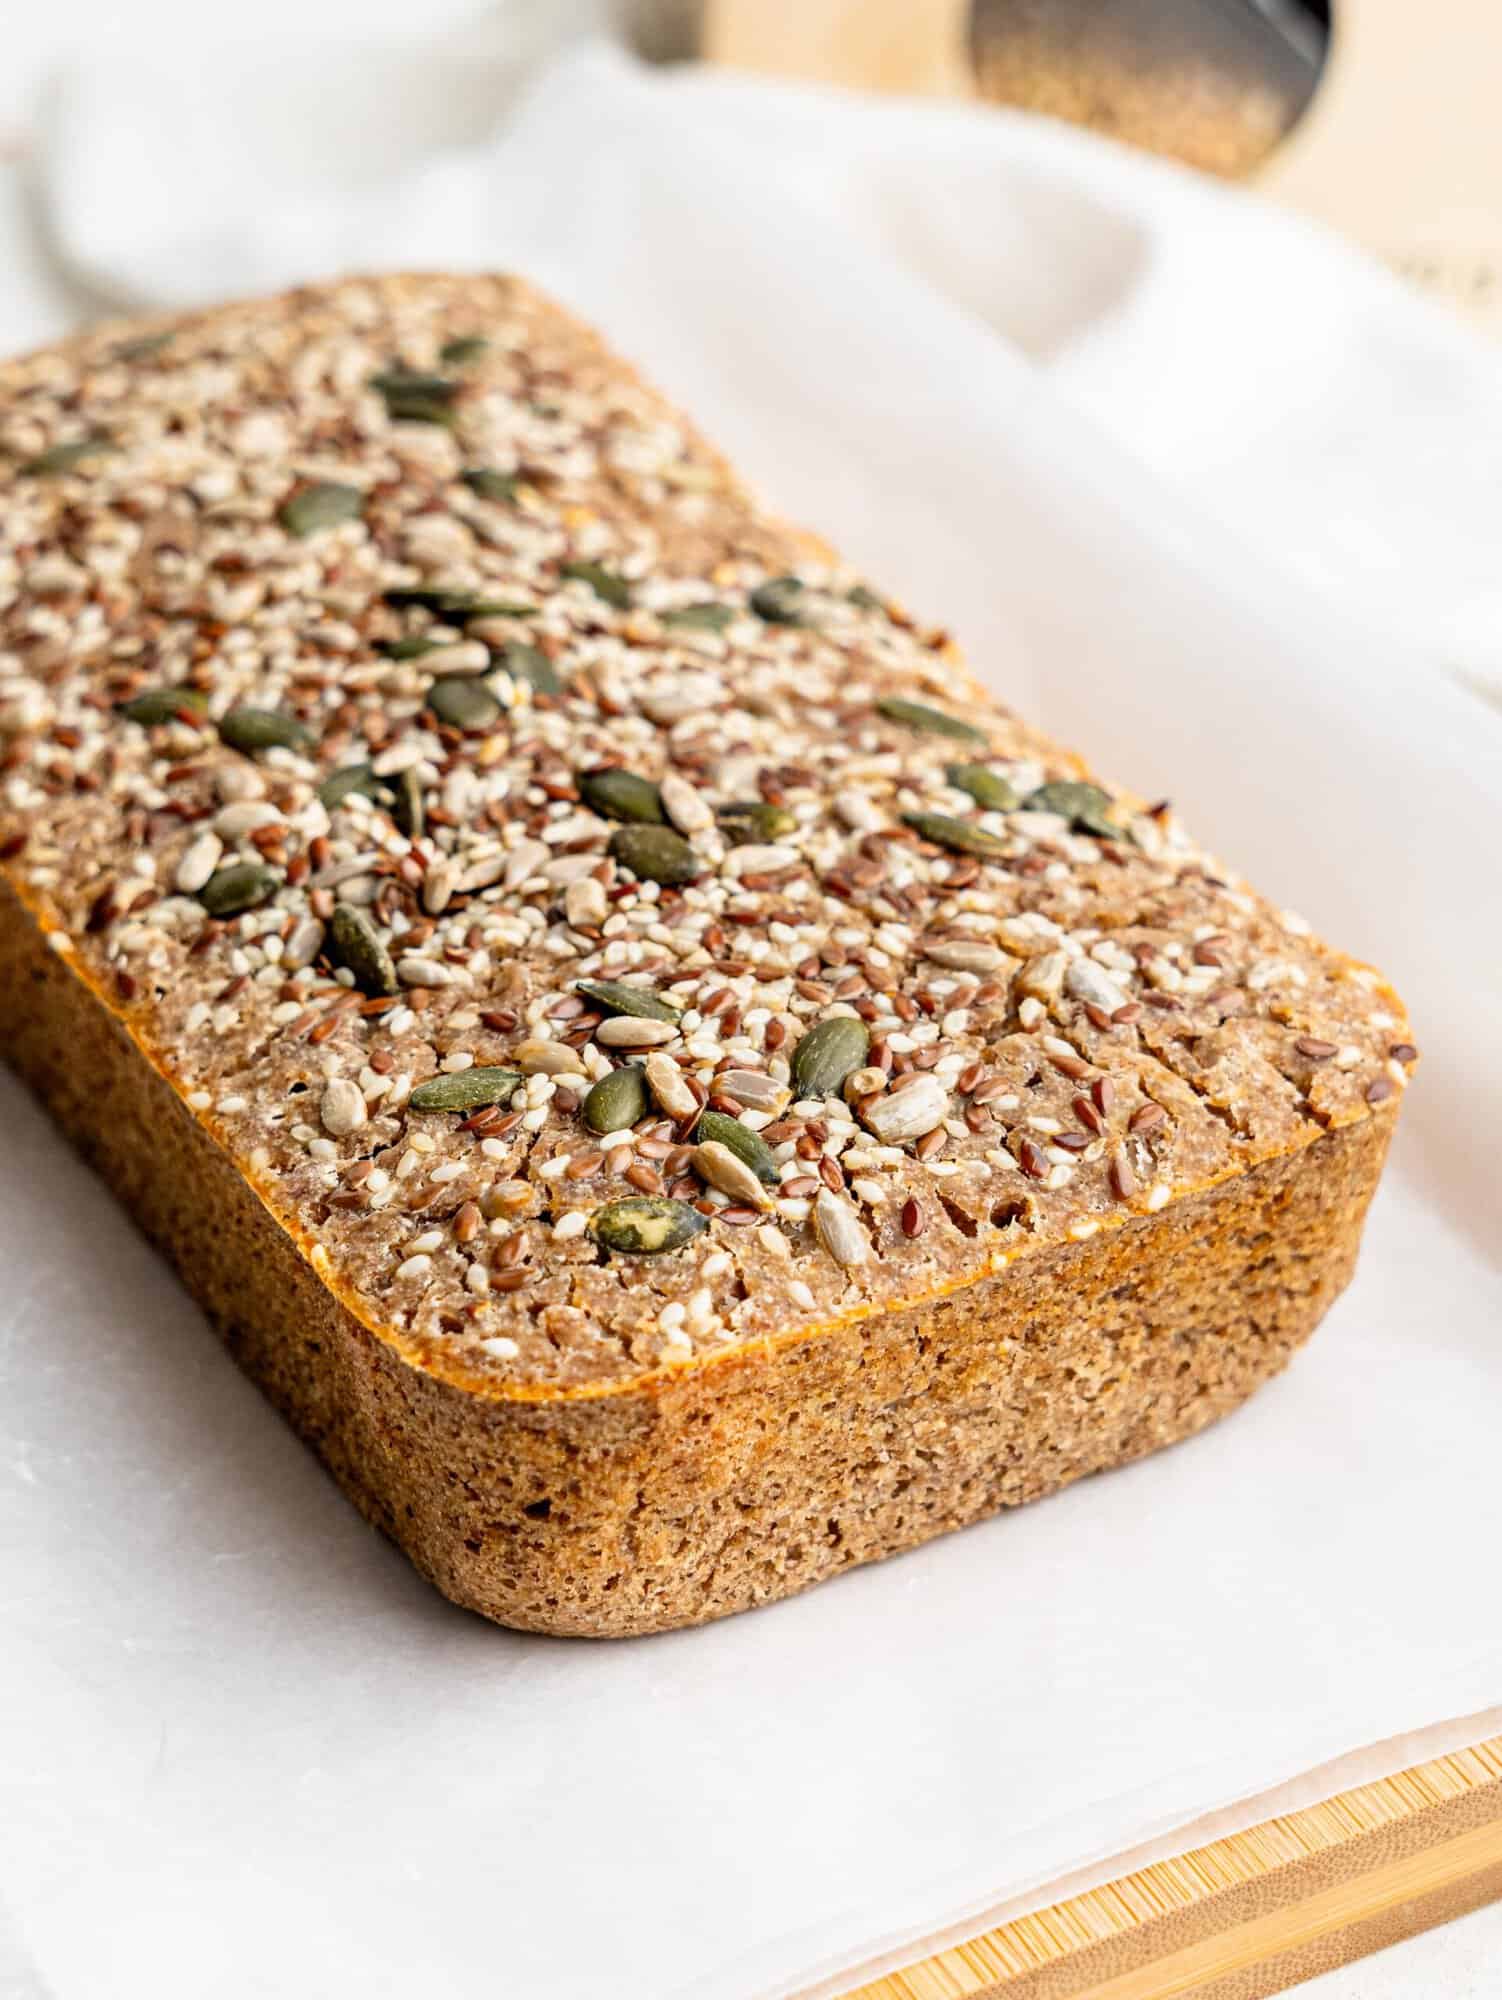
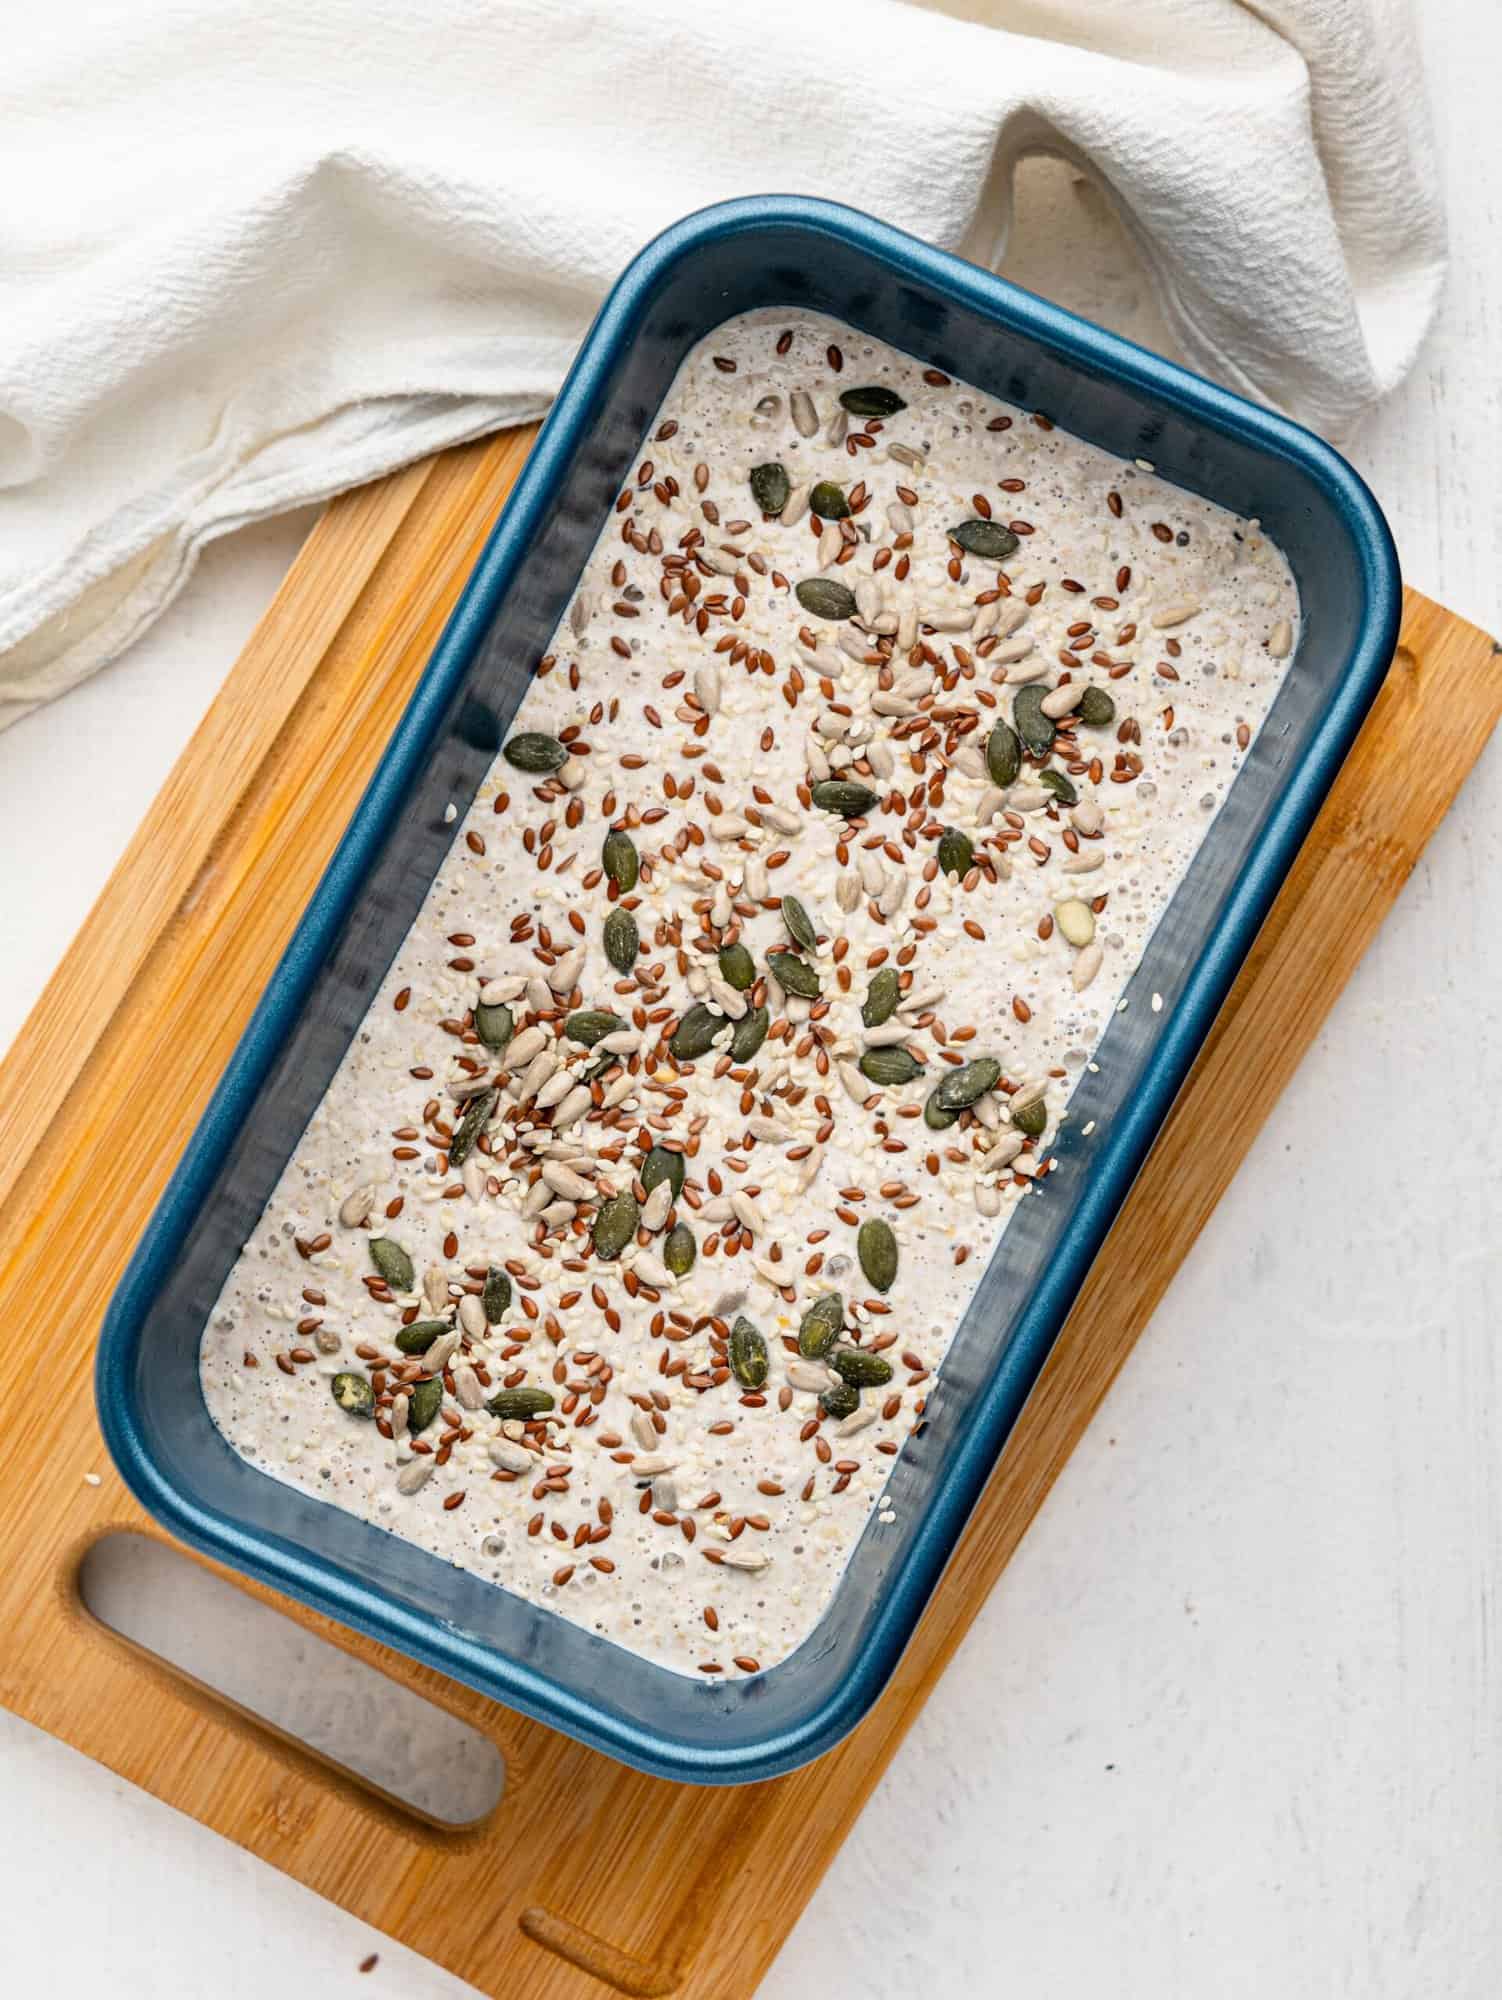
You can now mix in some salt, seeds, or anything else you’d like to add to your loaf. Pour the batter into your loaf pan and bake!

Step Seven:
Leave the loaf to cool for at least 30 minutes before removing from the pan. Slice with a sharp knife.
How Climate Affects This Buckwheat Bread Recipe
Warm Climates
- Effect: Faster fermentation, potentially leading to over-fermentation.
- Adjustment: Check dough at 12-18 hours. In temperatures above 80°F (27°C), consider refrigerating the dough to slow fermentation.
Cool or Cold Climates
- Effect: Slower fermentation; dough may not rise as much.
- Adjustment: Ferment in a warmer spot, such as near a stove or with an oven light on (around 70-75°F or 21-24°C). Extend fermentation time if necessary.
High Humidity
- Effect: Wetter dough and longer baking time.
- Adjustment: Reduce water slightly if the batter is too runny. Bake at the same temperature but monitor closely. Store bread in the fridge or freezer to prevent excess moisture.
Dry Climates
- Effect: Faster evaporation, potentially dry dough.
- Adjustment: Cover dough well to retain moisture. Add a bit more water if needed. Bake at a slightly lower temperature (around 350°F or 175°C) and for a longer time to avoid dryness.
These adjustments based on your climate will help you achieve the best results with this buckwheat bread!
Tips and Notes
- If using a smaller baking pan: If you use a 1lb loaf pan instead of 2lb, your baking time will be shorter. Check the loaf after 45 minutes. Insert a toothpick or skewer into the center of the loaf. If it comes out clean or with just a few moist crumbs, the bread is done. If it comes out with wet batter, bake for a few more minutes and check again.
- Use Unroasted Buckwheat Groats: Make sure to use raw, unroasted, dehulled buckwheat groats for this recipe. Roasted buckwheat (also known as kasha) will not work the same way and will alter the flavor and texture.
- Don’t Rinse the Groats After Soaking: Once the groats have soaked, just drain them and let them sit for a few minutes. Rinsing can wash away the natural slime, which helps bind the bread together.
- Find the Right Fermenting Spot: The bread ferments best in a warm, draft-free spot. Avoid direct sunlight or cold areas, as this could slow down the fermentation process. If your kitchen is cool, you can place the bowl near a warm oven or wrap it in a towel.
- Don’t Disturb the Fermentation: Once the batter is set to ferment, leave it undisturbed. The natural fermentation will do all the work, so just cover the bowl and let it sit for 24 hours.
- Customize the Flavor: Add seeds, herbs, or spices to the batter before baking for extra flavor. Popular choices include sunflower seeds, chia seeds, flaxseeds, rosemary, or thyme.
- Let It Cool Before Slicing: Once baked, allow the bread to cool for at least 30 minutes before removing it from the pan. Slicing the bread too early can cause it to crumble, so patience is key!
Storage Instructions for Buckwheat Bread
Room Temperature: Store the bread in an airtight container at room temperature for up to 3 days. To keep it fresh, place it in a breadbox or a paper bag inside the container to prevent moisture buildup.
Refrigeration: For longer storage, keep the bread in an airtight container or wrap it tightly in plastic wrap and place it in the refrigerator. It will stay fresh for up to a week. Refrigeration can help prevent mold and preserve the bread’s texture.
Freezing: To freeze, slice the bread and wrap each slice individually in parchment paper or plastic wrap. Place the wrapped slices in a freezer-safe bag or container. The bread can be frozen for up to 3 months. To thaw, let slices defrost in the refrigerator or toast directly from frozen.
Avoiding Staleness: To prevent the bread from becoming stale, avoid leaving it uncovered or in a humid environment. If the crust becomes too hard, you can refresh the bread by lightly toasting it or warming it in the oven at 350°F (175°C) for a few minutes.
FAQs
Can I substitute buckwheat flour for buckwheat groats?
It’s best to use buckwheat groats for this recipe. Substituting flour may change the bread’s consistency and taste.
Is baking powder necessary for this recipe?
No, baking powder is not needed. The fermentation process provides the necessary rise for the bread.
Can I use a bread machine instead of a loaf pan?
This recipe is designed for baking in a traditional oven. Using a bread machine may yield different results as it includes mixing and proofing steps not required for this bread. If using a bread machine, try the bake-only setting and monitor closely.
Should I grease the baking tin?
Greasing with oil, cooking spray or butter is a good idea since the recipe contains no added fats.
How do I know when the bread is fully baked?
Insert a toothpick or skewer into the center of the loaf. If it comes out clean or with just a few moist crumbs, the bread is done. If it comes out with wet batter, bake for a few more minutes and check again.
Can I make this recipe without fermentation?
The fermentation process is key to achieving the right texture and flavor. Skipping it will alter the bread’s consistency and taste, so it’s best to follow the recipe as directed.
Why does my bread dough smell funny?
If the dough has been left to ferment too long, it can develop a strong, unpleasant odor. This happens when the dough over-rises and the natural fermentation turns sour. Adjust the fermentation time to ensure it doesn’t exceed the recommended period. Check the dough periodically for a tangy smell, and bake as soon as it has fermented adequately.
You may like these recipes too
- 2-Ingredient Oat Tortillas (easy and healthy wrap recipe)
- Easy Blueberry Bagel Recipe – Ready in 40 minutes! (no yeast)
Hey! If you make this recipe, I would love it if you could leave me some feedback and a rating ⭐⭐⭐⭐⭐ in the comment section at the bottom of the page! Also, let me know on Facebook, Instagram, or Pinterest! I can’t wait to hear your thoughts and see your photos!

Fermented Buckwheat Bread
Ingredients
- 350 g Raw Buckwheat Groats (2 cups)
- 250 g Water (1 cup)
- Salt and Seeds optional
Instructions
- Add the buckwheat to a large glass bowl and cover with water. Cover the bowl with a tea towel and set it aside on the counter for 12 hours.
- Drain the water (but do not rinse) then add to a blender along with 250 grams of fresh water. Blend until a smooth batter forms. Pour into the cleaned bowl, cover with your cloth and leave for 24 hours.
- Fold in some salt and seeds and then pour the batter into a 1lb loaft pan lined with grease-proof paper.
- Preheat the oven to 180°C (160°C fan / 350°F) with the loaf in the oven and bake for 60 minutes. Insert a toothpick to check the doneness - it should come out clean. If there is still sticky dough on the toothpick, bake for a further 5 minutes.
- Remove the bread from the tin and peel off the paper (careful, it's hot!) Leave the bread to cool on a wire cooling rack for at least 30 minutes before slicing!
Video
Notes
- Adjust for Climate: In warmer climates, reduce fermentation time; in cooler climates, extend it. Make sure to maintain a consistent temperature for best results. PLEASE read more info about this in the blog post contents.
- Check Consistency: Ensure the batter is smooth and pourable, but not too runny. Adjust water as needed if the batter seems too thick or thin.
- Avoid Over-Fermentation: Monitor the dough closely during fermentation. If it has risen and developed a tangy aroma within 12-18 hours in warm climates, it’s ready to bake.
- Grease Baking Paper: If using parchment paper, grease it lightly to prevent sticking, especially since the recipe has no added fats.
- Use Fresh Ingredients: For the best results, use fresh buckwheat groats and clean water. Old or contaminated ingredients can affect the dough’s smell and texture.
- Cool Before Slicing: Let the bread cool in the pan for at least 30 minutes before slicing to ensure it holds its shape and texture.
Nutrition
Fermented Buckwheat Bread
Buckwheat groats and water are all you need to make this incredibly easy fermented buckwheat bread. This yeast-free, vegan and gluten-free bread is incredibly easy to make, it’s soft and moist and healthy too! This is surely going to become your new favourite recipe!
- Glass Bowl
- Blender
- Loaf pan
- 350 g Raw Buckwheat Groats
- 250 g Water
- Salt and Seeds (optional)
-
Add the buckwheat to a large glass bowl and cover with water. Cover the bowl with a tea towel and set it aside on the counter for 12 hours.
-
Drain the water (but do not rinse) then add to a blender along with 250 grams of fresh water. Blend until a smooth batter forms. Pour into the cleaned bowl, cover with your cloth and leave for 24 hours.
-
Fold in some salt and seeds and then pour the batter into a 1lb loaft pan lined with grease-proof paper.
-
Preheat the oven to 180°C (160°C fan / 350°F) with the loaf in the oven and bake for 60 minutes. Insert a toothpick to check the doneness – it should come out clean. If there is still sticky dough on the toothpick, bake for a further 5 minutes.
-
Remove the bread from the tin and peel off the paper (careful, it’s hot!) Leave the bread to cool on a wire cooling rack for at least 30 minutes before slicing!
These nutritional values are provided as a guide only and may be different depending on your ingredients and measurements.
- Please see the blog post contents for even more details and some process shots!
I hope you love this gluten free buckwheat bread recipe!


Thank you for this recipe! I add pumpkin and flax seeds to the mix and the bread is absolutely delicious 🥰
This looks great! How much salt would you add to this recipe? Thanks!
Yes, I too would like to know the salt ratio. 🙂
I add around 1/2 a tsp 🙂
Great question! I add around 1/2 a tsp 🙂
I am not sure what went wrong but I made this bread exactly according to instructions and it just came out as a doughy unusable mess!!! I had to trow it away!
Aww I’m so sorry to hear that! There are many factors that could cause this (mostly environmental differences), it does seem to be a bit hit or miss for some unfortunately. I will make this bread again and double check everything is correct. 🙂
A longer bake could help. I’ve seen other recipes suggest 90mins then turn off and open the oven and let it cool with the oven for 30min. Then cool completely. Toast if you want after. I also preheated my oven to above the temp for the bake and reduced it after I put it in to get it going and account for the heat loss when opening the oven to put in the bread.
*** there’s a great way to still use to make delicious bread if this happens
ok so my first batch didn’t ferment in our oven, even with the oven light on..
my first error was not rinsing the groats
maybe no big deal?,
then one recipe states to refrigerate , hmmn, so my soaking groats spent 6 hours soaking BUT only 1 in fridge
ultimately about a total of 21 hours later, no fermentation evidence BUT smelled fine,
so I now blend in EXACTS to follow:
baking powder
ground flaxseed meal
nutritional yeast
acacia senegal powder
SO good even my husband enjoyed!
thinking it did ferment some because it agreed with me
If your buckwheat batter failed to ferment, save the loaf by jump-starting it chemically before baking.
Use about 1 to 1.5 teaspoons of baking powder per 2 cups of buckwheat groats (or flour).
Add an Acid: Baking powder needs an acid to activate fully. Add 1 teaspoon of apple cider vinegar or lemon juice to your batter to help trigger a vigorous rise.
then I think 🤔 I added 1-2 tablespoons nutritional yeast, ground flaxseed meal, and acacia senegal powder.
it was lovely
Love this! My new go to bread!!!! I add turmeric and all sorts of seeds!! Mmm
Ahhh this sounds incredible! I definitely have to make this bread again, it’s been YEARS!
Най-ужасната рецепта! Водата е много, стана на каша всичко! Елдата СЕ ИЗМИВА многократно! В руски сайт има канал “Самовар”, виж там как се прави това!
The mixture started to smell really badly after only 12 hours leaving it (second process). Not sure it is still edible now…
The bread is meant to ferment so it should have a sour smell!
After fermentation the batter had a fishy smell. Is that the way it’s meant to smell or did it somehow spoil?
OH NO – mine has never smelt of fish! I don’t think that’s okay 🙁
Mine as well….
That fishy smell is probably the results of an over long fermentation. 24 hours is a long time depending on the temperature.
I tried it (winter in Europe). Let it first 12 hours in the water, drained, then 24 hours to rise.
Baked 90 minutes in the oven.
perfect 🙂
YAYYYY so happy you’re happy with this buckwheat bread!
Turned out perfect. To convert from grams, I used 1 1/2 cups buckwheat and 1 cup water. I added salt, pumpkin seeds and flax seeds.
YAYY! This makes me so happy to hear! I’m so glad you enjoyed it xx
I’ve made this bread 3 times now. It’s a little different each time bc the weather is really fluctuating now-teens to 50’s, but I liked each one. Now I’m going to use this recipe and make pumpkin seed, craisins crackers and dehydrate them. I’m anxious to see how it turns out. We need crackers for our winter soups. My Russian friend was elated when I took buckwheat bread to church fellowship meal today. She cannot find raw buckwheat in our small town. I ordered 55# online. Shipping cost 1/2 the amount of the product!!!
Thanks for this wonderful recipe. Leona
Aww this makes me so happy to hear! Well done for making it and good luck with the crackers – it sounds wonderful!
Followed the recipe to the letter. No bubbles at all, no increase in size. Not unpleasant when cooked, but couldn’t be called ‘bread’. I don’t think I did anything wrong as I successfully make sourdough twice a week for my husband – just wish I could eat that!
ok so my first batch didn’t ferment in our oven, even with the oven light on..
my first error was not rinsing the groats
maybe no big deal?,
then one recipe states to refrigerate , hmmn, so my soaking groats spent 6 hours soaking BUT only 1 in fridge
ultimately about a total of 21 hours later, no fermentation evidence BUT smelled fine,
so I now blend in EXACTS to follow:
baking powder
ground flaxseed meal
nutritional yeast
acacia senegal powder
SO good even my husband enjoyed!
thinking it did ferment some because it agreed with me
Wanting to add some tapioca flour to make the loaf bigger. . . any ideas if I should then add some baking powder or a little yeast to aid the rising ? Thanks
Hi, I bought toasted buckwheat groats, does that work? Can I use the same measurements?
Hello, I’d like to add this recipe and add some more ingredients to my FatSecret app. Cause I couldn’t find anything about buckwheat grouts fermentation.
How did you create this nutrients facts ?
The only ingredient is Buckwheat groats, so you just use the nutritional information for the buckwheat and divide that by the number of slices of bread.
This is an amazing recipe, came out really great! I am curious about something – why is it possible to ferment buckwheat just by leaving it outside, but when people make sourdough bread, you need a special starter? The fermentation worked so well for this bread without adding anything, why would you go through the trouble of adding some extra cultures for sourdough bread?
I really wish I could give you an answer to this, but I have no clue! It’s just a bit of funky food science, I guess! Glad you enjoyed the recipe 🙂
Buckwheat isn’t related to wheat, at all. It’s not a grain, it’s a berry. Fruit already naturally has some yeast on it, you don’t have to wild catch it as you do when making sour dough starter.
Had NO idea buckwheat is a berry, that’s incredible! Thank you for the info x
Buckwheat isn’t a berry, it’s a seed from the pseudocereal family like quinoa.
Fermentation is simply the chemical process by which molecules such as glucose are broken down anaerobically (without oxygen) by bacteria, yeasts, and molds. Everything ferments under the right conditions. Ever tipped out old cut flower water and noticed that awful smell? That’s due to fermentation of dead plant matter by microbes in the water. Not all fermentation results in something we can eat.
It’s during the breaking down of molecules that new molecules are created or released like alcohol which is produced by yeast breaking down glucose.
Sourdough starters are used because certain bacteria give bread a particular flavour and quality that’s preferred and allows the baker to control the end result.
Thank you!
I got home late and ended up soaking the groats 4 hours longer. Do you think that will be an issue? Thanks so much! Really looking forward to trying this!
Wondering the same thing ….
Perfect! I went according to recipe, except that for fermentation didn’t have much time so popped bowl in car where it’s warmer (always good for rising dough btw!), for about 8 hrs, when it just began to get that yeasty smell, and then 2 heaping tsp salt inside + nice mix of seeds on top with 1 tsp kosher salt, and exactly one hr in oven. Delicious!!
Oh that is genius putting it in your car! I’m glad you enjoyed the recipe Rachel xx
Could this be used to make a pizza crust?
I have not a clue, but I’ve made wraps with buckwheat groats – the recipe is on my instagram: https://www.instagram.com/reel/DADymMuoZkp/?utm_source=ig_web_copy_link&igsh=MzRlODBiNWFlZA==
Just made this and it turned out perfectly. Thank you so much for your clear recipe. It’s delicious. ❤️
Hi! I’m in FL…what happens if it ferments too long (was apparently warm) and it smells bad. Can I still cook it and will it be safe to eat?
Works absolutely perfect. I make the batch in a long and thin cocktail loaf pan, and the result is a wonderfully moist, highly risen loaf that is beautifully cracked on top. The key to success is to get the fermentation correct, which is entirely dependent on the ambient temperature where the fermentation is occurring. The goal is to reach a slightly nutty smell with some (not necessarily a lot of) visible bubbles, indicating activity in the dough. I live in a cooler climate, the controlled temp inside is 67deg., and I ferment this on my counter for about 32 hours. If I want to speed it up, I’ll heat my oven to around 100deg., NOT WARMER, and allow it to sit, covered, in the ambient warmth for the last part of the fermentation. It’s really all about watching it through the process and getting used to what you’re looking for. Once you have a few successes under your belt and get a feel for working with this process, the minimalist recipe can be achieved reliably.
Hi! Excited to try this recipe The blog says to preheat first, but the recipe says preheat with loaf in oven. Which one is right?