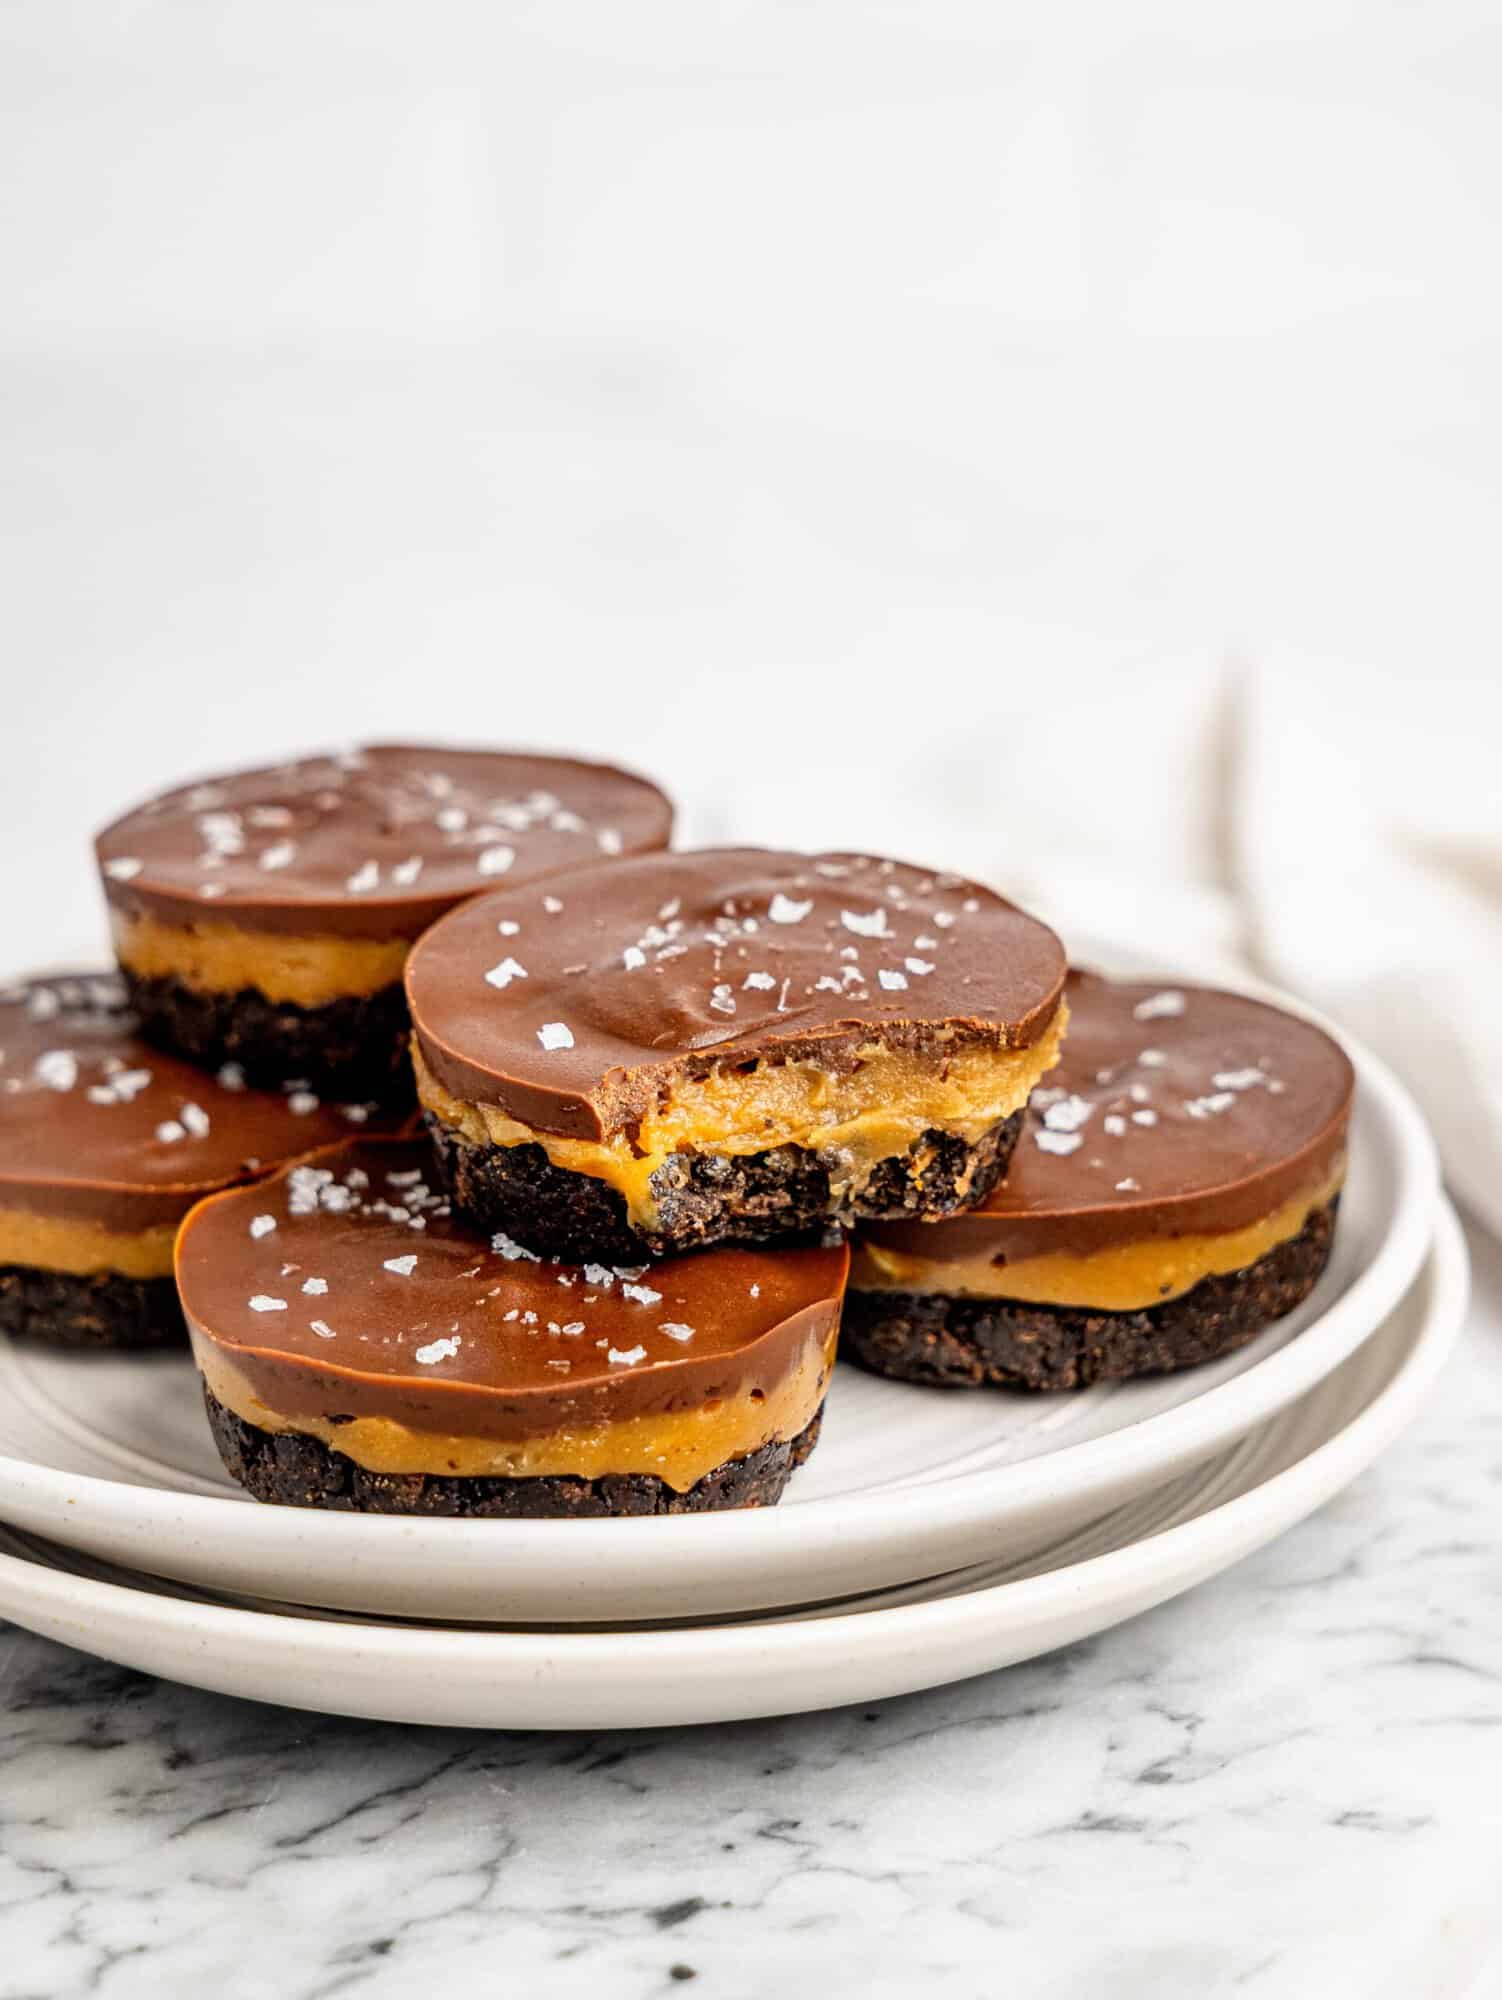
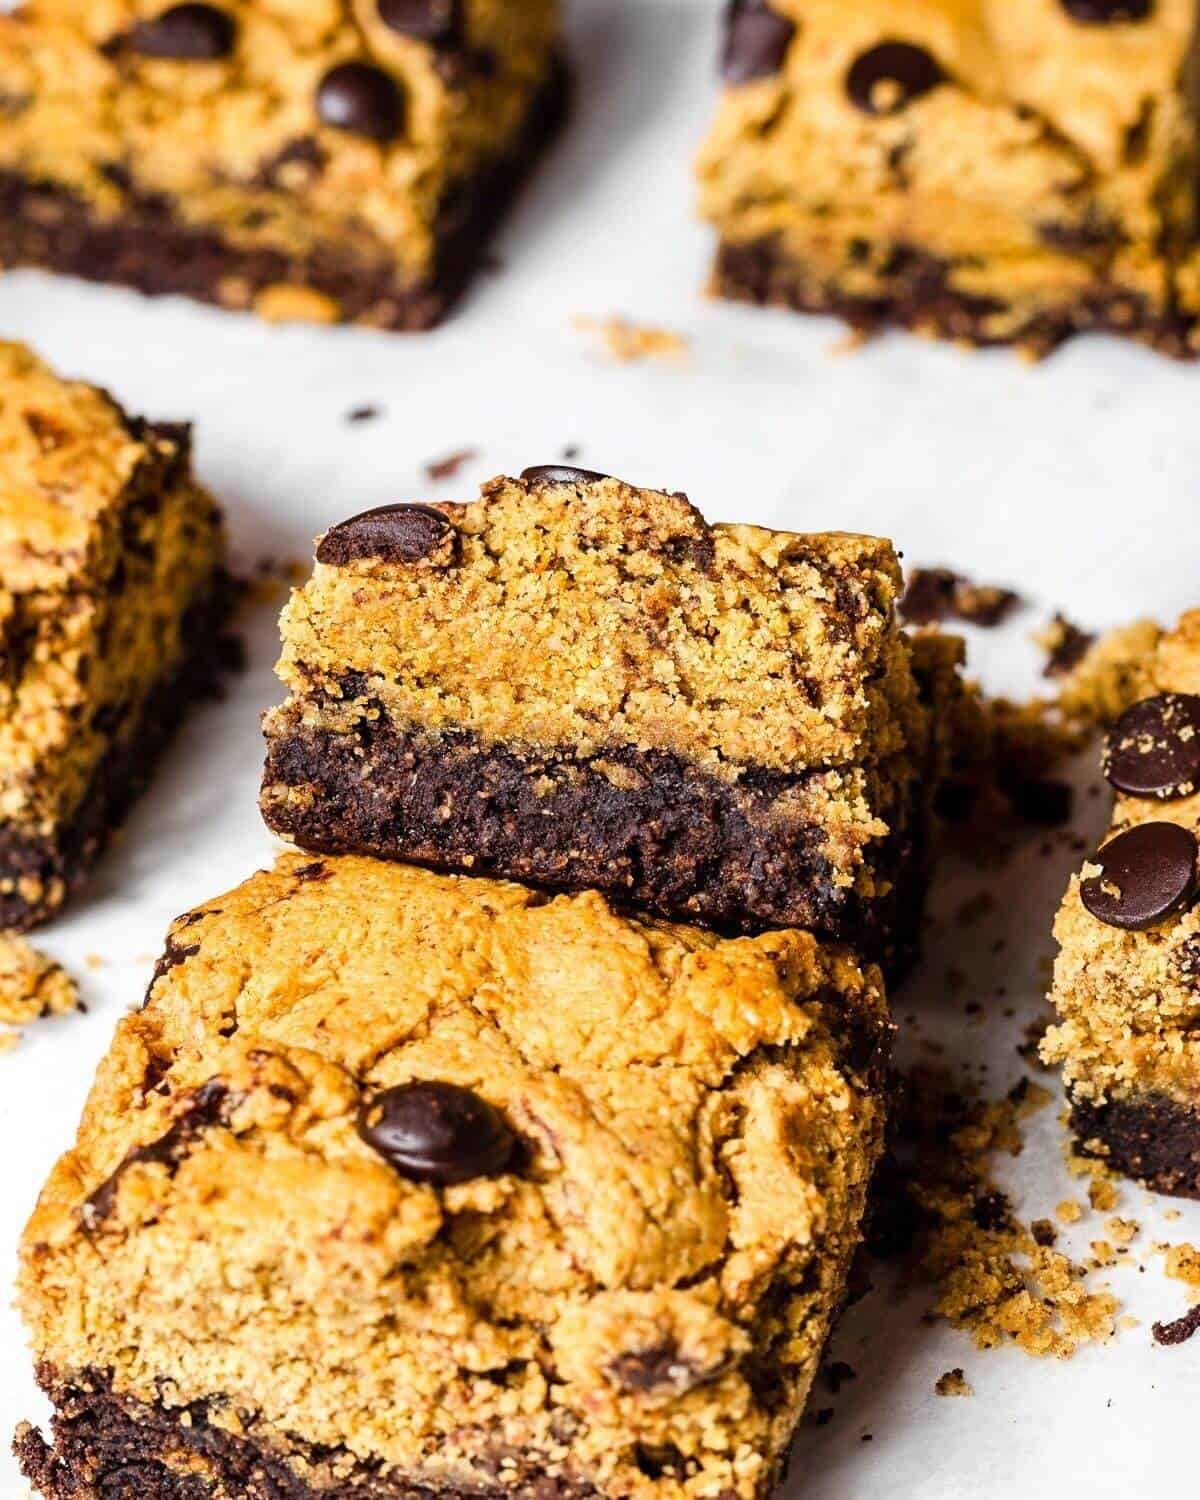
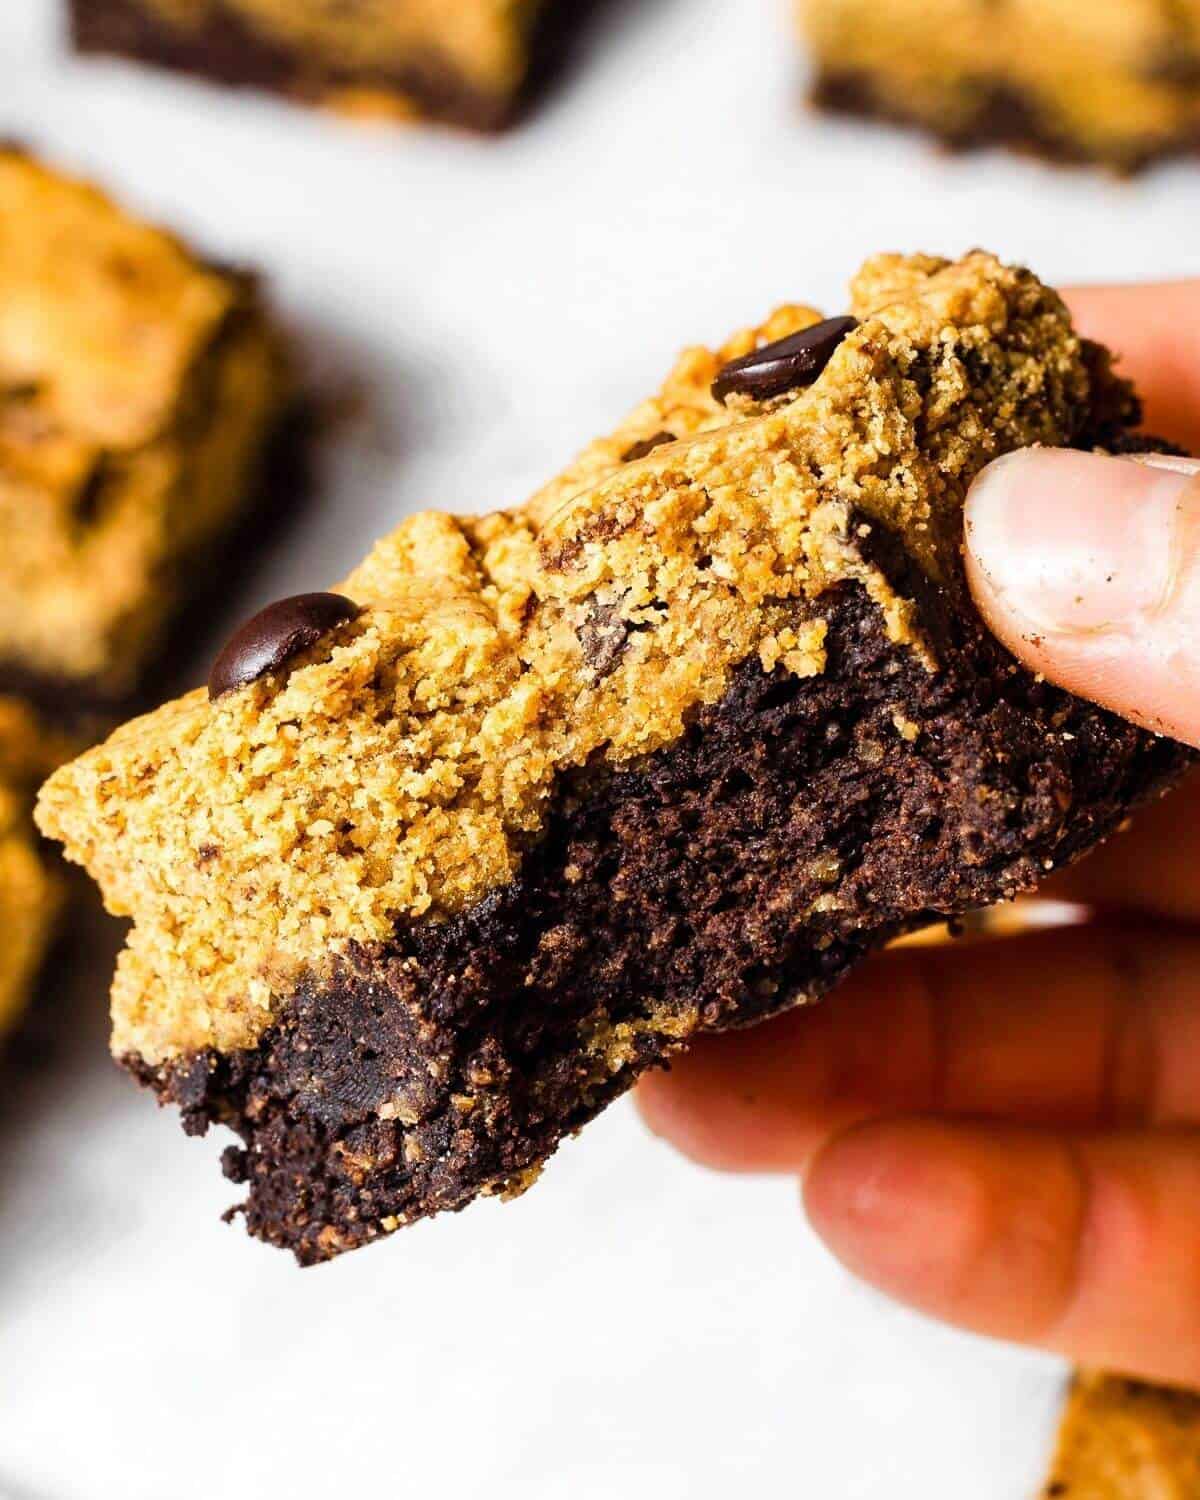
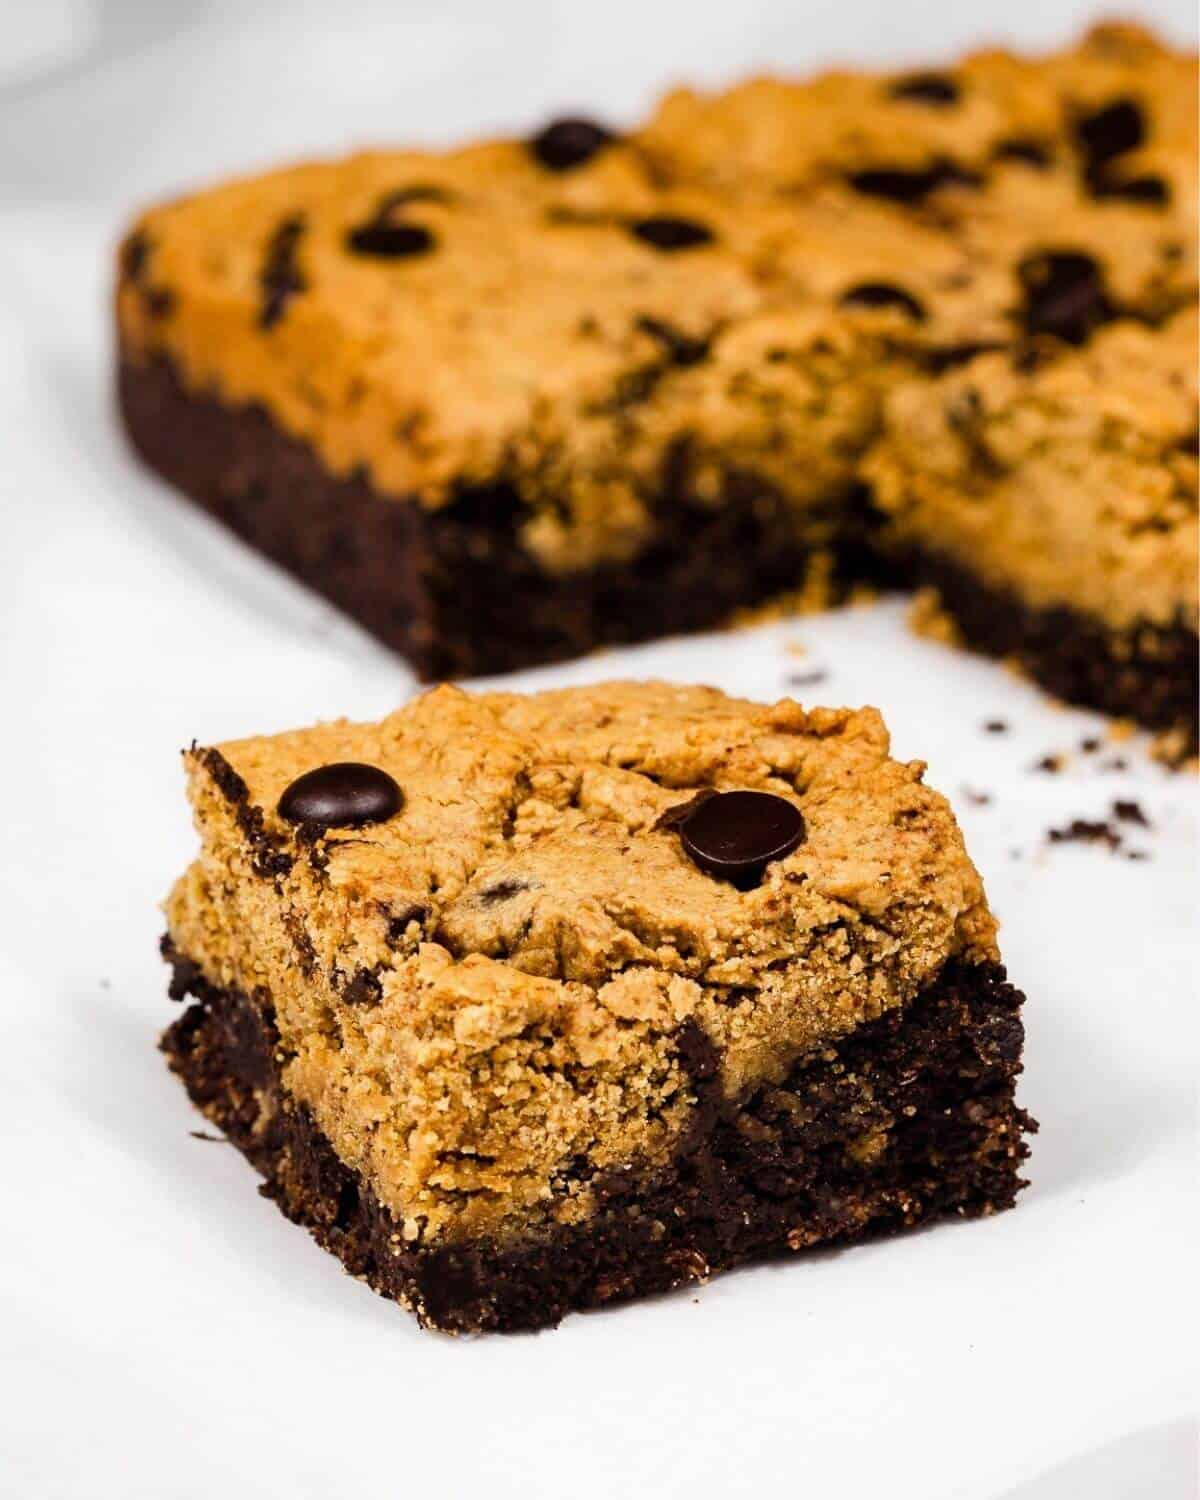
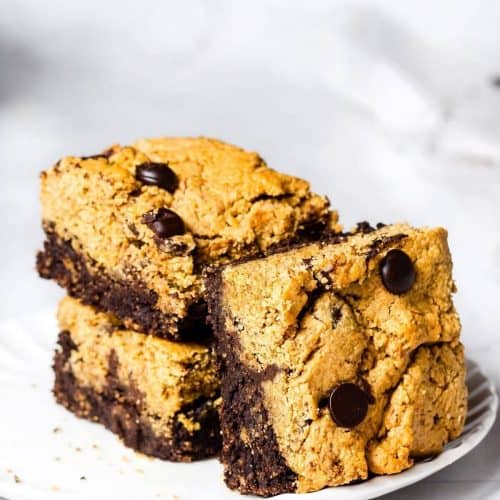
These Vegan Brookies are perfect if you can’t decide between making brownies or cookies! A moist, chocolaty brownie base topped with a crunchy cookie layer. They’re stupidly quick, easy and healthy – you’re going to love them!
Gluten-Free | Dairy-Free | Egg-Free | Oil-Free | Refined Sugar-Free | Nut-Free Option | Soy-Free

Brownies are my absolute favourite treat to make, followed closely by cookies. Sometimes it’s a struggle deciding which treat I want to make, so the best way to settle this struggle is to obviously combine the two and make brookie bars!
Me being me, I obviously had to make them slightly healthier. This recipe uses some of my favourite healthy baking ingredients: oats, peanut butter and liquid sweetener!
These vegan brookies are so moreish. The combination of gooey brownies and chocolate chip cookies are an absolute dream. Luckily they’re good for your body as well as your soul – just how I like it!
What are brookies?
While the name may sound a bit strange to my fellow South Africans (the word “broekie” translated from Afrikaans to English means “pants”…) the concept is pretty simple and very appetising indeed.
Brownie + Cookie = Brookies
See? Simple and absolutely delicious. Perhaps one of the best creations ever.
You can make these healthy brookies in one of two ways:
- Brownie base, cookie topping – the cookie will have a crunchy top.
- Cookie base, brownie topping – the cookie will be denser and the brownie gooier.
I chose the former as I love a crunchy cookie.
What you need to make Vegan Brookies
Equipment
- Two mixing bowls
- Whisk or a fork
- Spatula
- Blender or Food Processor.
- Baking tin – I used an 8-inch square tin, but you can use a loaf tin or a larger tin (see the “Baker’s Tips” section).
Ingredients
To make these vegan and gluten-free brookies you only need 8 ingredients, and you probably already have them in your kitchen!
*Please see the recipe card at the bottom of the page for the full ingredients list and measurements.
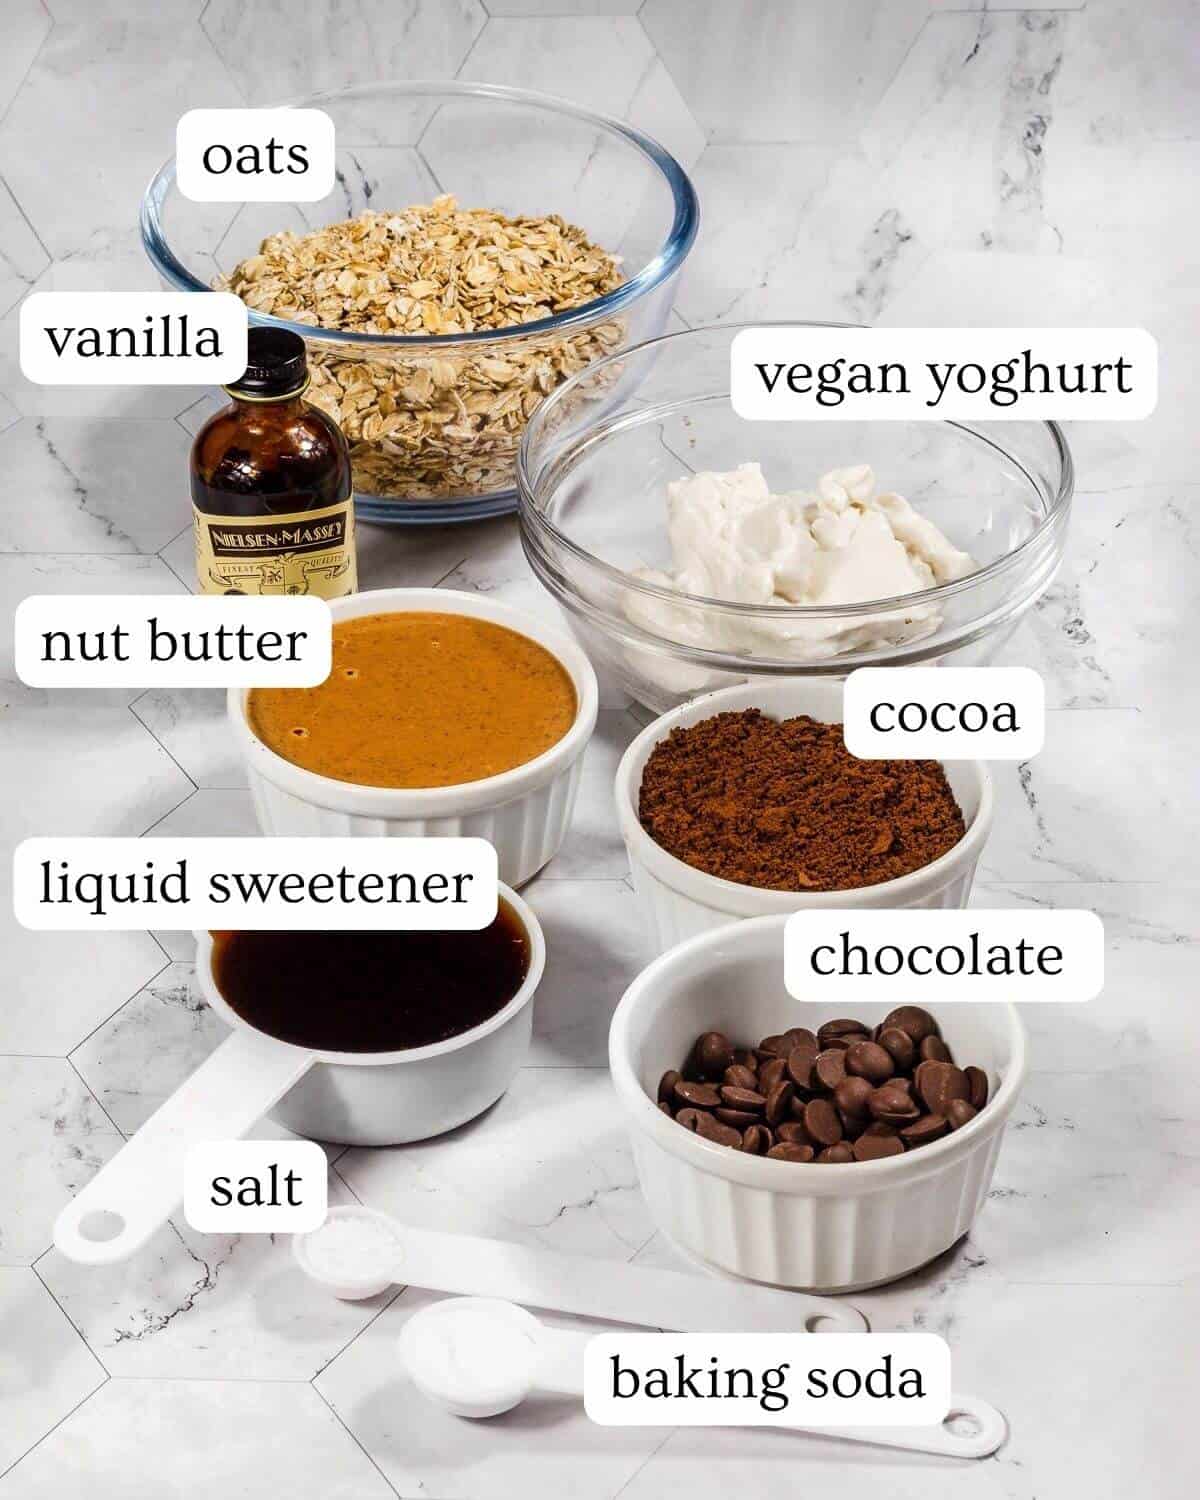
- Nut Butter: Any smooth nut or seed butter like peanut butter, almond butter, cashew butter or sunflower seed butter for a nut-free version.
- Liquid Sweetener: A great way to replace refined sugar and make any treat more insulin-friendly. I use Maple Syrup, but you can use Agave, Coconut Nectar, Sugar-Free Syrup or even Honey if you’re not vegan.
- Oats: We will be using this instead of flour, making these brookie bars healthier and naturally higher in protein! We will be blending the oats into a fine powder (a.k.a. Oat Flour – so you can use oat flour instead if you have some). I have not tried to make this with a different type of flour, but you can try these Blondie Brownies which are very similar but uses plain flour.
- Vegan Yoghurt: A thick Greek-style yoghurt works best, I use an Oat yoghurt, but you could use Soy or Coconut Yoghurt, or if you don’t need these brookies to be vegan or dairy-free, you can use Greek Yoghurt.
- Cocoa Powder: You can use Cacao powder or chocolate protein powder if you want to make this higher protein.
- Chocolate: This is optional (but not really). Use a vegan dark chocolate or chocolate chips – most dark chocolate with a higher cocoa content is naturally vegan (check the packaging).
Step-by-step
These vegan brookies are honestly so easy to make – I’ve tried to simplify the recipe as much as possible so that you can hurry up and get to the eating part!
I’ve also made a little recipe video to help you along the way.
Jump to VideoHow this recipe differs from most brookie recipes, is that instead of making the brownie and cookie dough separately, we make it in one bowl and then separate the batter into two and then pimp each section up. If that made no sense, bare with me…
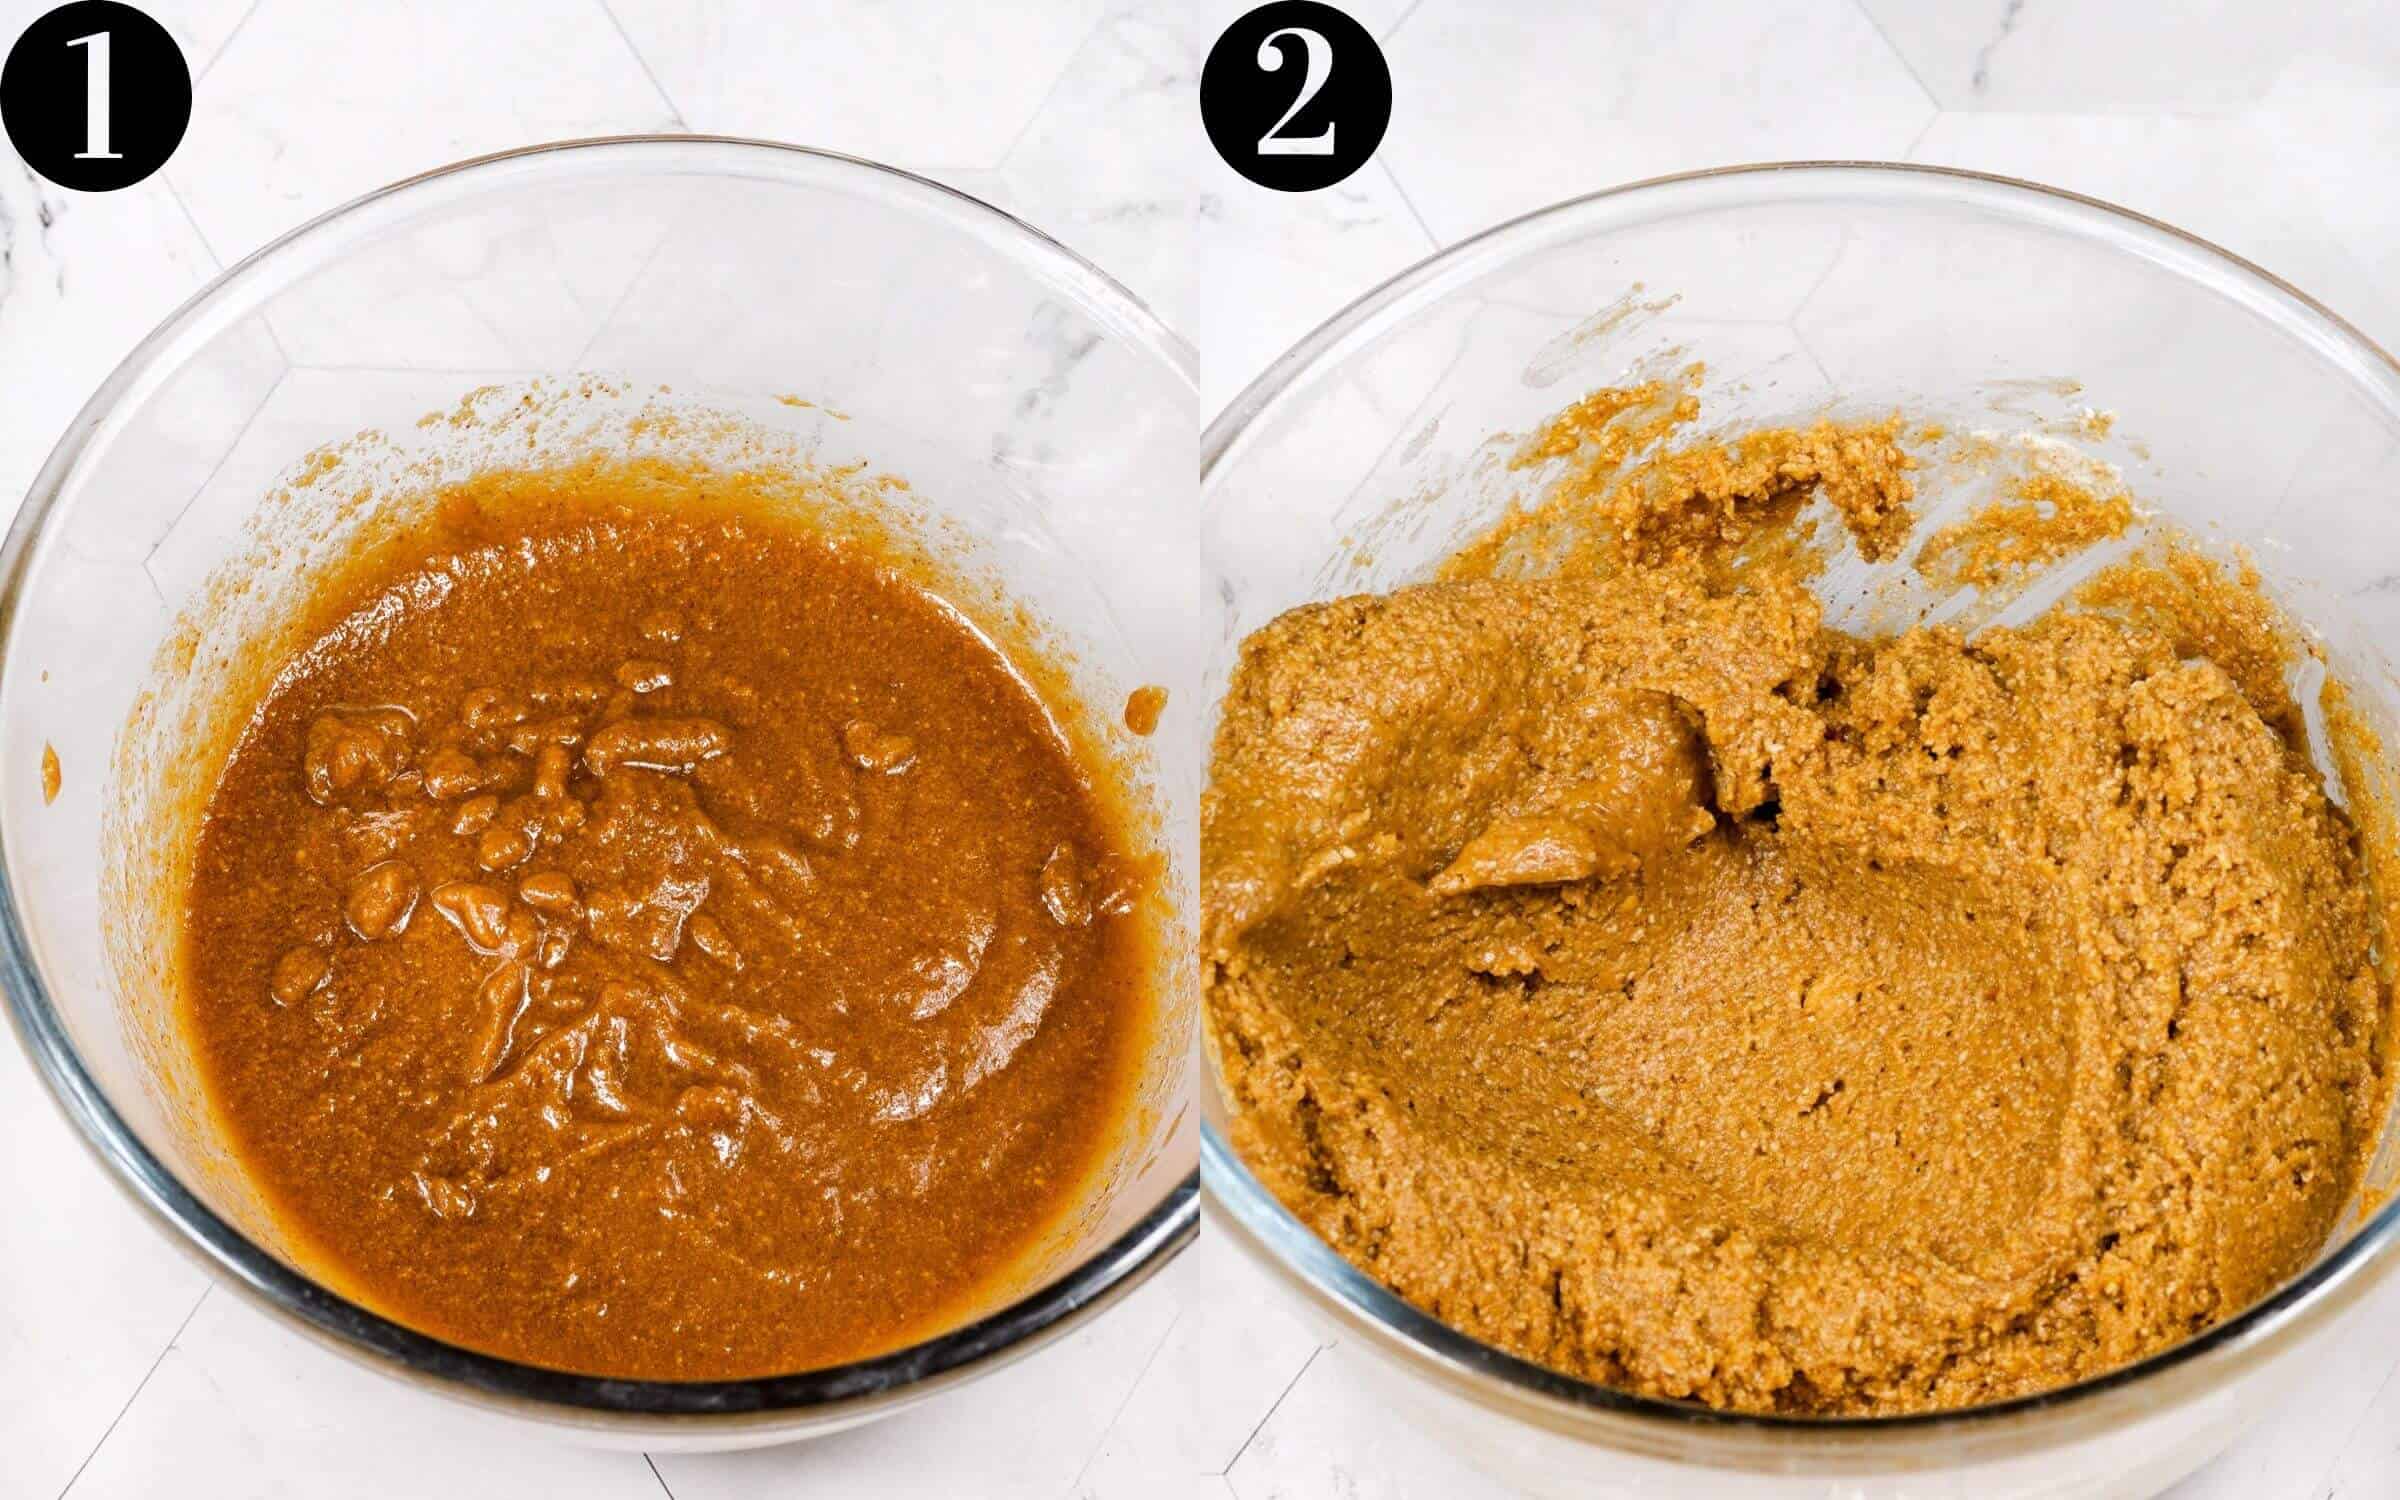
- Step 1: Combine your nut butter and liquid sweetener in a bowl. Use a whisk to whisk until smooth and combined.
- Step 2: Add in your blended oats, baking soda and salt and fold until combined.
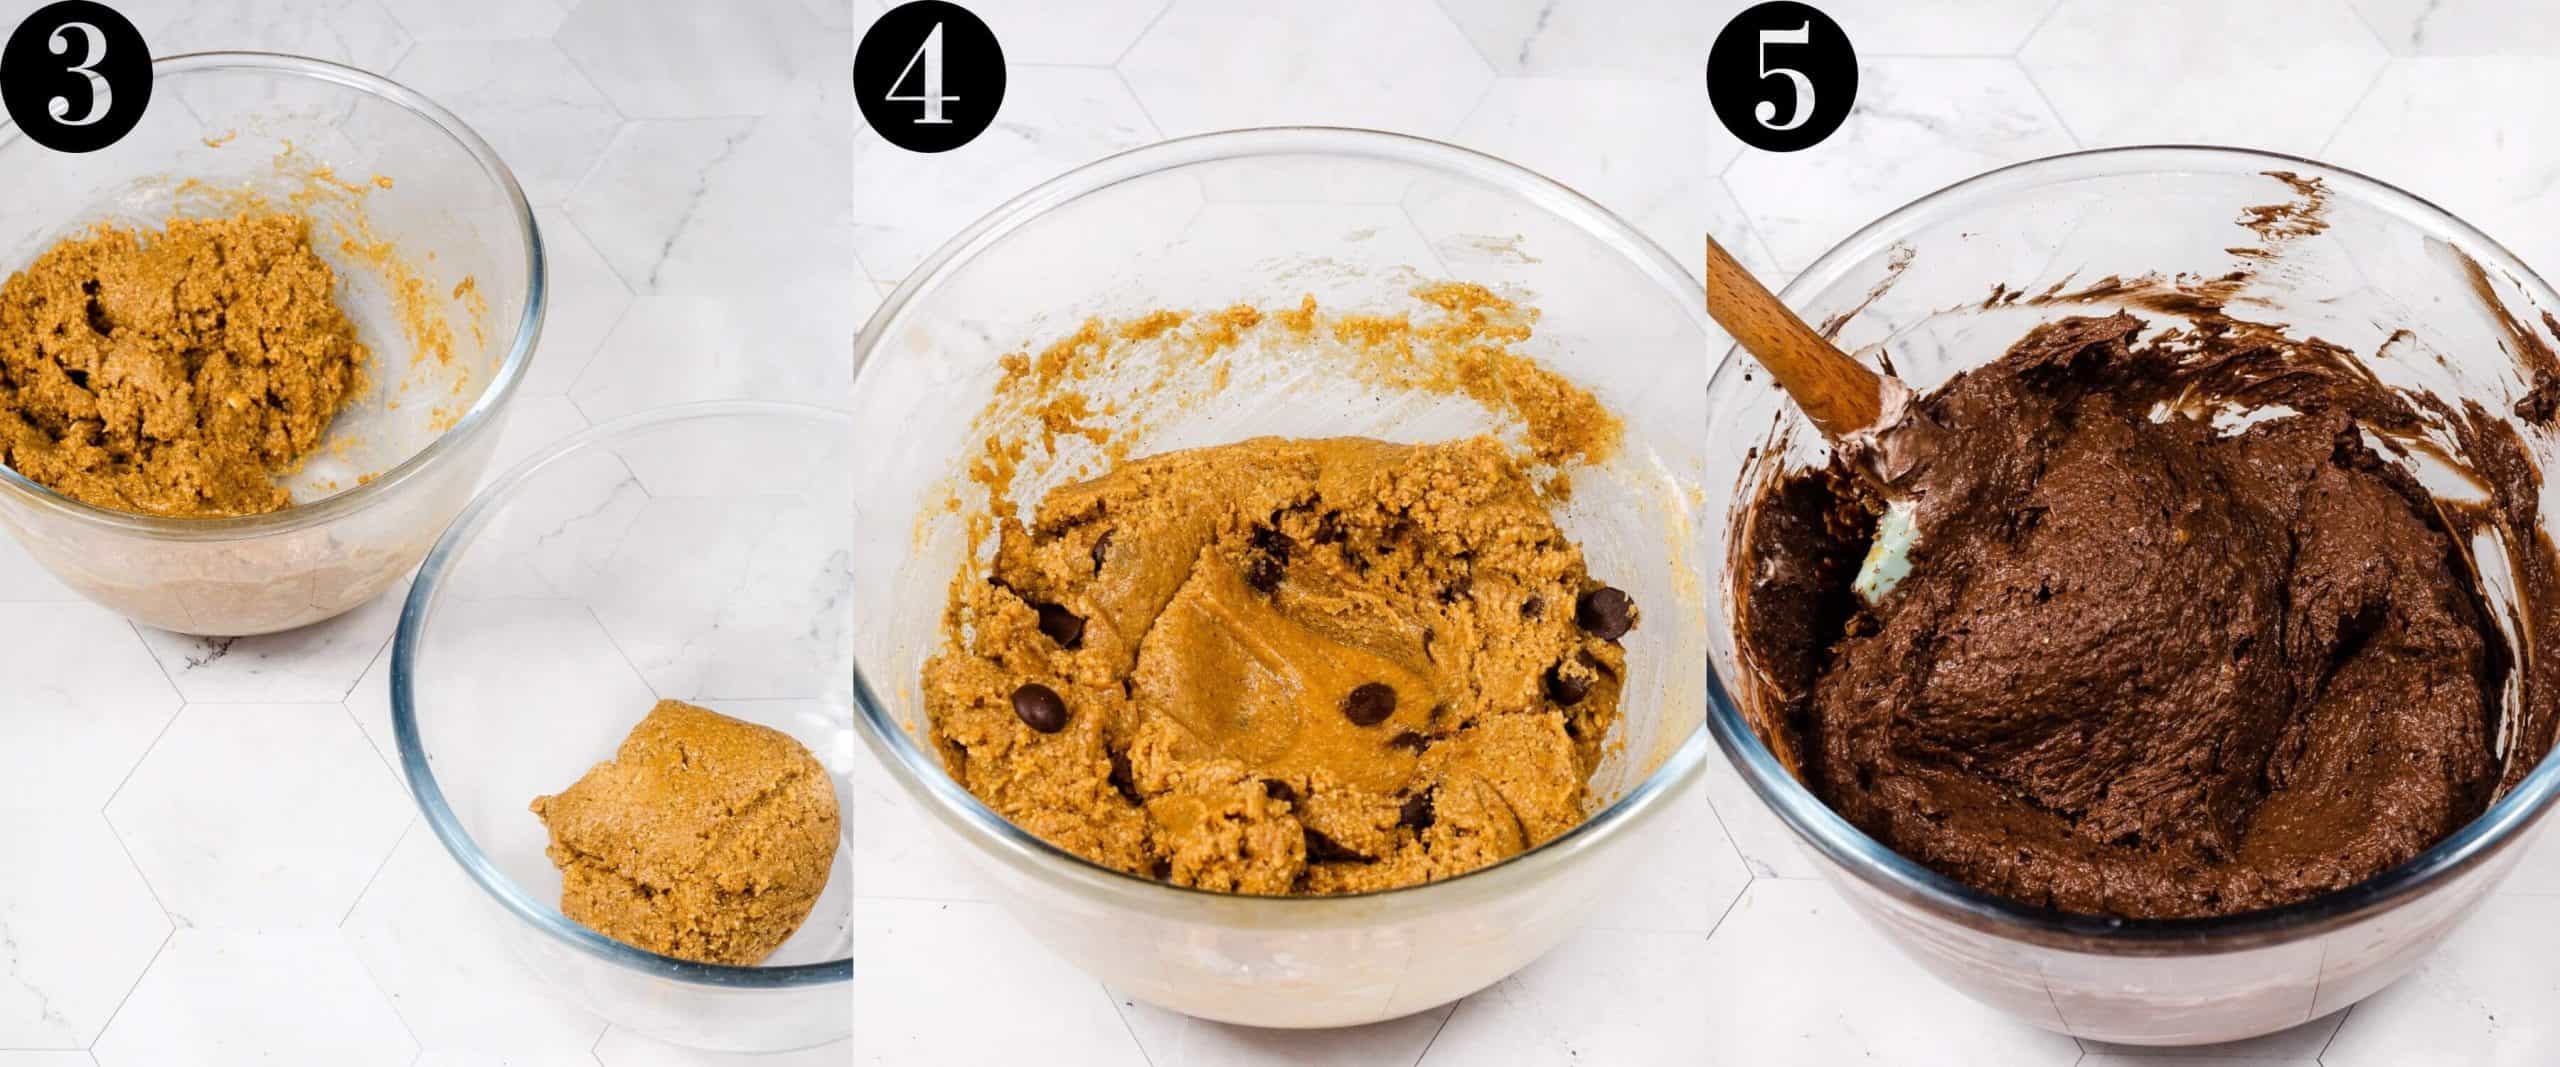
- Step 3: Now where things get exciting – take a third of the mixture and place it into a different bowl. The best way to do this is to place your bowl onto your kitchen scales, set the scale to 0 and scoop out 160g of the mixture into a different bowl.
- Step 4: Add chocolate chunks to the larger portion.
- Step 5: To the smaller portion, add in your yoghurt and cocoa powder and mix until it is fully combined.
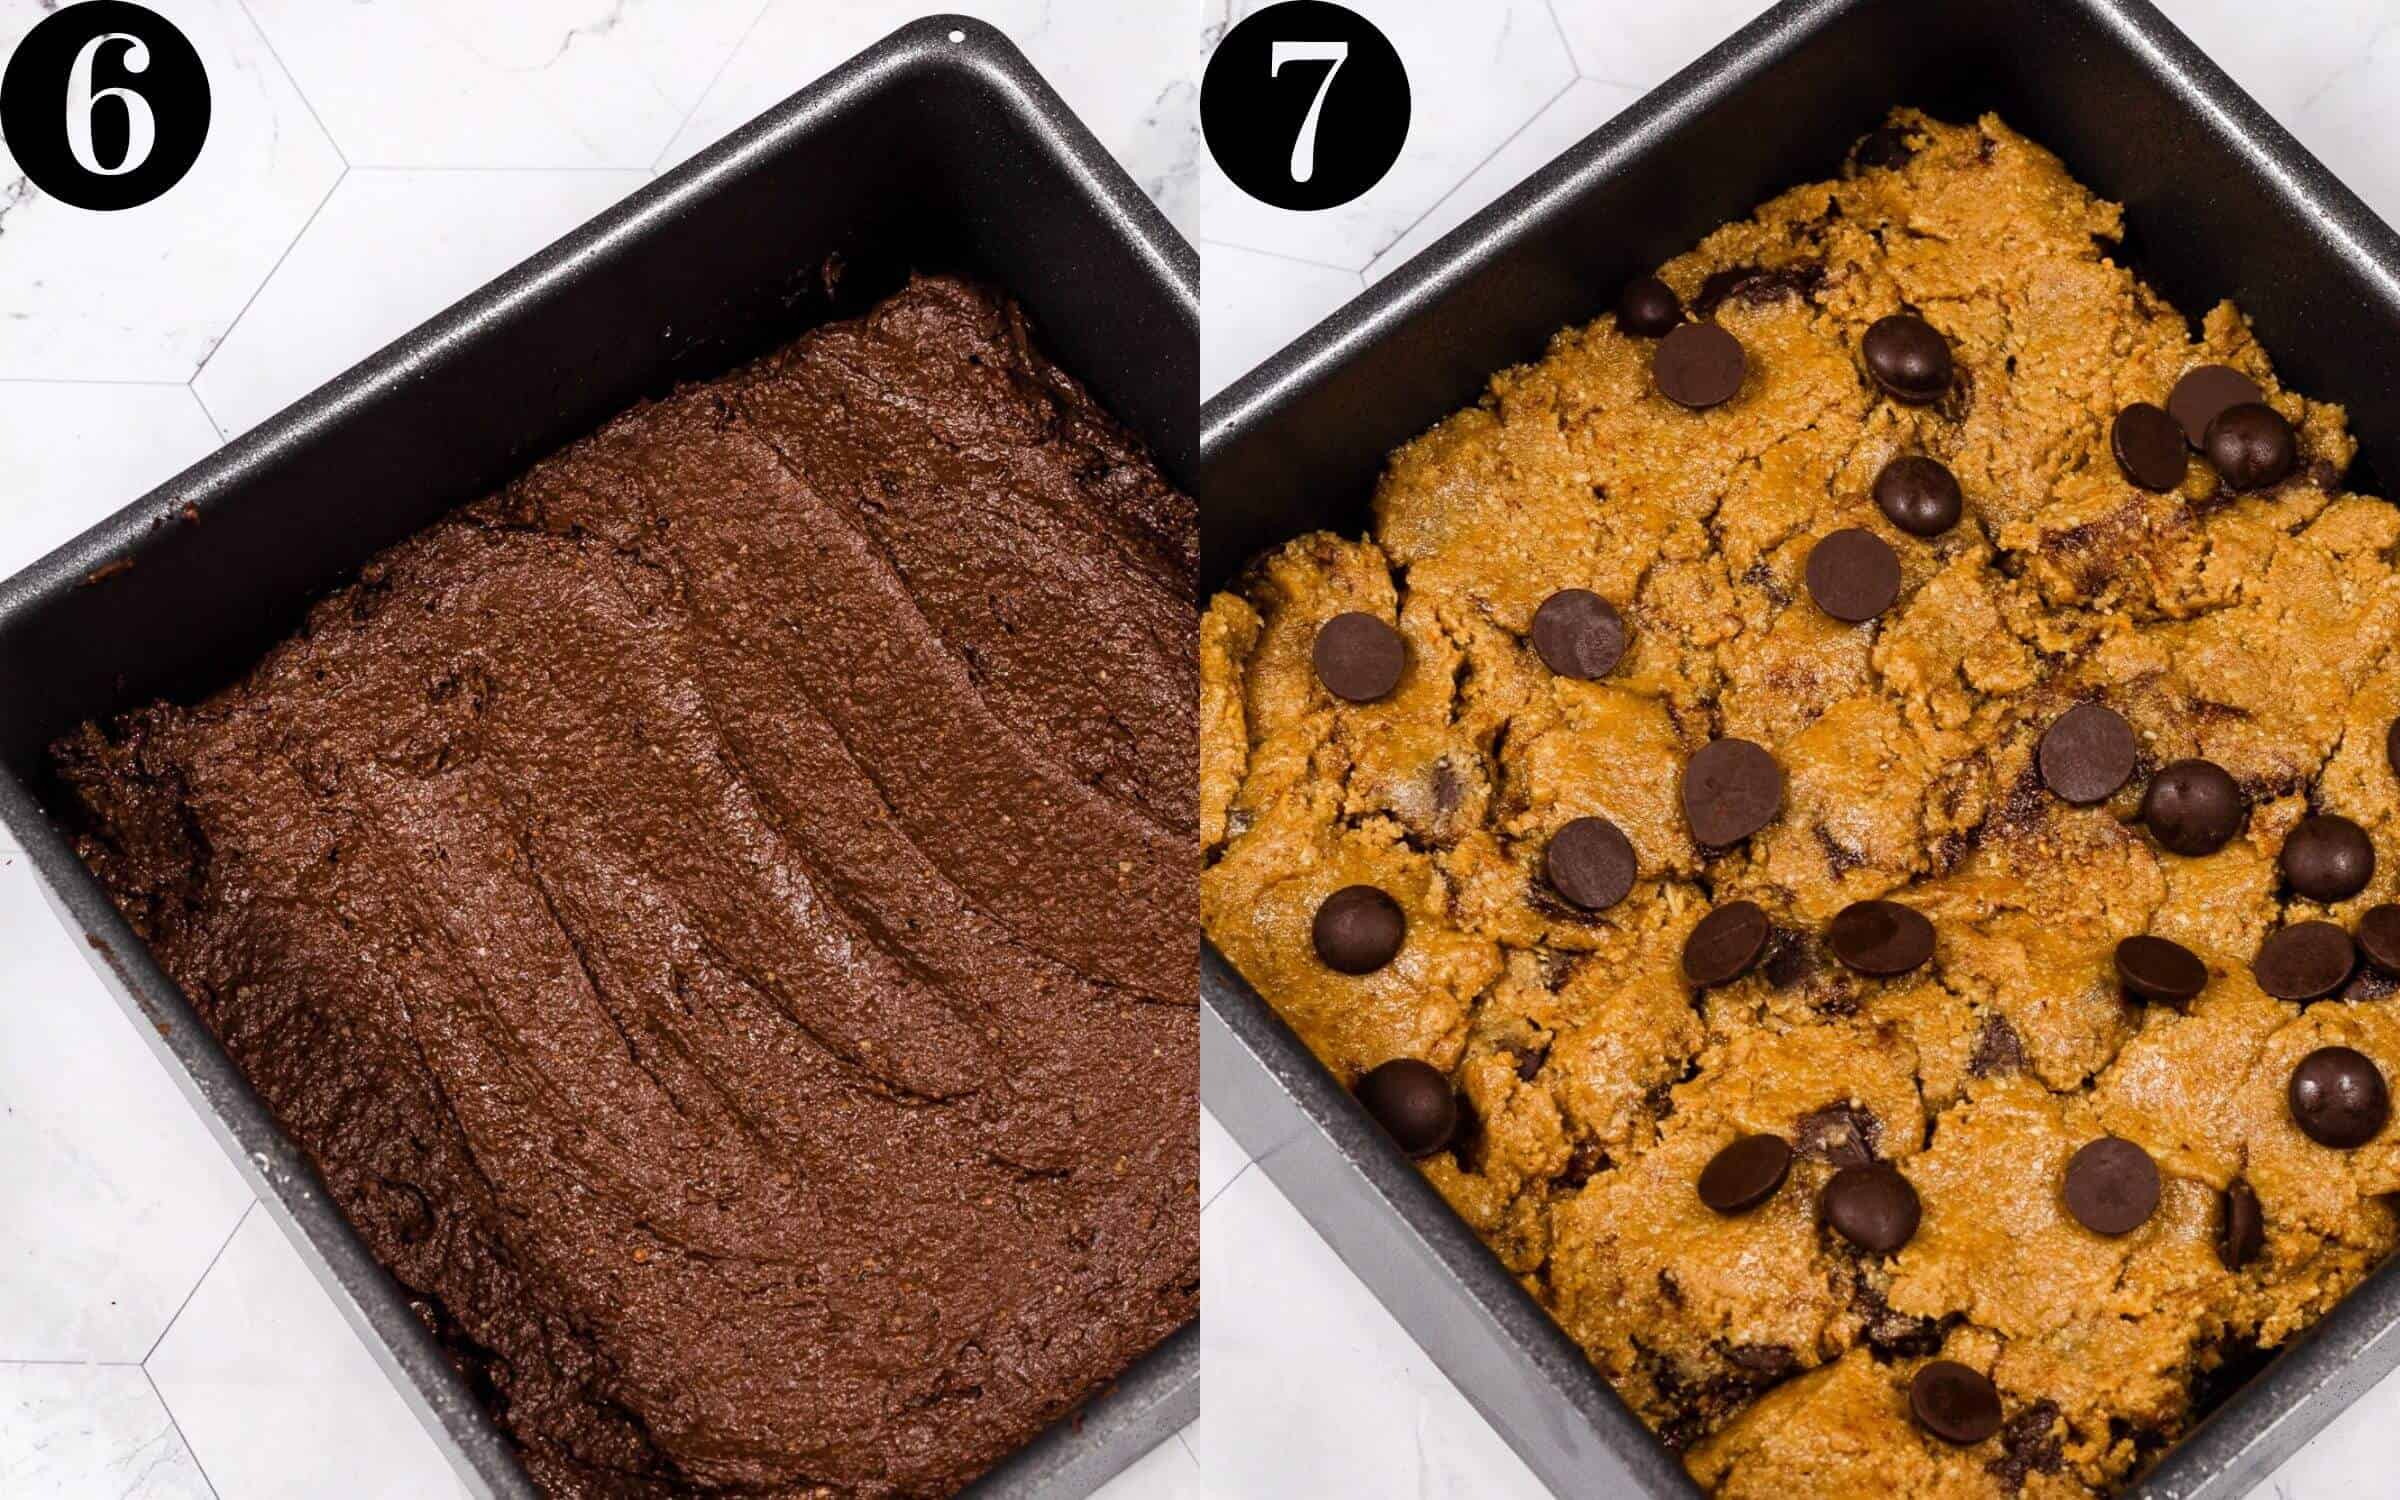
- Step 6: Grease your baking tin or line it with some parchment paper. Add your brownie batter to the bottom and spread it out.
- Step 7: Use your hands to place the cookie dough on top. Once the whole brownie base is covered, press down the cookie dough to make it more compact then top with some more chocolate if you like.
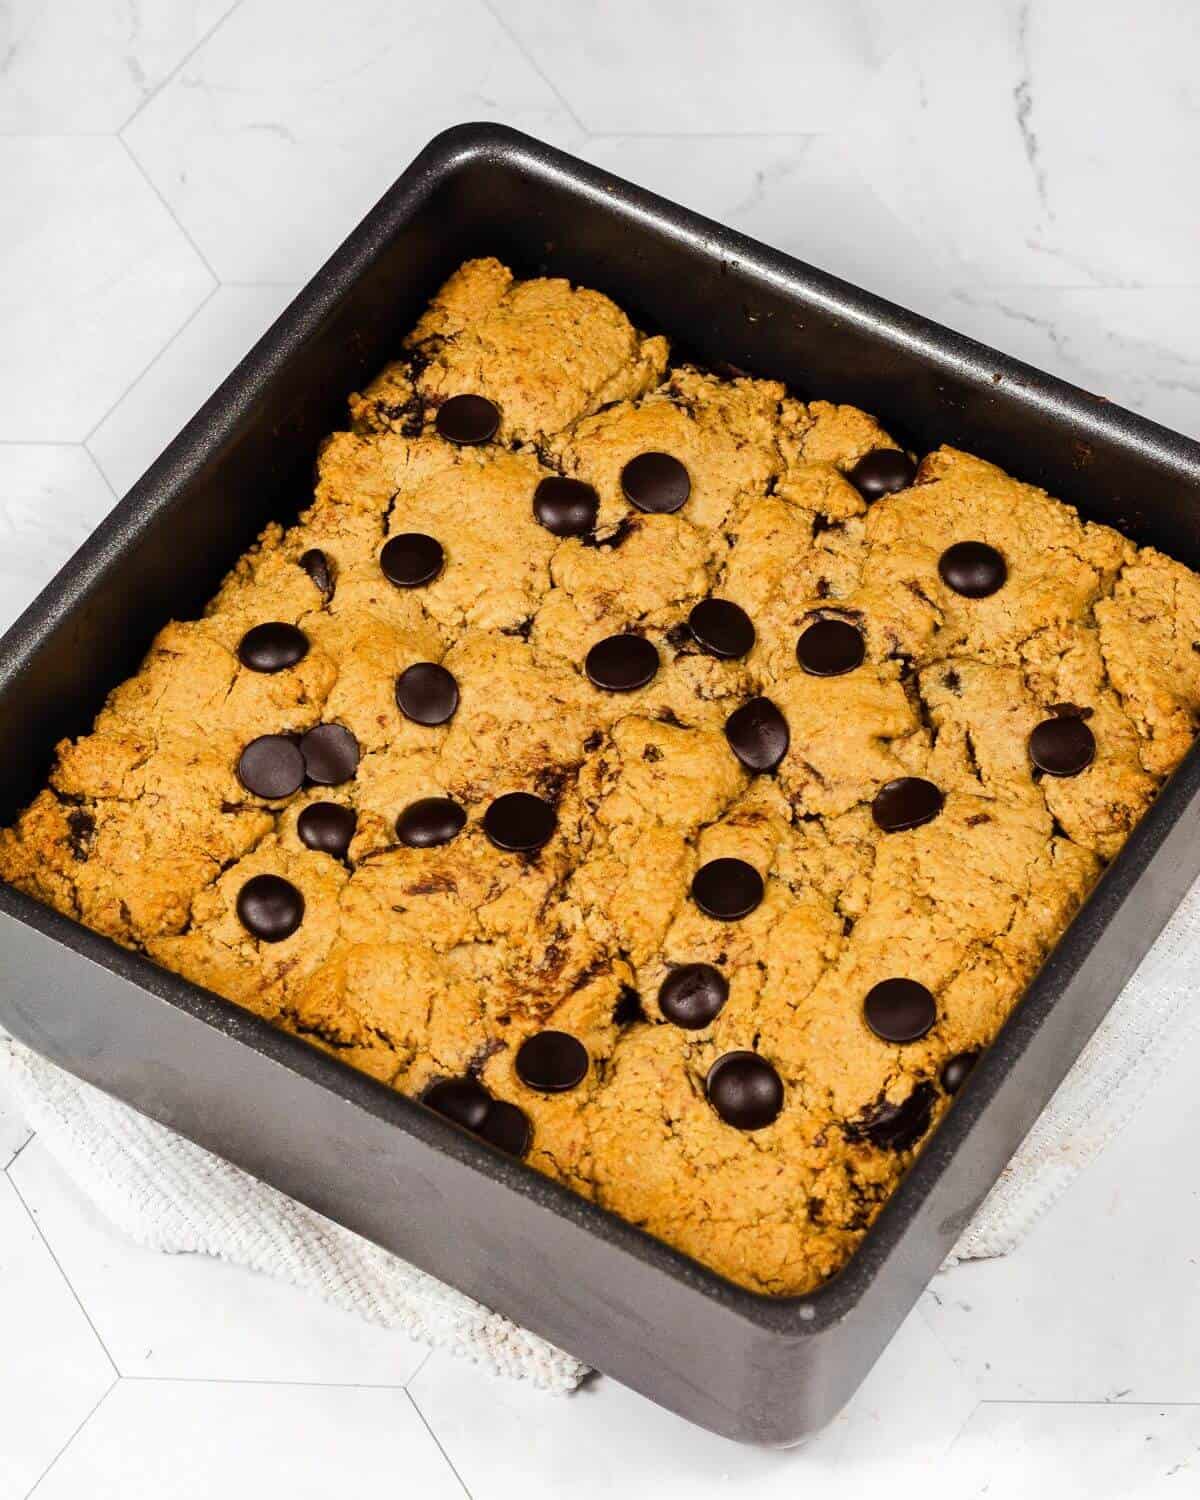
- Step 8: Then all that’s left to do is to pop it in the oven.
Baker’s Tips
If you don’t have a square 9-inch tin, you could use a larger tin. Just bear in mind that your brookies will be thinner and will therefore not have to bake for as long.
Make sure to really press down your cookie dough, if it’s too loose, it will crumble off of your brownie.
Once the baking time is over, insert a toothpick or skewer, it should have some moist crumbs attached to it. You could also bake it for a shorter amount of time if you would like really gooey brookies. The batter is safe to eat raw as it contains no flour or eggs.
How to store vegan brookies
You can keep these at room temperature for a day or two in an air-tight container. After that, please store them in the fridge, where they will keep well for 5 days.
If you want to freeze these brookies, wrap them in parchment paper and place them in a freezer bag or freezer-safe container. You can freeze them for up to three months. Once you’re ready to tuck in, leave them to thaw in the fridge for at least 4 hours.
You can pop these vegan cookie brownies into the microwave to replicate the “freshly baked” illusion.
More Oat Flour Recipes you should try:
- Healthy Banana Brownies
- Blueberry Banana Oatmeal Muffins
- Healthy Tiramisu
- Healthy Chocolate Cake
- Giant Chocolate Chip Cookie
BAKING IN GRAMS
All of the recipes I create are tried and tested a few times until it has been perfected. My goal is to develop recipes that are simple to make and easy to follow so that anyone can make them – even if you’ve never baked before!
One very important thing that will ensure that you get the best results is to measure your ingredients by weight! I recommend purchasing a kitchen scale, they are very affordable and it will honestly change your baking game for good! Not all measuring cups are made equally – for example, a cup of flour to me weighs 120g, but for you, it may be anywhere between 100g and 200g – that’s a BIG difference!
I do provide cup measurements, but for best results, I recommend using the weighted ingredients provided.
If you don’t have a kitchen scale yet, you can use this Ingredient Weight Chart as a guideline to convert the ingredients to help you!
Now – dust your apron off and get baking! X
Hey! If you make this recipe, I would love it if you could leave me some feedback and a rating ⭐⭐⭐⭐⭐ in the comment section at the bottom of the page! Also let me know on Facebook, Instagram or Pinterest! I can’t wait to hear your thoughts and see your photos!
Vegan Brookies (easy + healthy!)
Equipment
- 8-inch Square Baking Tin see notes for alternative
Ingredients
- ½ cup Smooth Nut Butter
- ½ cup Liquid Sweetener
- 1 tsp Vanilla Extract optional
- 2 cups Whole Oats 180g
- 1 tsp Baking Soda
- ½ tsp Salt
- ¾ cup Vegan Yoghurt 185g
- ¼ cup Cocoa Powder 30g
- ¼ cup Chocolate Chips 30g
Instructions
- Preheat your oven to 180°C / 350°F / 160°C and prepare your baking tin with parchment paper or cooking spray.
- Add your nut butter, liquid sweetener and vanilla to a bowl and whisk until smooth.
- Add your oats to a blender or food processor and blend into a fine powder.
- Add your blended oats, baking soda and salt to the bowl and fold until combined.
- Place your bowl onto your kitchen scale and set it to zero. Remove 160g of the dough and place it into a separate bowl and set aside.
- Add your chocolate chips to the larger portion (this is your cookie dough).
- To the smaller portion, add in your yoghurt and cocoa powder and mix until it is fully combined.
- Transfer the brownie batter into your baking tin and spread it out evenly.
- Add your cookie dough on top and press it down tightly. Top with some more chocolate if you like.
- Bake for 15-20 minutes, the cookie top should be golden, but a toothpick should come out with a few moist crumbs on.
- Leave to cool in the tine for around 10 minutes, then remove and allow to cool completely before slicing.
Video
Notes
- If you don’t have a square 9-inch tin, you could use a larger tin. Just bear in mind that your brookies will be thinner and will therefore not have to bake for as long.
- Make sure to really press down your cookie dough, if it’s too loose, it will crumble off of your brownie.
- Once the baking time is over, insert a toothpick or skewer, it should have some moist crumbs attached to it. You could also bake it for a shorter amount of time if you would like really gooey brookies. The batter is safe to eat raw as it contains no flour or eggs.