These vegan and gluten-free spirulina cookies are crispy around the edges, and soft in the middle and they provide you with all the goodness and benefits of spirulina without tasting green!
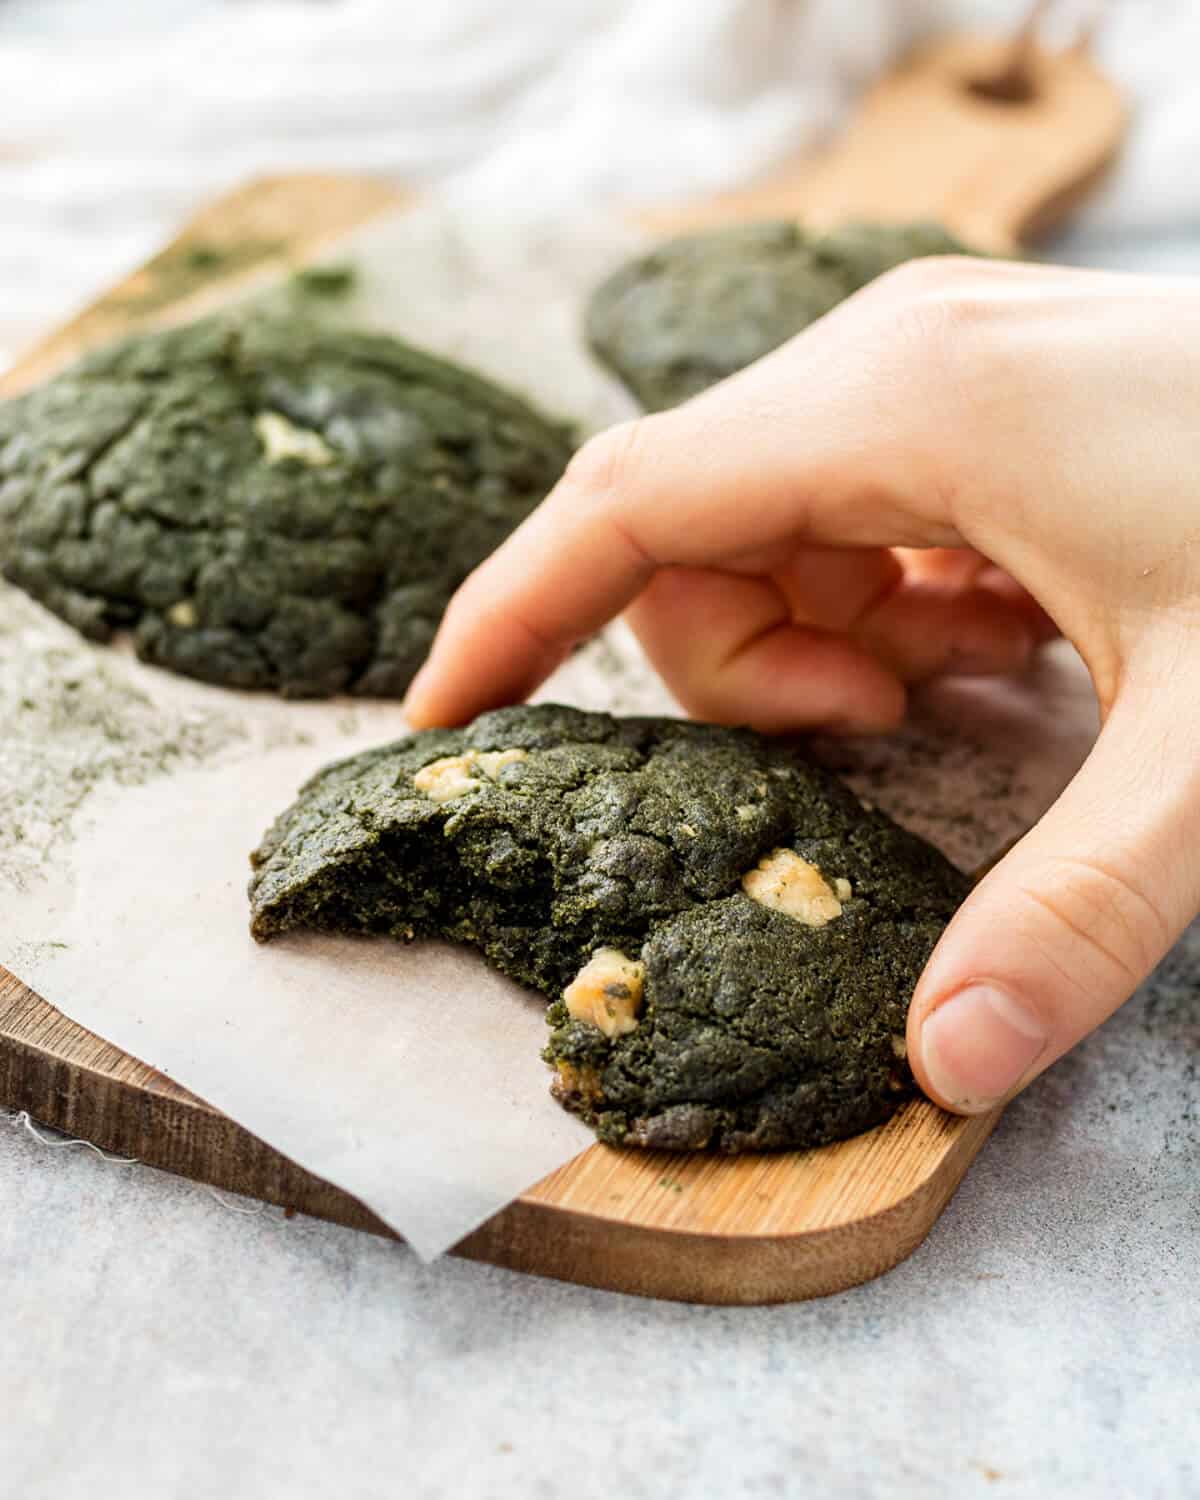
Greens powders aren’t just made for juices and smoothies!
These very green cookies are the perfect way to use any greens powders you may have while still being delicious and enjoyed by everyone. These are not your average cookie! They taste just like a chocolate chip cookie, but they’re green and are filled with minerals and vitamins from the spirulina powder!
Ingredients & Substitutions
-
Gluten-free plain flour – if you do not need these to be gluten-free you can use regular all-purpose flour. I have not tried this recipe with any other flour, but if you try it – let me know!
-
Cornstarch (cornflour) – this can be replaced by potato or arrowroot starch. If you don’t have either (or if you are using regular flour with gluten), you can replace it with more flour at a 1:1 ratio although your cookie may be slightly more crumbly as this acts as a binding ingredient.
-
Spirulina – You can substitute this for a similar greens powder such as matcha or moringa! They all have different benefits, but spirulina is my personal favourite! I use Naturya’s Spirulina.
-
Chia Seeds – This is used as an egg replacer and binds the cookies, preventing them from being crumbly! You can replace it with a flax egg. I have not tried any other egg replacements, but I’d imagine a real egg would work as well.
How to make Spirulina Cookies
Cookies can be hard to crack, but I’d like to think this recipe is pretty easy! Here are some tips to make these cookies incredible!
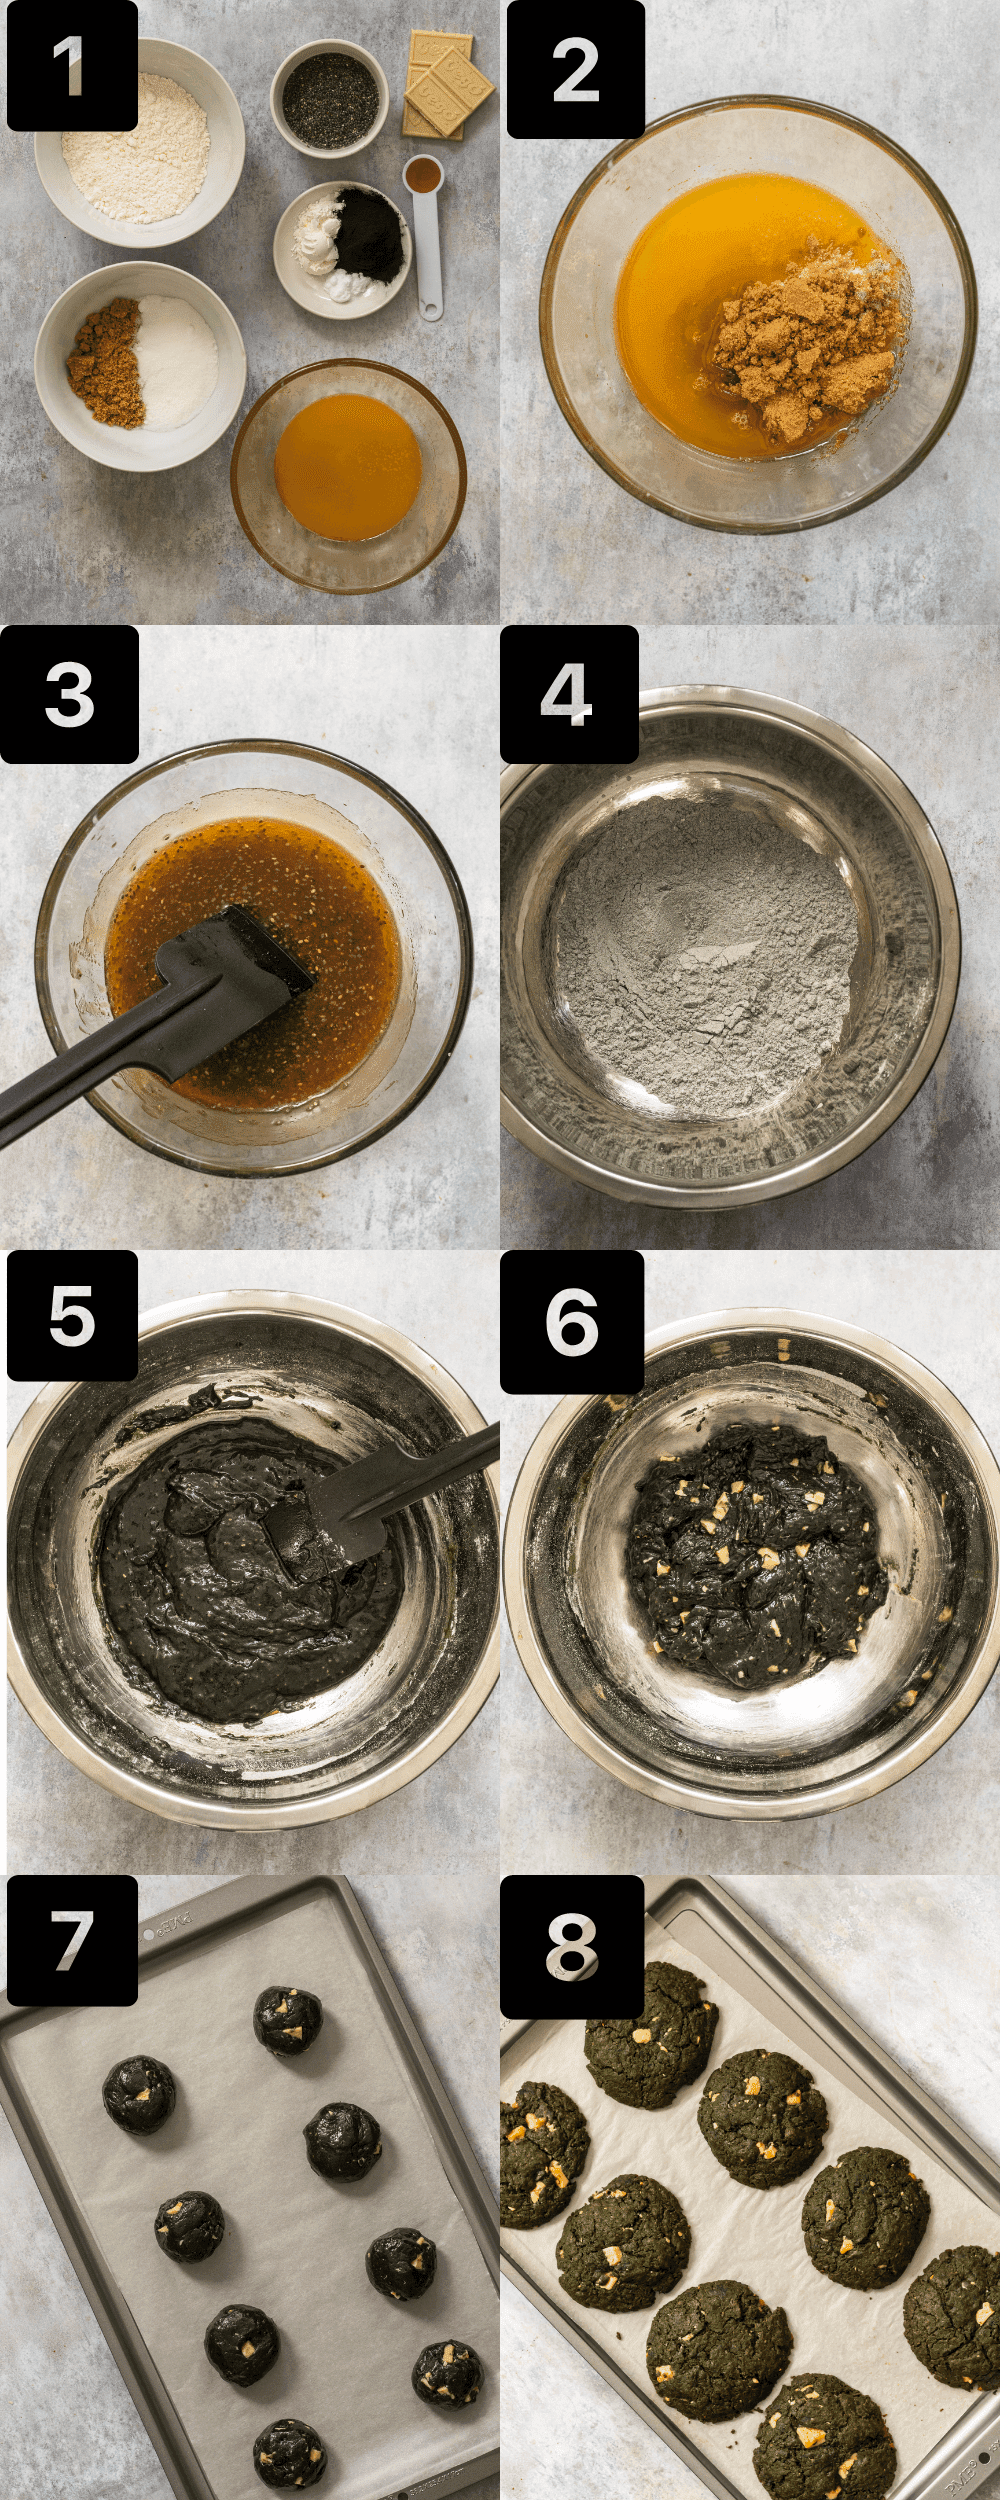
Melt your butter. If you want chewy cookies, this step is crucial! Melt your butter on a stovetop or in the microwave until it is liquid. Using softened butter instead of melted butter will make your cookies cakier.
Use a combination of white and brown sugar. White sugar helps the cookies to spread and makes the edges super crispy, while brown sugar adds a depth of flavour that is sorely missed when only using white sugar.
Refrigerate your dough. Please don’t skip this step! It may seem like an insignificant step, but it makes a big difference in how your cookies spread. Refrigerating your dough will help it to stiffen as the butter gets colder again, which will prevent the cookies from spreading too much and being too thin.
Roll the dough into balls, do not press them! If you flatten the cookies they will be thinner and crispier – we want crispy edges and a soft centre!
Spread them out! Leave enough room for the cookies to spread! I leave around 4cm between them, but even more would be better!
Bake until the edges are slightly crispy but the centres are still underdone. Remember that as the cookies cool, they will become firmer, so don’t be tempted to cook them for longer!
How to Store Spirulina Cookies
Allow your spirulina cookies to cool completely before placing them in an airtight container. If you cover them while they’re still warm, the trapped steam will make them soggy.
Keep the cookies in the air-tight container on your countertop for up to 5 days.
You can also keep them in the fridge, but the edges will lose their crispiness.
To make the cookies crispy again, you put them in the oven again for a couple of minutes and allow them to cool.
You can also roll the cookie dough into balls and freeze them. To bake, simply bake them a few minutes longer than the given time.
Love Cookies? Try These:
BAKING IN GRAMS
All of the recipes I create are tried and tested a few times until it has been perfected. My goal is to develop recipes that are simple to make and easy to follow so that anyone can make them – even if you’ve never baked before!
One very important thing that will ensure that you get the best results is to measure your ingredients by weight! I recommend purchasing a kitchen scale, they are very affordable and it will honestly change your baking game for good! Not all measuring cups are made equally – for example, a cup of flour to me weighs 120g, but for you, it may be anywhere between 100g and 200g – that’s a BIG difference!
If you don’t have a kitchen scale yet, you can use this Ingredient Weight Chart as a guideline to convert the ingredients to help you!
Now – dust your apron off and get baking! X
Easy Spirulina Cookies
Ingredients
- 1 tbsp Chia Seeds*
- 100 g Vegan Butter
- 50 g White Sugar
- 50 g Brown Sugar
- 1 tsp Vanilla Extract
- 100 g Plain Flour gluten-free if necessary
- 10 g Cornflour
- 1/2 tsp Baking Soda
- 1.5 tbsp Spirulina Powder*
- 1/4 tsp Salt
- 50 g White Chocolate or Macadamia Nuts
Instructions
- Preheat oven to 200°C / 350°F / 160°C fan.
- Make a chia egg by adding two and a half tbsp hot water to your chia seeds, mix well and set aside.
- Melt your butter in a saucepan or in the microwave. Add in the sugar and whisk until smooth.
- Add the chia egg and vanilla to your butter and sugar and mix well.
- In a large mixing bowl, sift the flour, cornstarch, baking soda, spirulina and salt and mix until combined.
- Pour in the wet mixture and mix well.
- Fold in your chocolate chunks.
- Form 8 balls and place them on a cookie sheet lined with parchment paper. Leave around 4cm between each ball.
- Bake for 10 to 12 minutes until the edges start the crispen.
Notes
- Cornstarch (cornflour) – this can be replaced by potato or arrowroot starch. If you don’t have either (or if you are using regular flour with gluten), you can replace it with more flour at a 1:1 ratio although your cookie may be slightly more crumbly as this acts as a binding ingredient.
- Spirulina – You can substitute this for a similar greens powder such as matcha or moringa! They all have different benefits, but spirulina is my personal favourite!
- Chia Seeds – This is used as an egg replacer and binds the cookies, preventing them from being crumbly! You can replace it with a flax egg. I have not tried any other egg replacements.

